Why Install Visual Studio Community?
You may have heard of Visual Studio, often called the "best IDE in the universe" (Integrated Development Environment), known for its powerful features. However, it is also quite "heavyweight." For those not primarily engaged in .NET development, it's usually unnecessary to install it.
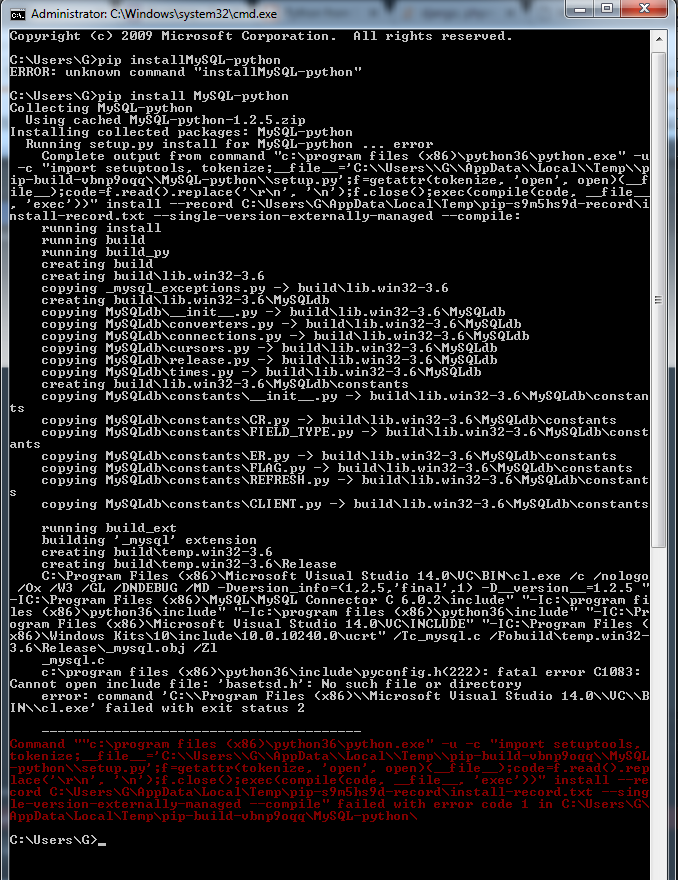
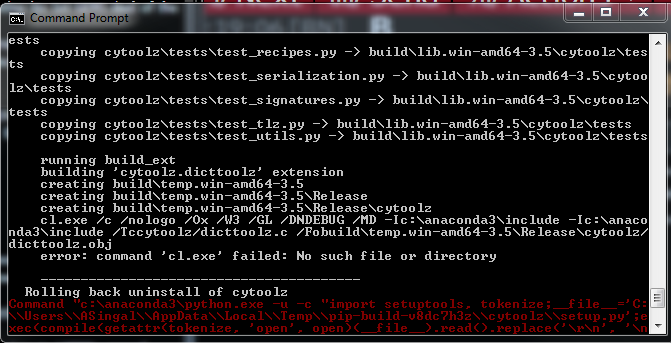
But! If you frequently need to run open-source AI projects (such as Python-based projects) on your Windows computer, installing Visual Studio Community becomes almost essential. This is because many Python libraries (referred to as "dependencies") require "compilation" on your computer during installation, a process that relies on Microsoft's C++ compilation tools (MSVC). If your computer lacks the MSVC environment, installing these Python libraries will fail, displaying error messages similar to the following:
Fortunately, the easiest and most recommended way to install the MSVC compilation environment is by installing the free Visual Studio Community edition. Let's go through the steps.
Step 1: Download the Visual Studio Installer
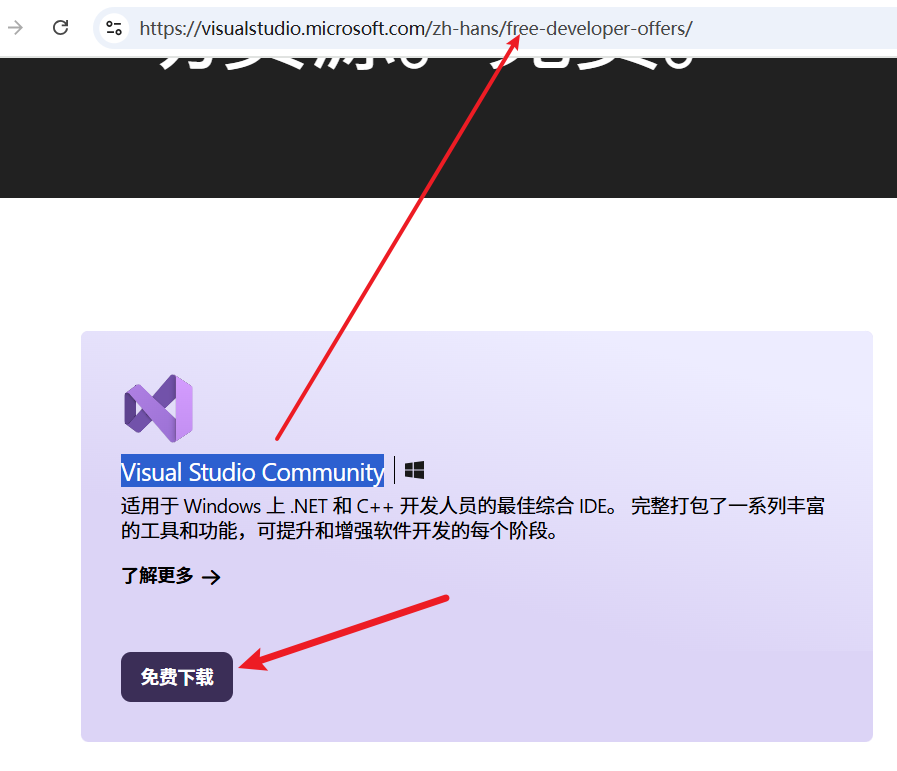
- Open your browser and visit:
https://visualstudio.microsoft.com/zh-hans/free-developer-offers/ - On the page, locate the
Visual Studio Communitysection and click the "Free Download" button below it.
- After the download completes, find the downloaded
.exefile (usually starting withVisualStudioSetupor a similar name) and double-click to run it.

- A small prompt window may appear; click "Continue." The installer will prepare for a moment.
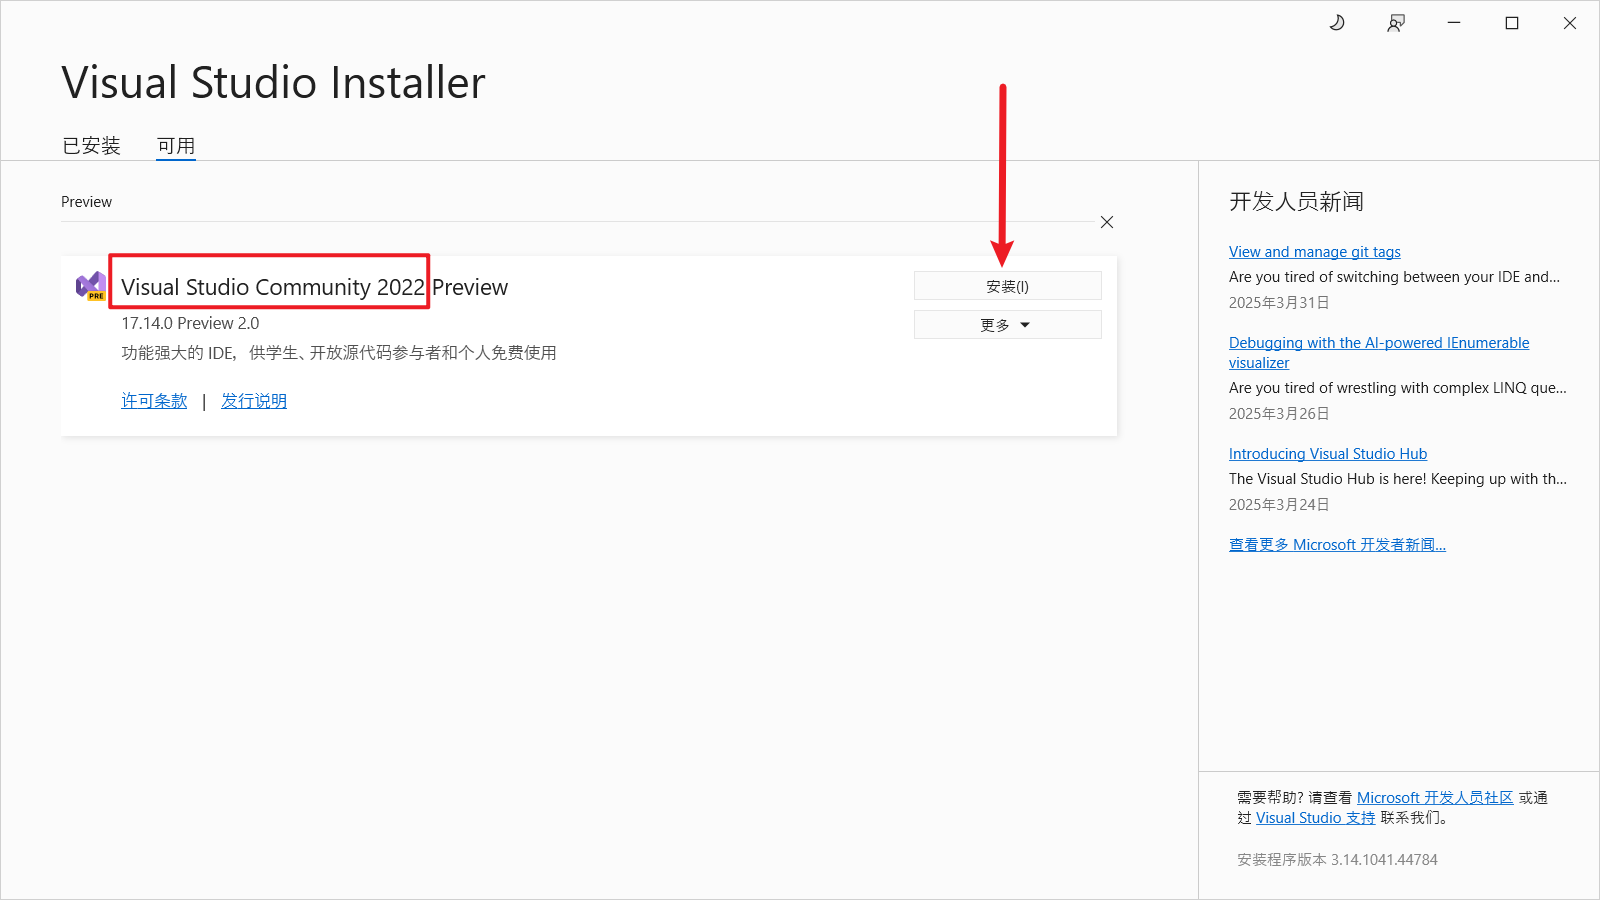
- Next, you'll see the main interface of the Visual Studio Installer, showing different available versions of Visual Studio. Ensure you are on the "Available" tab and find the option labeled
Visual Studio Community(e.g.,Visual Studio Community 2022). This version is completely free, while others (like Professional or Enterprise) require payment. Select the latest Community version (e.g., 2022 or newer) and click the corresponding "Install" button.
Step 2: Select Components to Install
After clicking "Install," you'll enter a more detailed setup interface where you can choose specific features to install, known as "Workloads."
- In this interface, scroll down to the large category named "Desktop & Mobile."
- Under this category, find and check the "Desktop development with C++" option. This is key to installing the MSVC compilation environment.
- Once "Desktop development with C++" is checked, look at the right side of the window. There will be an "Installation details" area listing the specific components to be installed. Most necessary components are automatically selected.
- (Important Recommendation) In the "Installation details" on the right, find and additionally check the options with names containing "Build Tools" and "MSVC v14x ... Build Tools" (e.g., v140, v141, v142, v143, etc.). These are indicated by areas 4, 5, and 6 in the red boxes in the image below (specific numbers and versions may vary slightly; focus on the names).
Also, select at least one Windows 10/11 SDK based on your system version.
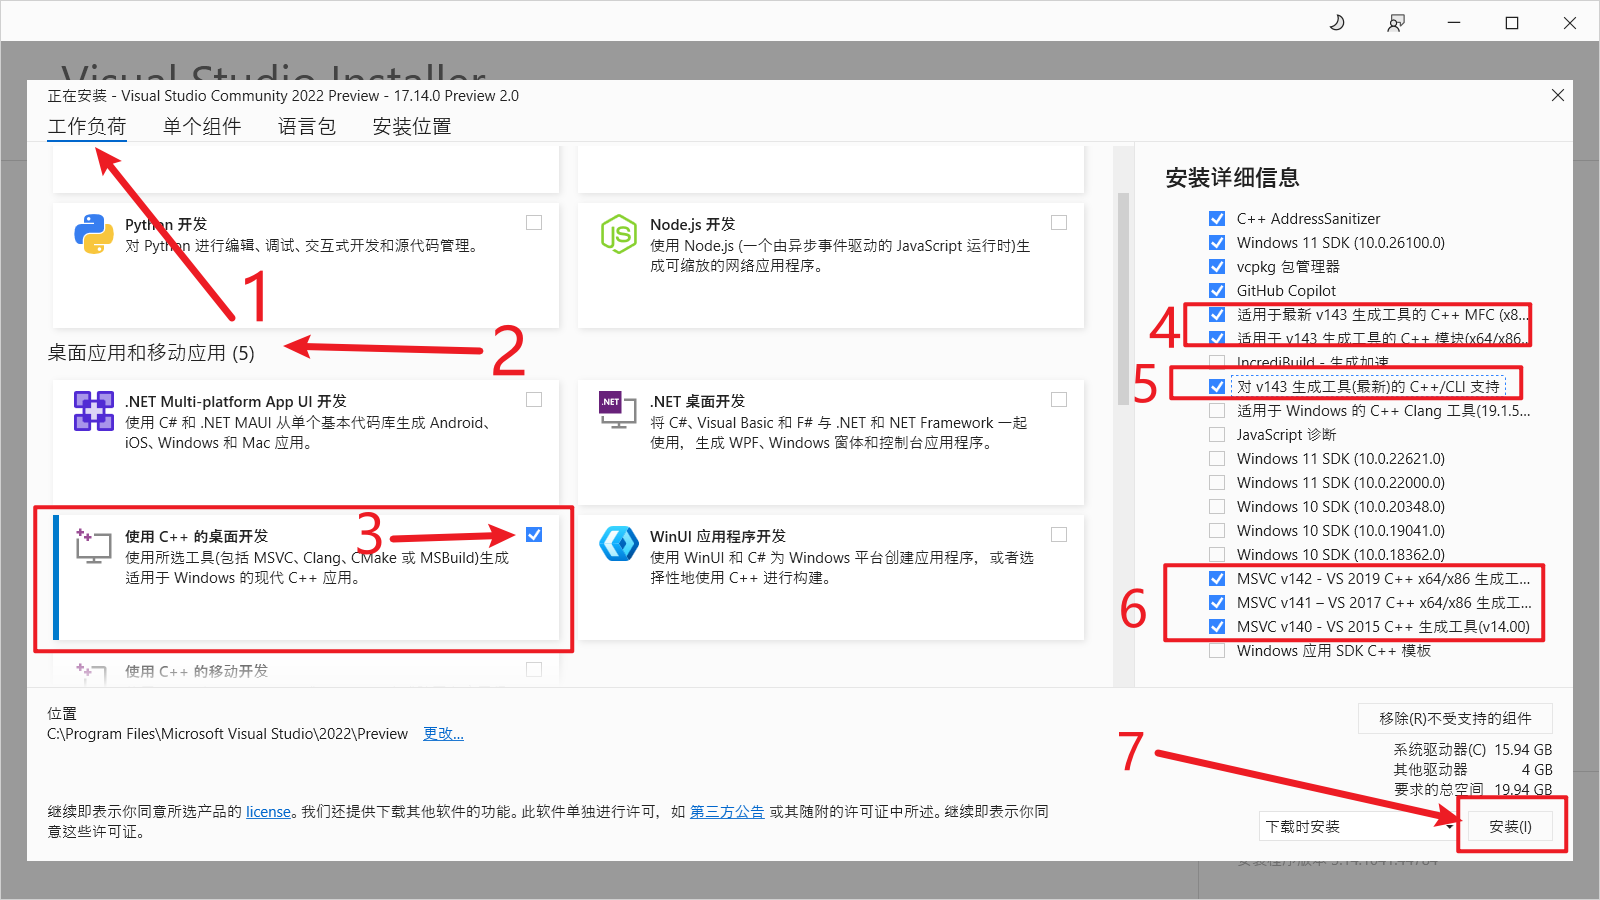
Why select these extra items? Because some older Python projects may depend on specific versions of the MSVC compiler. To avoid future compilation errors due to missing a particular version, it's recommended to select build tools for several major MSVC versions (v142, v143, etc.). This will use a bit more disk space but save you from potential issues later.
- After confirming your selections, click the "Install" button in the lower-right corner of the interface.
Step 3: Wait for Installation to Complete
The installer will now begin downloading and installing all the selected components. This process may take some time, depending on your internet speed and computer performance, so please be patient.
Once the installation is successfully completed, the installer will notify you. You can then close the Visual Studio Installer.
Great! Visual Studio Community (and the crucial C++ compilation environment) is now successfully installed on your computer! Now, return to the previously failing pip install command that was missing MSVC and try running it again—it should work smoothly this time!