An ideal translated video should have the following characteristics: accurate subtitles, appropriate length, voice tone matching the original, and perfect synchronization between subtitles, audio, and visuals.
This guide details the four steps of video translation and provides optimal configuration recommendations for each step.
Step 1: Speech Recognition
Goal: Convert speech in the video into subtitle files in the corresponding language.
Corresponding Control Element: "Speech Recognition" row
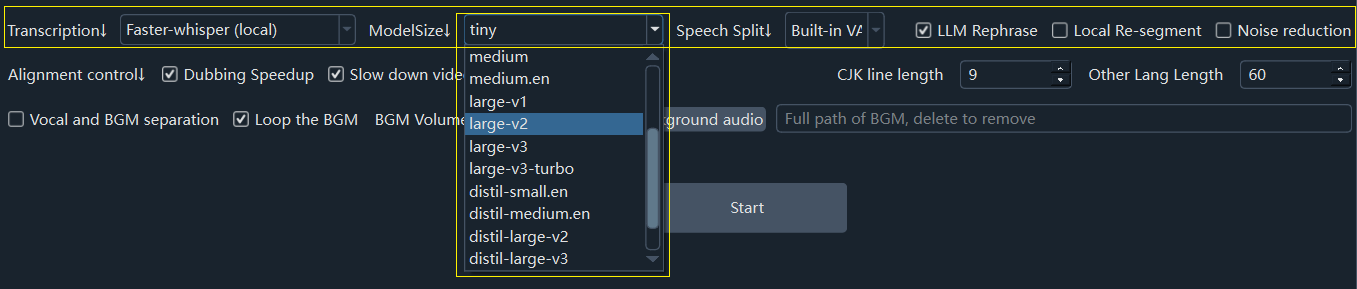
Best Configuration for Non-Chinese:
- Select
faster-whisper(local) - Choose model
large-v2,large-v3, orlarge-v3-turbo - Select speech segmentation mode
Overall Recognition - Check
Preserve Original Background Audio(time-consuming)
- Select
Best Configuration for Chinese:
- Select
Ali FunASR - Select speech segmentation mode
Overall Recognition - Check
Preserve Original Background Audio(time-consuming)
- Select
Best Configuration for Minor Languages:
- Select
Gemini Large Model Recognition
- Select
Note: Processing is extremely slow without an Nvidia GPU or a configured CUDA environment for CUDA acceleration. May crash with insufficient VRAM.
Step 2: Subtitle Translation
Goal: Translate the subtitle file generated in Step 1 into the target language.
Corresponding Control Element: "Translation Channel" row
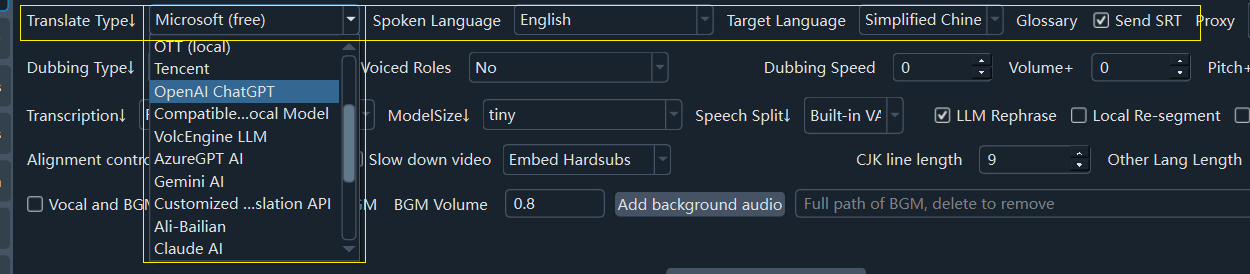
Best Configuration:
- First Choice: If you have a VPN and know how to configure it, use the
gemini-2.5-flashmodel in Menu - Translation Settings - Gemini pro (Gemini AI channel). - Second Choice: If you don't have a VPN or cannot configure a proxy, select
DeepSeekin the "Translation Channel".
How to use GeminiAI: https://pyvideotrans.com/gemini.html
- First Choice: If you have a VPN and know how to configure it, use the
Step 3: Dubbing
Goal: Generate dubbing based on the translated subtitle file.
Corresponding Control Element: "Dubbing Channel" row
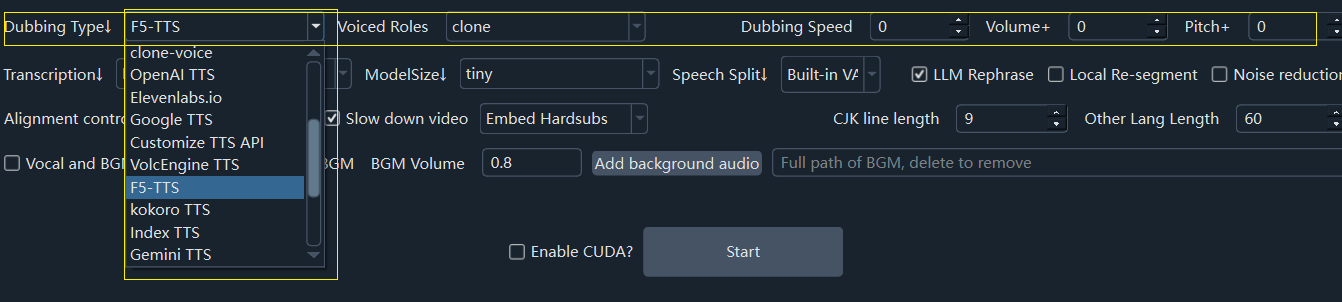
Best Configuration:
- Edge-TTS: Free and supports all languages
- Chinese or English:
F5-TTS/Index-TTS(local) - Japanese or Korean:
CosyVoice(local)
Requires additional installation of corresponding
F5-TTS/CosyVoice/clone-voiceintegration packages. See documentation: https://pyvideotrans.com/f5tts.html
Step 4: Synchronize Subtitles, Dubbing, and Video
- Goal: Synchronize subtitles, dubbing, and video.
- Corresponding Control Element:
Sync Alignmentrow
- Best Configuration:
- When translating Chinese to English, set the
Dubbing Speedvalue (e.g.,10or15) to speed up dubbing, as English sentences are typically longer. - Check both
Speed Up DubbingandSlow Down Videooptions to force alignment of subtitles, audio, and video.
- When translating Chinese to English, set the
Output Video Quality Control
- Default output is lossy compression. For lossless output, go to Menu - Tools - Advanced Options - Video Output Control area, and set
Video Transcoding Loss Controlto 0: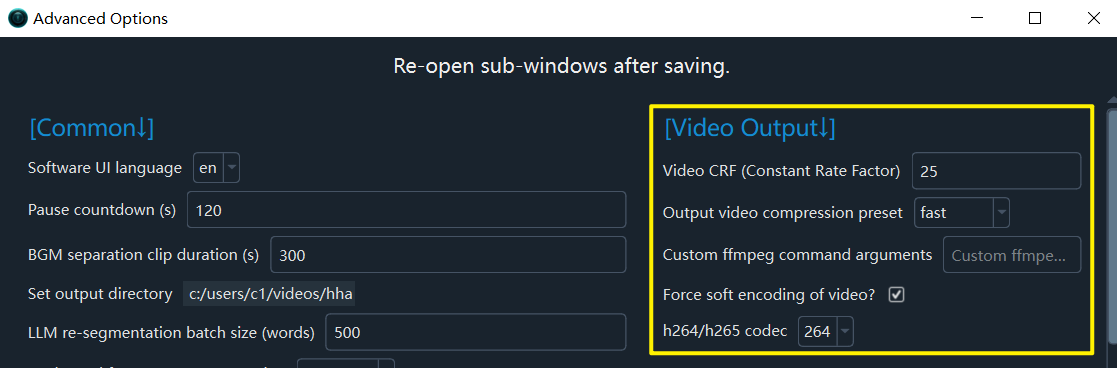
- Note: If the original video is not in mp4 format or uses embedded hard subtitles, video encoding conversion will cause some loss, but it is usually minimal. Increasing video quality significantly reduces processing speed and increases output video size.