Google Colab is a free cloud-based programming environment. Think of it as a computer in the cloud where you can run code, process data, and even perform complex AI tasks—like quickly and accurately converting your audio/video files into subtitles using large models.
This guide will walk you through using pyVideoTrans on Colab to transcribe audio/video into subtitles. Even if you have no programming background, it's easy: we provide a ready-to-use Colab notebook, and you only need to click a few buttons.
Prerequisites: Internet Access and Google Account
Before starting, you'll need two things:
- Internet Access: Due to regional restrictions, Google services may not be directly accessible in some areas. You might need special methods to access Google sites.
- Google Account: A free Google account is required to use Colab and log in to its services.
Make sure you can open https://google.com.
Open the Colab Notebook
Once you can access Google and are logged into your account, click the link below to open our pre-set Colab notebook:
https://colab.research.google.com/drive/1kPTeAMz3LnWRnGmabcz4AWW42hiehmfm?usp=sharing
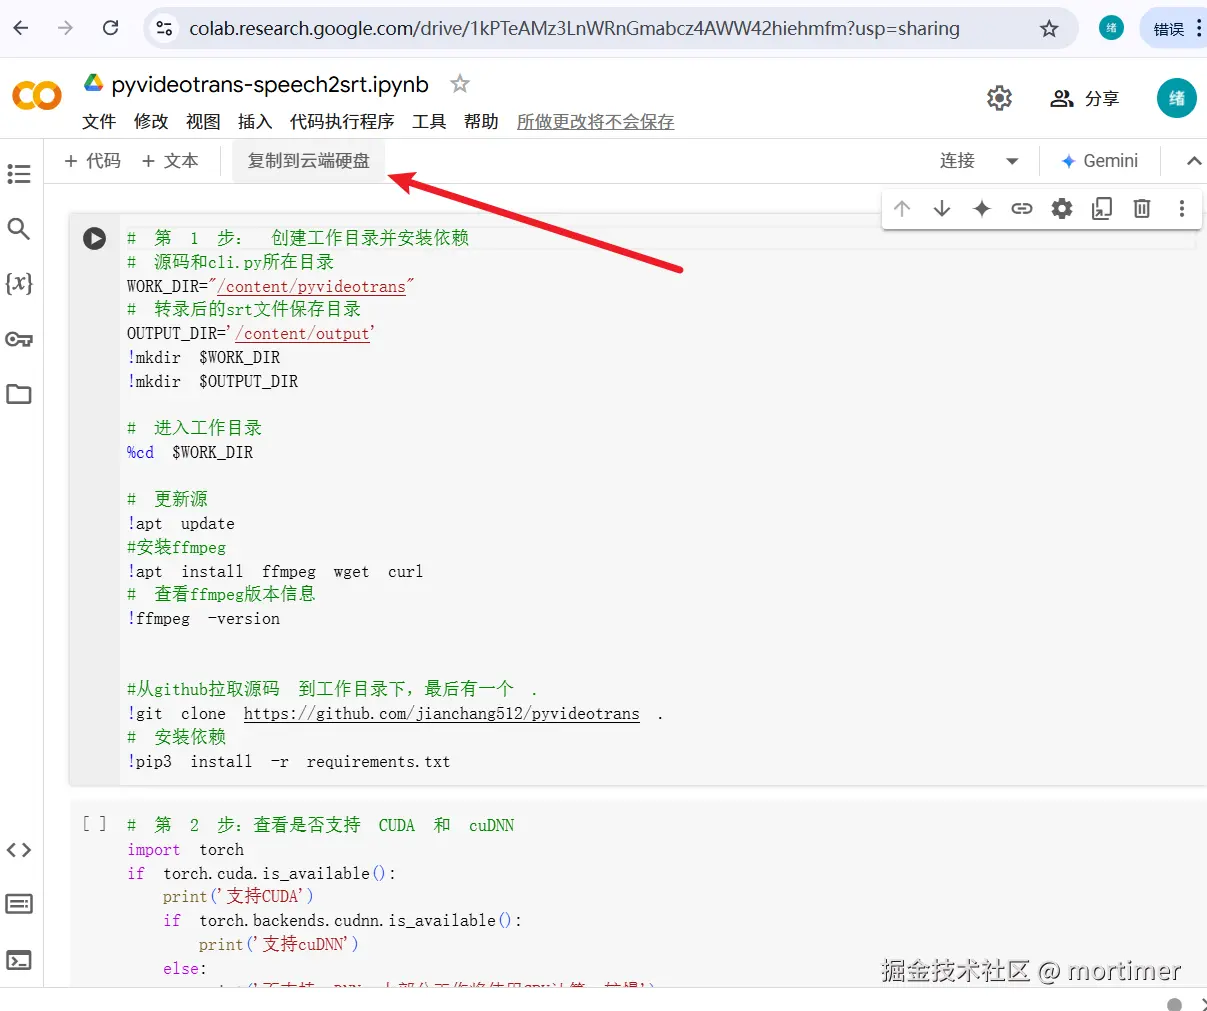
You'll see an interface similar to the image below. Since this is a shared notebook, you need to make a copy to your own Google Drive to edit and run it. Click "Copy to Drive" in the top-left corner, and Colab will automatically create and open a copy for you.
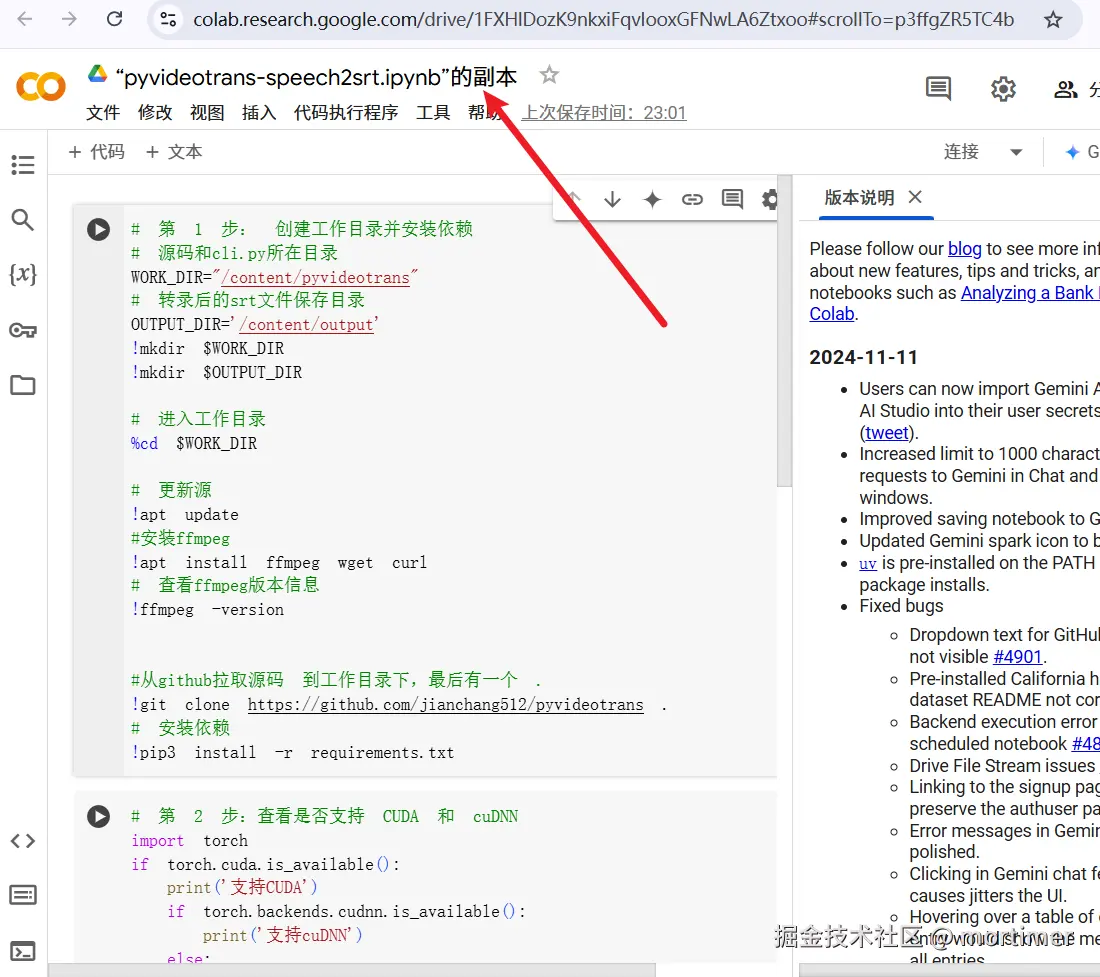
Here's what the created page looks like:
Connect to GPU/TPU
Colab runs code on CPU by default. To speed up transcription, we'll use a GPU or TPU.
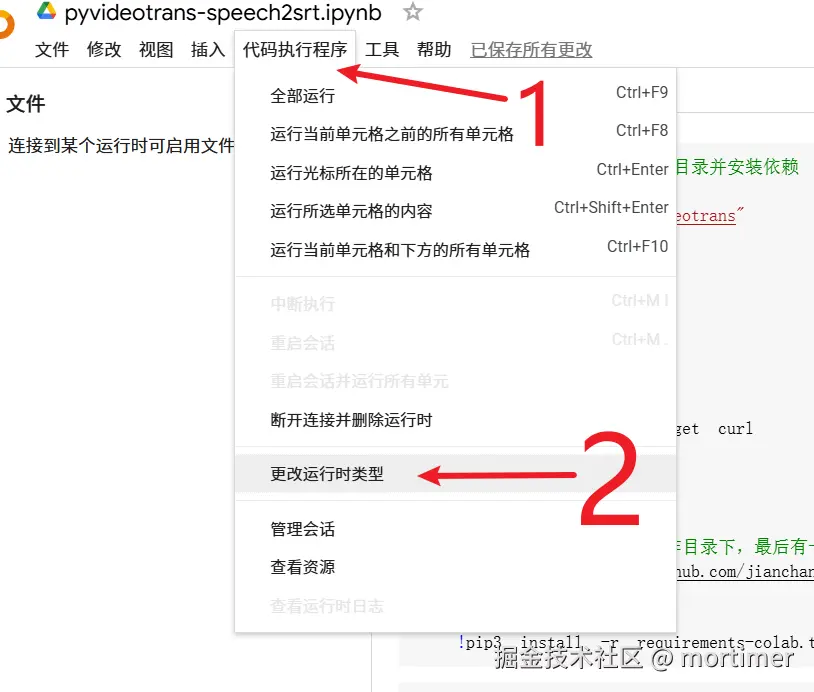
Click "Runtime" → "Change runtime type" in the menu, then select "GPU" or "TPU" from the "Hardware accelerator" dropdown. Click "Save."
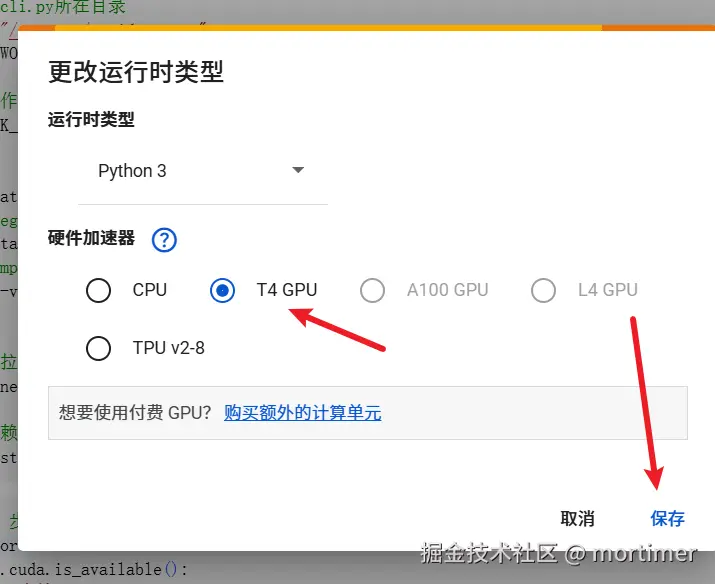
Once saved, if any dialog boxes appear, choose "Allow" or "Agree" for all.
It's simple—just follow these three steps.
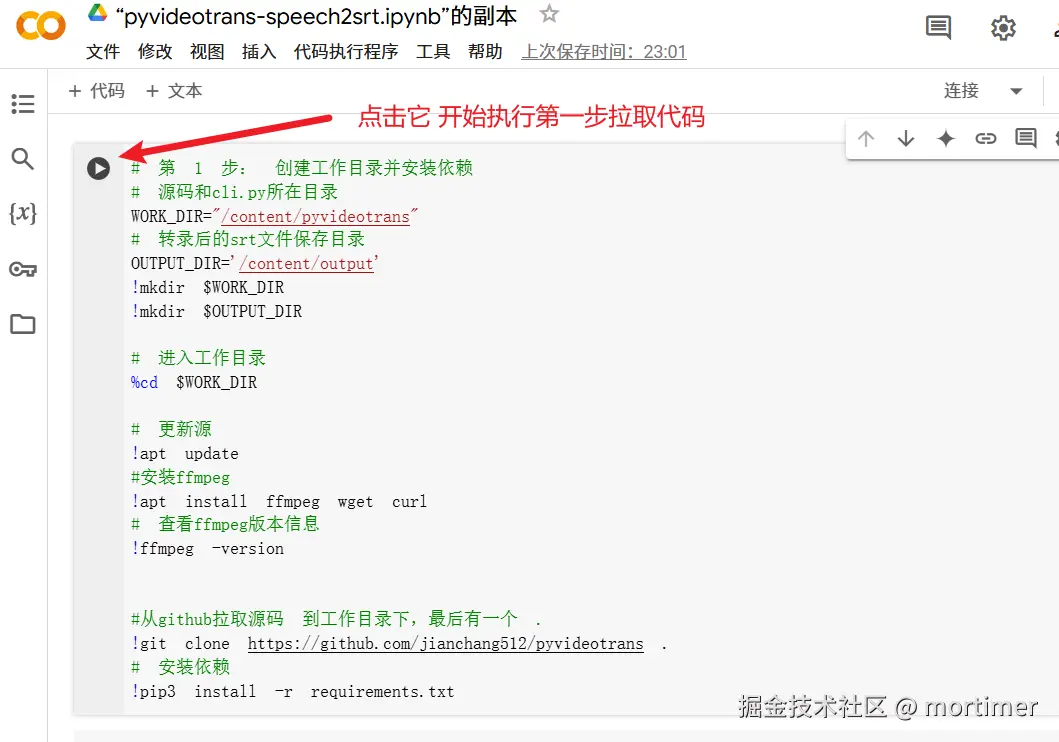
1. Pull Source Code and Set Up Environment
Find the first code block (gray area with a play button) and click the play button to run the code. This will automatically download and install pyvideotrans along with its dependencies.
Wait for the code to finish executing; the play button will turn into a checkmark. You might see red error messages—these can be ignored.
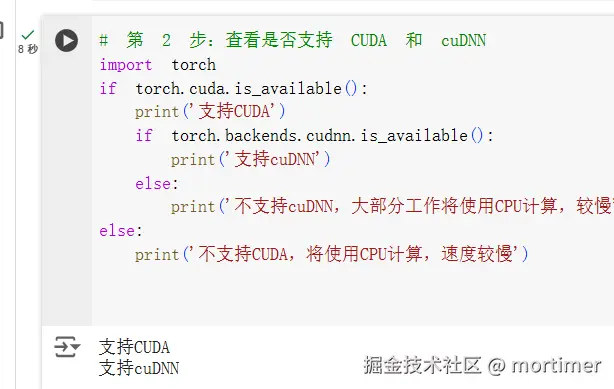
2. Check GPU/TPU Availability
Run the second code block to confirm if GPU/TPU is connected successfully. If the output shows CUDA support, it's working. If not, go back and check your GPU/TPU connection.

3. Upload Audio/Video and Run Transcription
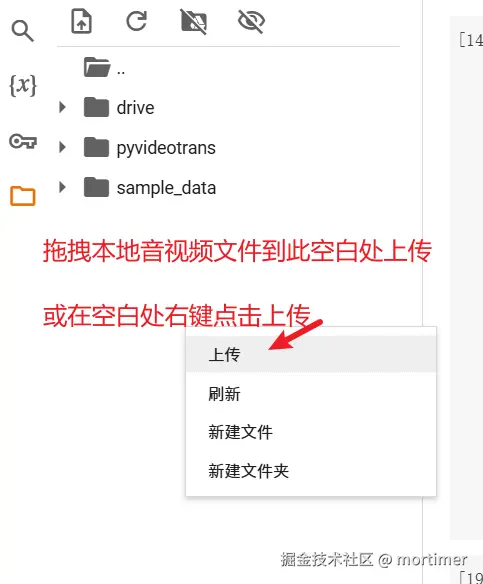
- Upload File: Click the file icon on the left side of the Colab interface to open the file browser.
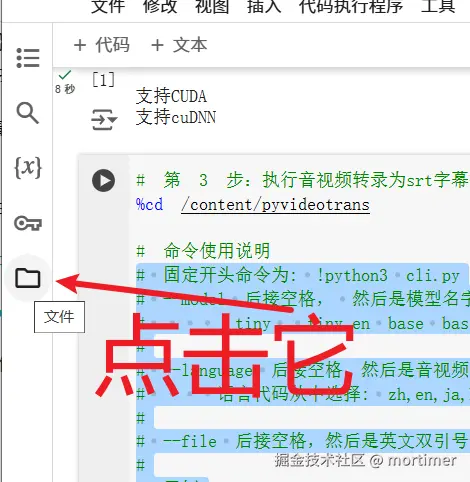
Drag and drop your audio/video file from your computer into the blank area of the file browser to upload it.
Copy File Path: After uploading, right-click the filename and select "Copy path" to get the full path (e.g.,
/content/yourfile.mp4).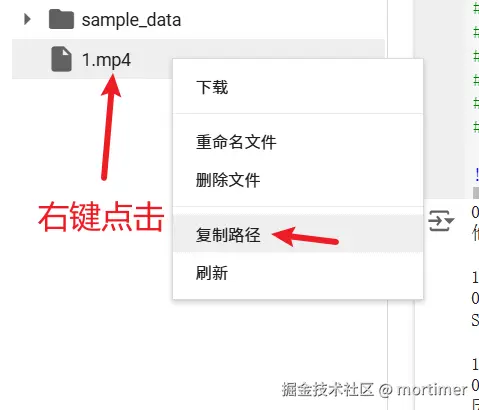
Run Command
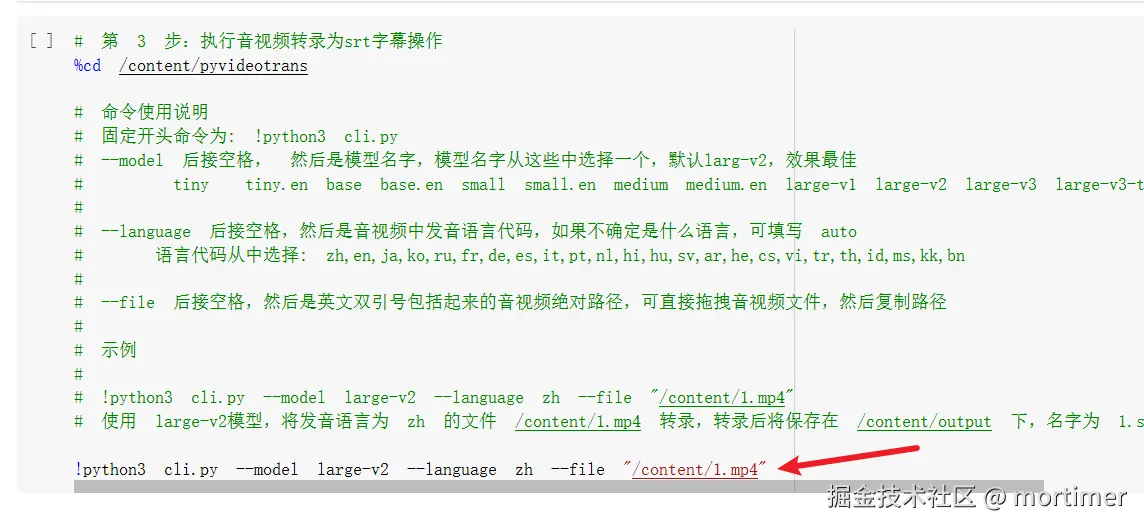
Here's an example command:
!python3 cli.py --model large-v2 --language zh --file "/content/1.mp4"
!python3 cli.pyis the fixed starting command—don't forget the exclamation mark.After
cli.py, you can add control parameters like which model to use, the audio/video language, GPU/CPU usage, and the file path. Only theaudio/video file pathis required; others can use default values.
If your video is named 1.mp4, paste the copied path inside English double quotes to avoid errors from spaces:
!python3 cli.py --file "paste the copied path here" becomes !python3 cli.py --file "/content/1.mp4"
Then click the play button to execute and wait for it to finish. Required models will download automatically with fast speeds.
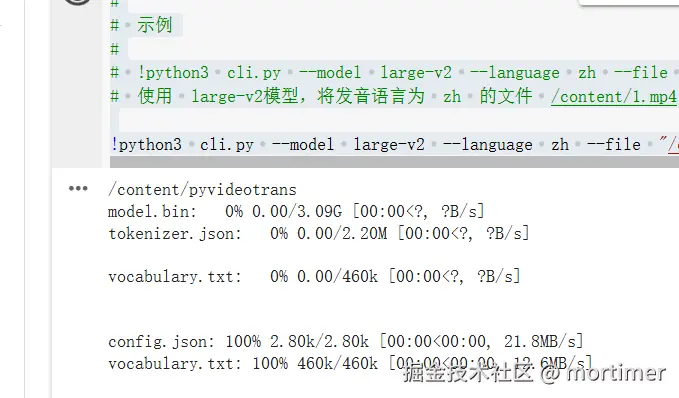
The default model is
large-v2. To switch tolarge-v3, use:
!python3 cli.py --model large-v3 --file "paste the copied path"To also set the language to Chinese:
!python3 cli.py --model large-v3 --language zh --file "paste the copied path"
Where to Find Transcription Results
After starting execution, you'll see an output folder in the left file list. All transcription results are saved here, named after the original audio/video file.
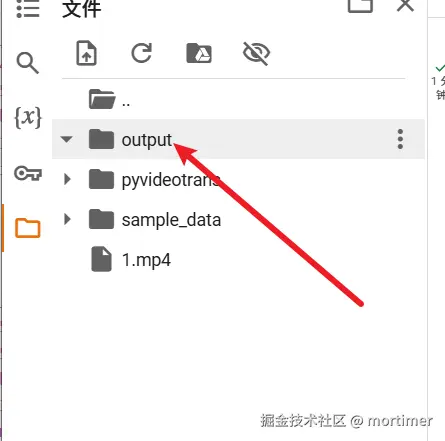
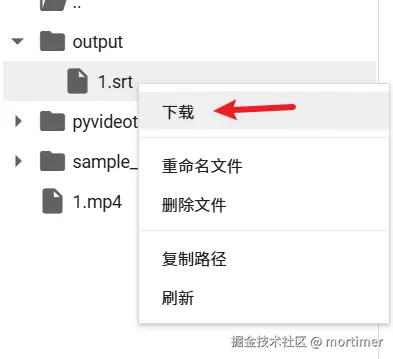
Click the output folder to view all files. Right-click any file and select "Download" to save it to your computer.
Important Notes
- Ensure stable internet access.
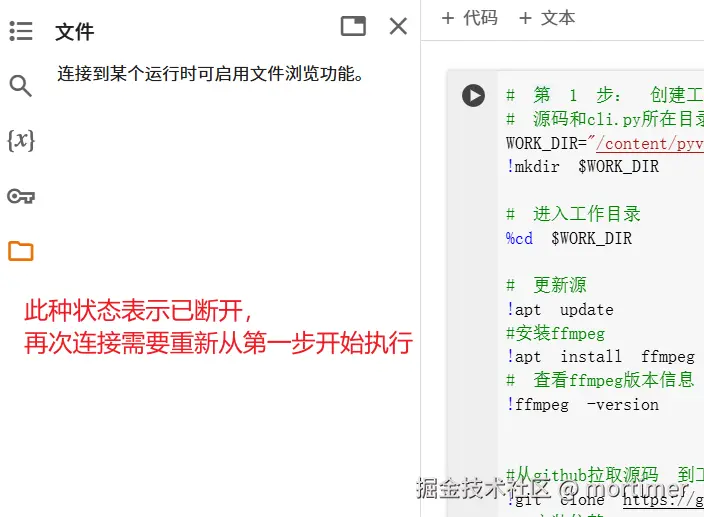
- Uploaded files and generated SRT files are temporarily stored in Colab. They will be deleted when the connection ends or the free Colab session limit is reached—including all source code and dependencies. Download results promptly.
- If you reopen Colab or reconnect after disconnection, you must restart from step 1.
- If you close the browser, where to find it next time?
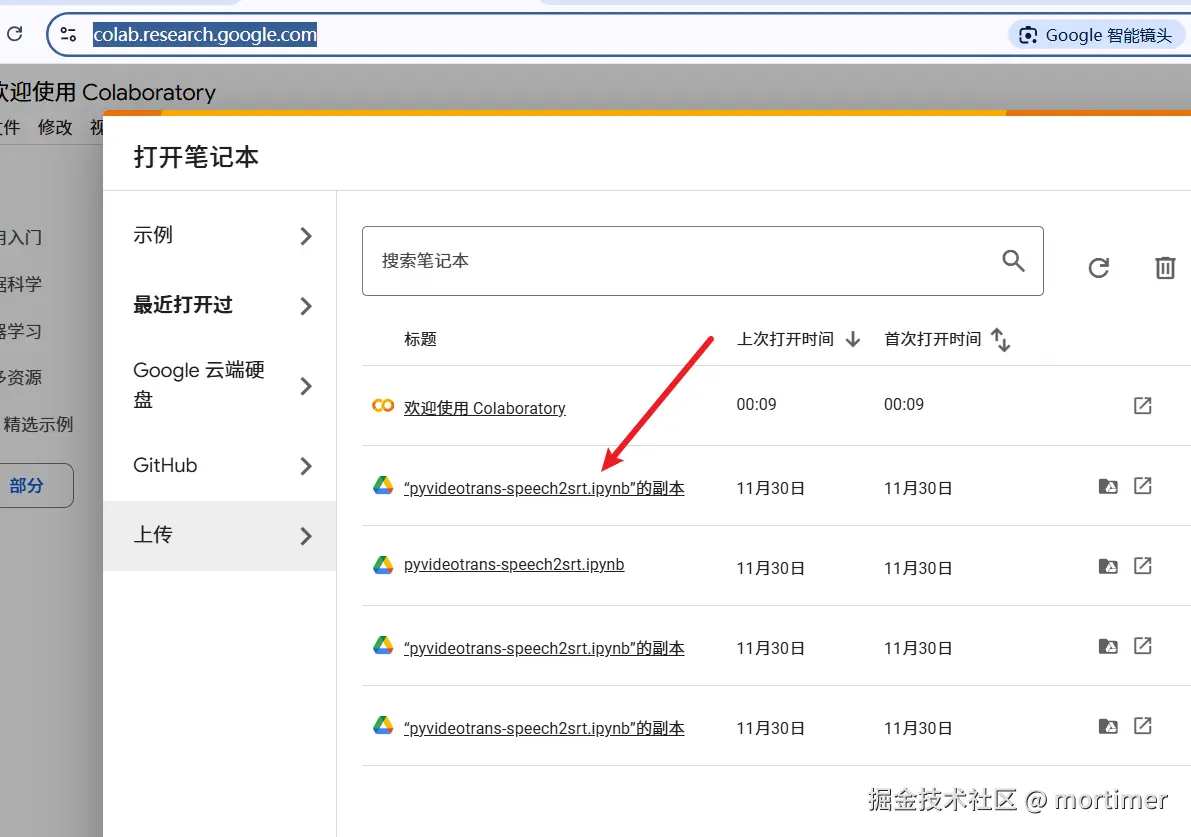
Go to https://colab.research.google.com/
Click on the name of the last used notebook.
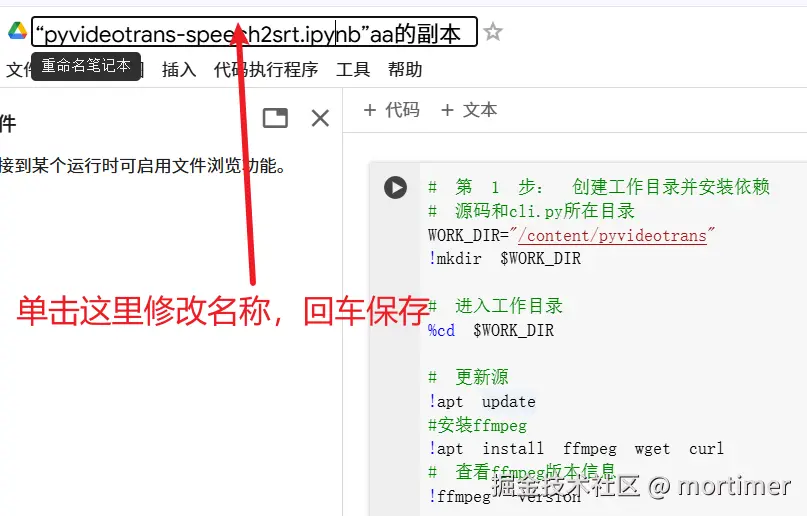
- To rename the notebook for easier identification:
