F5-TTS is an open-source voice cloning tool developed by Shanghai Jiao Tong University, known for its excellent performance. The initial version supported only Chinese and English cloning, but the latest version v1 has expanded to include French, Italian, Hindi, Japanese, Russian, Spanish, Finnish, and more.
This article explains how to install and launch F5-TTS using the official source code and integrate it with the pyVideotrans project. It also covers modifying the source code for local network access.
Due to limited time, I will no longer maintain previous personal integrated packages and API interfaces. Instead, I will use the official interface to integrate with pyVideotrans. The limitation of the official interface is that it can only be called locally, not over a local network. For a solution, refer to the Local Network Usage section.
Prerequisites
Your system must have Python 3.10 installed. While versions 3.11/3.12 might work in theory, they have not been tested, so it is recommended to use 3.10.
If Python is not installed:
Windows installation tutorial: https://pvt512.com/20250313/pythoninstall
Mac installation: If not installed, download the pkg installer from the Python website https://www.python.org/downloads/macos, and select version
3.10.11.
Check if Python is installed:
- Windows: Press Win+R, type
cmd, and press Enter. In the black window, typepython --version. If it shows3.10.xx, it is installed. If it says "python is not recognized as an internal or external command," Python is not installed or not added to the Path environment variable, and you need to reinstall. - Mac: In the terminal, run
python3 --version. If it outputs3.10.x, it is installed; otherwise, install it.
Download F5-TTS Source Code
First, create an empty folder in a suitable location. It is recommended to choose a non-system drive or a location that does not require special permissions, such as the D drive. Avoid placing it in directories like C:/Program Files (it is recommended to use folder names composed only of numbers or letters). For example, D:/f5/v1 is a good location, while D:/open source f5/f5 v1 with spaces and Chinese characters is not recommended.
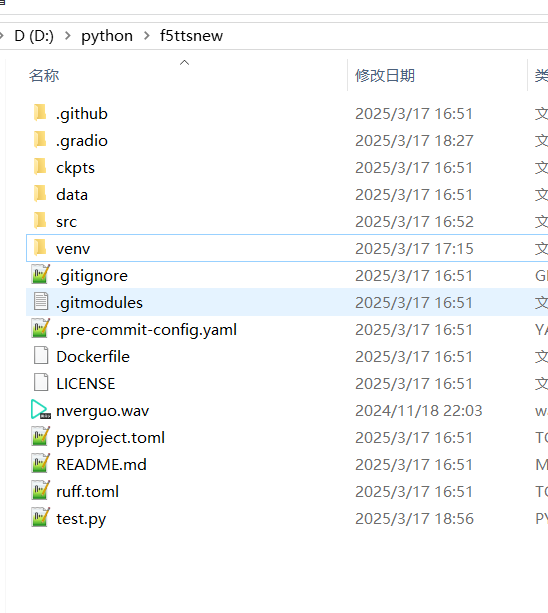
This article uses the example of installing F5-TTS in the D:/python/f5ttsnew folder on a Windows10 system.
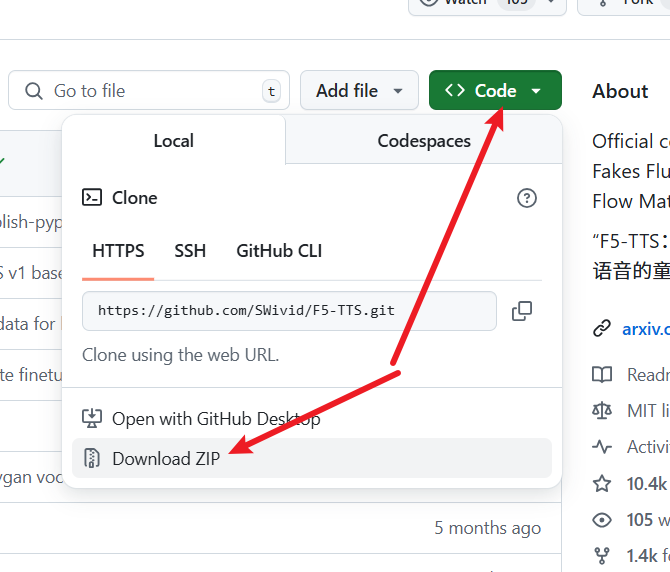
Open the URL: https://github.com/SWivid/F5-TTS
As shown in the image below, click to download the source code:
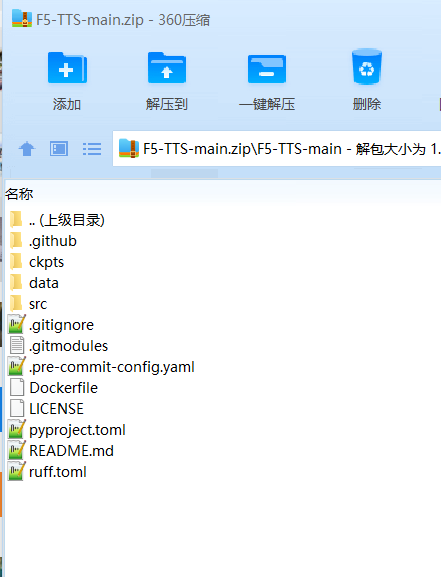
After downloading, extract the zip file and copy all files from the F5-TTS-main folder to the D:/python/f5ttsnew folder, as shown below:
Create a Virtual Environment
It is strongly recommended to create a virtual environment unless your computer has no other Python or AI projects. A virtual environment can prevent many potential errors.
In the address bar of the newly created folder D:/python/f5ttsnew, type cmd and press Enter (on Mac, use the terminal to navigate to this folder).
Run the following command to create a virtual environment: python -m venv venv. After execution, a new folder named venv will appear.
Next, activate the virtual environment (note the spaces and dots):
- Windows:
.\venv\scripts\activate - Mac:
. ./venv/bin/activate
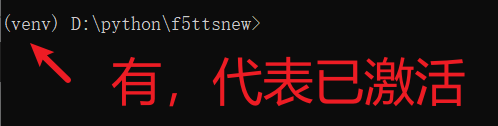
After activation, the command prompt will show (venv) at the beginning. Ensure all subsequent operations are performed in this virtual environment and check for (venv) before each operation.
Install Dependencies
In the activated virtual environment terminal, enter the following command (note the spaces and dots):
pip install -e .
Wait for the installation to complete. If CUDA acceleration is needed, run the following command (this is a single command, do not break it):
# Install pytorch with your CUDA version, e.g.
pip install torch==2.4.0+cu124 torchaudio==2.4.0+cu124 --extra-index-url https://download.pytorch.org/whl/cu124Configure Proxy for Access
Important: F5-TTS needs to download models online from huggingface.co. Since this site is blocked in some regions and cannot be accessed directly, you must configure a proxy with global or system settings before starting.
If your VPN tool provides an HTTP port (as shown below):
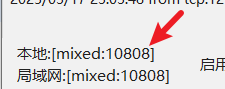
Set the proxy in the terminal with:
- Windows:
set https_proxy=http://127.0.0.1:10808(replace the port number with your actual port) - Mac:
https_proxy=http://127.0.0.1:10808(replace the port number with your actual port)
You can also modify the code to set the proxy and avoid entering it manually each time. Open the file F5-TTS root directory/src/f5_tts/infer/infer_gradio.py and add the following code at the top:
import os
os.environ['https_proxy']='http://127.0.0.1:10808' # Fill in your actual proxy addressLaunch the WebUI
After configuring the proxy, launch the WebUI by entering the following command in the terminal:
f5-tts_infer-gradio
On the first launch, the program will automatically download models, which may be slow. Be patient. On subsequent launches, it may still connect to huggingface.co for checks, so it is recommended to keep the proxy enabled to avoid errors.
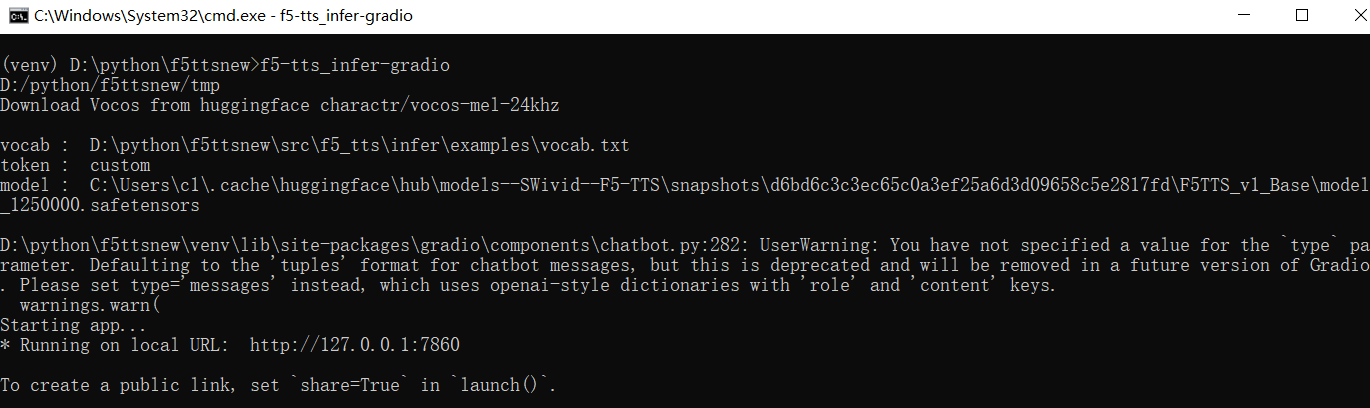
Upon successful launch, the terminal will display the IP address and port, as shown below:
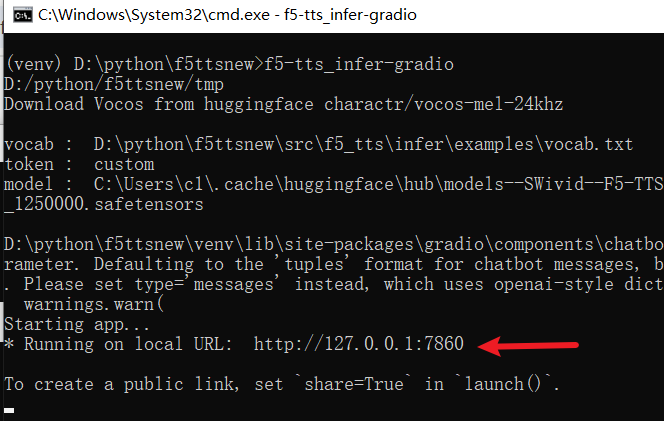
Open the displayed address in your browser, default is http://127.0.0.1:7860.
Integrate with pyVideoTrans API
To use F5-TTS in the video translation software, first start F5-TTS and keep the terminal window open.
Then, open the video translation software, go to the menu: "TTS Settings" -> "F5-TTS API", and fill in the F5-TTS launch address, default is http://127.0.0.1:7860. If your address is different, use the actual address.
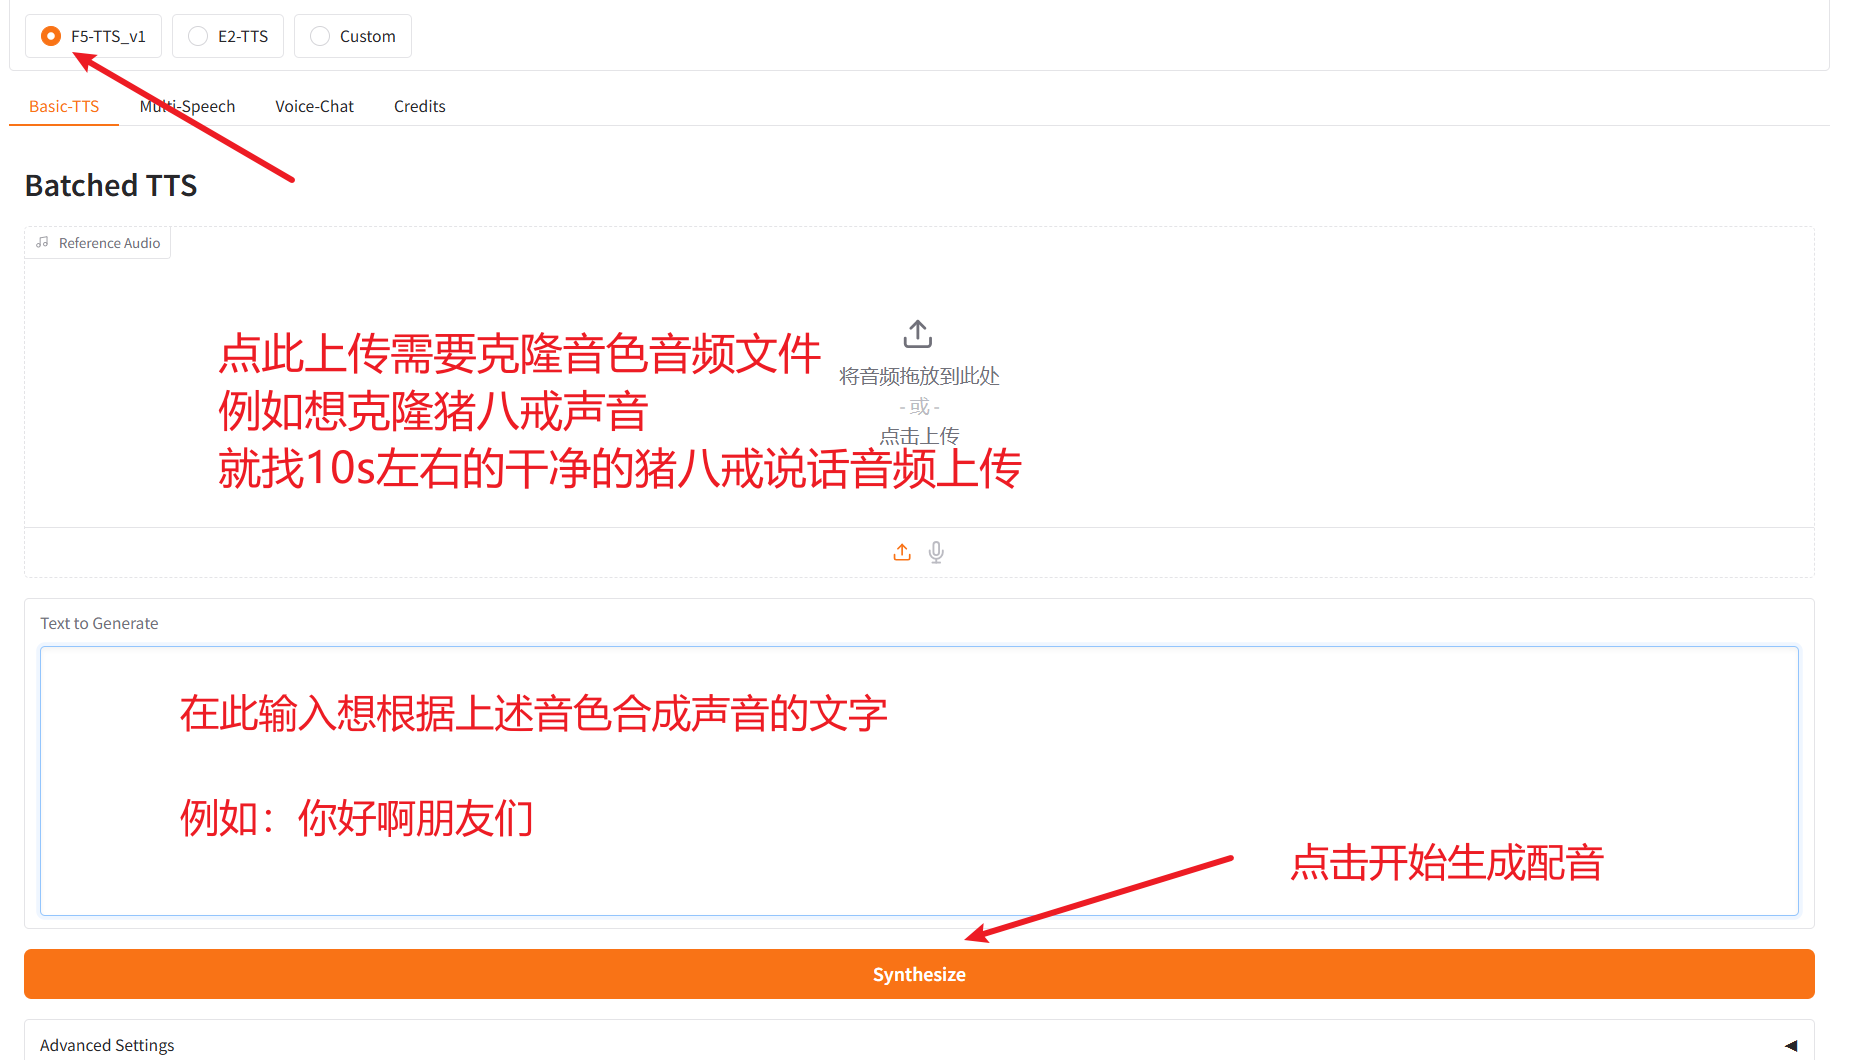
In the "Reference Audio" field, enter:
Audio file name to use#Text in that audio file
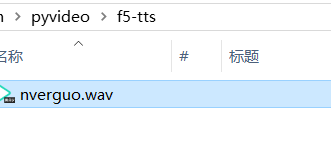
Note: Place the reference audio file in the f5-tts folder under the root directory of the pyVideotrans project. If the folder does not exist, create it manually. For example, you can name the reference audio file nverguo.wav.
Example of filling:
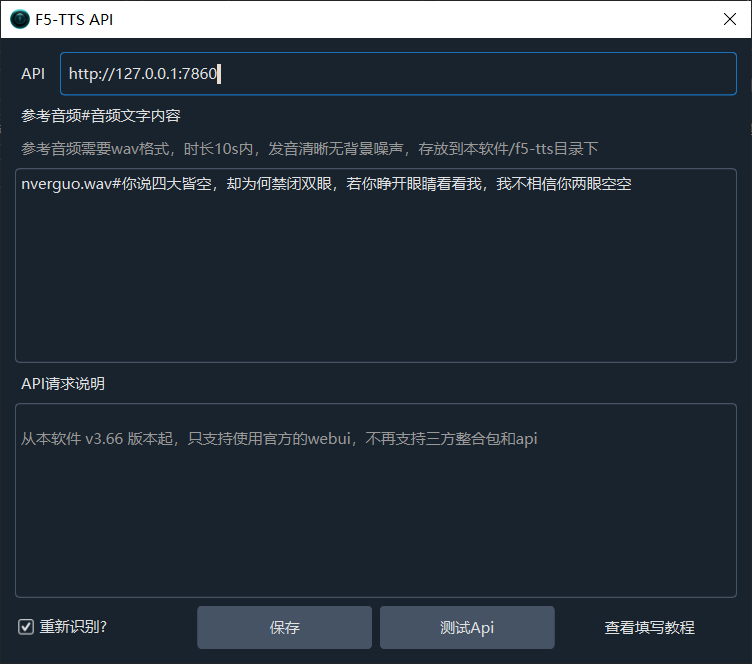
Re-recognize? By default, the reference audio (subtitles recognized during cloning) will be sent to F5-TTS to avoid F5-TTS starting whisper for speech recognition, saving time and improving efficiency. However, sometimes you may want F5-TTS to re-recognize, which can improve cloning quality. Check this box if needed, but note that if it's the first time, F5-TTS will download the openai-whisper-v3 model from huggingface.co online, so ensure the proxy is configured.
Solve Local Network Issues
If your F5-TTS is deployed on another computer in the local network, you need to modify the F5-TTS code to support local network access.
Open the file F5-TTS project directory/src/f5_tts/infer/infer_gradio.py, and add the following code below line 16:
# Add start for local network
import os
from pathlib import Path

ROOT=Path(os.getcwd()).as_posix()
TMP=f'{ROOT}/tmp'
Path(TMP).mkdir(exist_ok=True)
os.environ['GRADIO_TEMP_DIR']=TMP
gr.set_static_paths(paths=[TMP,tempfile.gettempdir()])
print(TMP)

## Add end for local networkCode addition location diagram: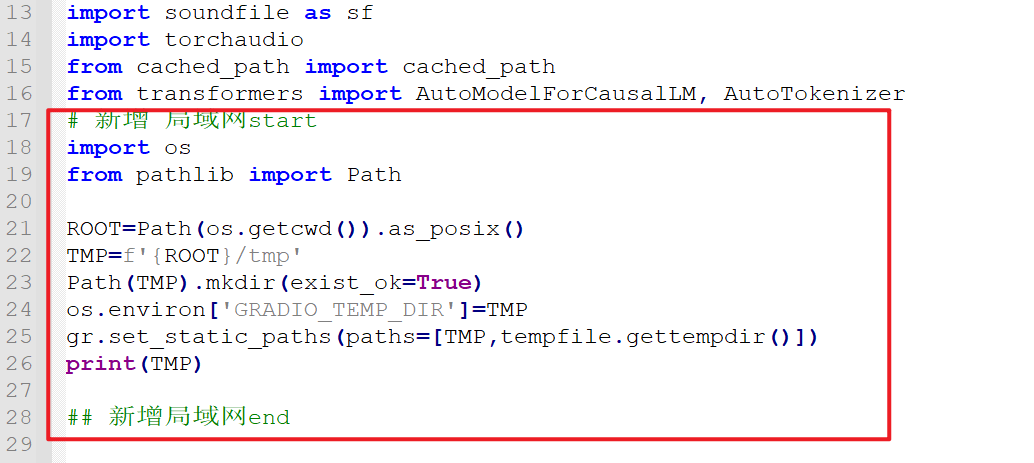
After saving the changes, restart F5-TTS. Then, in pyVideotrans, fill in the IP address and port where F5-TTS is running, e.g., http://192.168.0.12:7860.
Add Other Languages
If you need to use models for other languages, also modify the file F5-TTS project directory/src/f5_tts/infer/infer_gradio.py.
Find the code around line 59:
DEFAULT_TTS_MODEL_CFG = [
    "hf://SWivid/F5-TTS/F5TTS_v1_Base/model_1250000.safetensors",
    "hf://SWivid/F5-TTS/F5TTS_v1_Base/vocab.txt",
    json.dumps(dict(dim=1024, depth=22, heads=16, ff_mult=2, text_dim=512, conv_layers=4)),
]Code location diagram:
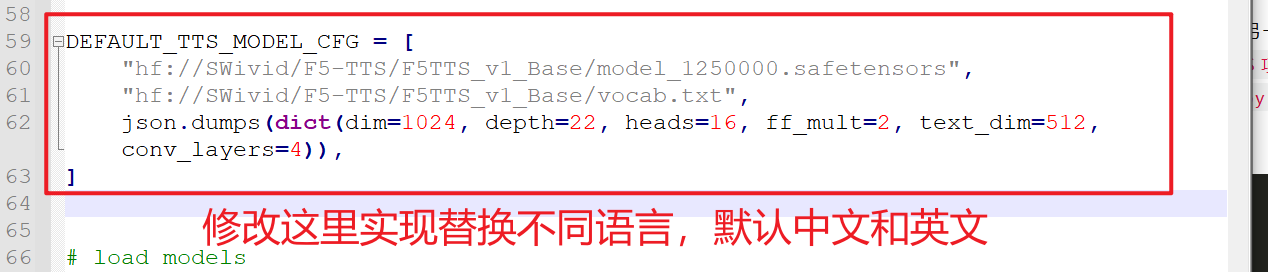
By default, this configures the official Chinese and English models. If you need to use models for other languages, modify it as described below. After modification, restart F5-TTS and ensure the proxy is configured so the program can download the new language model online. After successful download, test by cloning a voice via the WebUI before using it with pyVideoTrans.
Important: Before use, ensure the dubbing text language in pyVideoTrans matches the model language selected in F5-TTS.
Here are the configurations for each language model:
French:
pythonDEFAULT_TTS_MODEL_CFG = [ "hf://RASPIAUDIO/F5-French-MixedSpeakers-reduced/model_last_reduced.pt", "hf://RASPIAUDIO/F5-French-MixedSpeakers-reduced/vocab.txt", json.dumps({"dim": 1024, "depth": 22, "heads": 16, "ff_mult": 2, "text_dim": 512, "text_mask_padding": False, "conv_layers": 4, "pe_attn_head": 1}), ]Hindi:
pythonDEFAULT_TTS_MODEL_CFG = [ "hf://SPRINGLab/F5-Hindi-24KHz/model_2500000.safetensors", "hf://SPRINGLab/F5-Hindi-24KHz/vocab.txt", json.dumps({"dim": 768, "depth": 18, "heads": 12, "ff_mult": 2, "text_dim": 512, "text_mask_padding": False, "conv_layers": 4, "pe_attn_head": 1}) ]Italian:
pythonDEFAULT_TTS_MODEL_CFG = [ "hf://alien79/F5-TTS-italian/model_159600.safetensors", "hf://alien79/F5-TTS-italian/vocab.txt", json.dumps({"dim": 1024, "depth": 22, "heads": 16, "ff_mult": 2, "text_dim": 512, "text_mask_padding": False, "conv_layers": 4, "pe_attn_head": 1}) ]Japanese:
pythonDEFAULT_TTS_MODEL_CFG = [ "hf://Jmica/F5TTS/JA_25498980/model_25498980.pt", "hf://Jmica/F5TTS/JA_25498980/vocab_updated.txt", json.dumps({"dim": 1024, "depth": 22, "heads": 16, "ff_mult": 2, "text_dim": 512, "text_mask_padding": False, "conv_layers": 4, "pe_attn_head": 1}) ]Russian:
pythonDEFAULT_TTS_MODEL_CFG = [ "hf://hotstone228/F5-TTS-Russian/model_last.safetensors", "hf://hotstone228/F5-TTS-Russian/vocab.txt", json.dumps({"dim": 1024, "depth": 22, "heads": 16, "ff_mult": 2, "text_dim": 512, "text_mask_padding": False, "conv_layers": 4, "pe_attn_head": 1}) ]Spanish:
pythonDEFAULT_TTS_MODEL_CFG = [ "hf://jpgallegoar/F5-Spanish/model_last.safetensors", "hf://jpgallegoar/F5-Spanish/vocab.txt", json.dumps({"dim": 1024, "depth": 22, "heads": 16, "ff_mult": 2, "text_dim": 512, "conv_layers": 4}) ]Finnish:
pythonDEFAULT_TTS_MODEL_CFG = [ "hf://AsmoKoskinen/F5-TTS_Finnish_Model/model_common_voice_fi_vox_populi_fi_20241206.safetensors", "hf://AsmoKoskinen/F5-TTS_Finnish_Model/vocab.txt", json.dumps({"dim": 1024, "depth": 22, "heads": 16, "ff_mult": 2, "text_dim": 512, "text_mask_padding": False, "conv_layers": 4, "pe_attn_head": 1})]
Follow official updates for other languages; they can be added similarly. Address: https://github.com/SWivid/F5-TTS/blob/main/src/f5_tts/infer/SHARED.md
Common Errors and Notes
During API usage, you can close the WebUI in the browser, but do not close the terminal window where F5-TTS is running.
Can models in F5-TTS be switched dynamically? No. You need to manually modify the code as described above and restart the WebUI.
Frequent errors like this:
    raise ConnectTimeout(e, request=request)
requests.exceptions.ConnectTimeout: (MaxRetryError("HTTPSConnectionPool(host='huggingface.co', port=443): Max retries exceeded with url: /SWivid/F5-TTS/resolve/main/F5TTS_v1_Base/vocab.txt (Caused by ConnectTimeoutError(<urllib3.connection.HTTPSConnection object at 0x000002174796DF60>, 'Connection to huggingface.co timed out. (connect timeout=10)'))"), '(Request ID: 0458b571-90ab-4edd-ae59-b93bd603cdd0)')Proxy issue. Use a reliable proxy and configure it as described in the proxy setup section.
- How to prevent connecting to huggingface.co every time?
Ensure you have successfully cloned at least once and the model is downloaded. Open
F5-TTS root directory/src/f5_tts/infer/utils_infer.py
Search for snapshot_download, find the line as shown:

Modify to:
local_path = snapshot_download(repo_id="nvidia/bigvgan_v2_24khz_100band_256x", cache_dir=hf_cache_dir,local_files_only=True)Then search for hf_hub_download, find the 2 lines as shown:

Modify to:
config_path = hf_hub_download(repo_id=repo_id, cache_dir=hf_cache_dir, filename="config.yaml",local_files_only=True)
model_path = hf_hub_download(repo_id=repo_id, cache_dir=hf_cache_dir, filename="pytorch_model.bin",local_files_only=True)Essentially, add the new parameter
,local_files_only=Trueto these 3 function calls. Ensure the model is downloaded locally, otherwise, it will report a model not found error.
- F5-TTS runs normally, but pyVideotrans test returns
{detail:"Not found"}- Check if other AI projects are using the port. Many AI projects with interfaces use gradio and default to port 7860. Close others and restart F5-TTS.
- If pyVideotrans is deployed from source, run
pip install --upgrade gradio_clientand try again. - Restart F5-TTS using the command
f5-tts_infer-gradio --api.