Want to deploy powerful open-source AI models like Qwen 2.5, Llama 3, and DeepSeek-R1 locally, but struggling to find a simple and easy method?
Don't worry! The Ollama + Open WebUI duo will clear all obstacles for you.
This article provides a step-by-step tutorial on how to easily set up a local AI environment using Ollama + Open WebUI, giving you a personal, powerful AI assistant to explore the endless possibilities of AI!
Note: Due to hardware limitations, local deployment usually cannot run the largest versions of DeepSeek-R1 (such as 67B). But don't worry, smaller models (like 1.3B or 7B) can run smoothly on most personal computers and provide excellent reasoning capabilities. More importantly, you can choose the version that best suits your needs!
Why Choose Ollama + Open WebUI?
Among many local deployment solutions, the Ollama + Open WebUI combination stands out and has become the top choice for many AI enthusiasts. What makes them so appealing?
- Ollama: Simplifying the Model Engine
- Ollama is like an "AI model toolbox." With just one command, you can download, install, and run various mainstream large language models, such as Llama 3 and DeepSeek-R1!
- Open WebUI: An Elegant and Easy-to-Use Interface
- Open WebUI adds a beautiful layer to Ollama. It provides an attractive, intuitive web interface.
- Completely open-source and free.
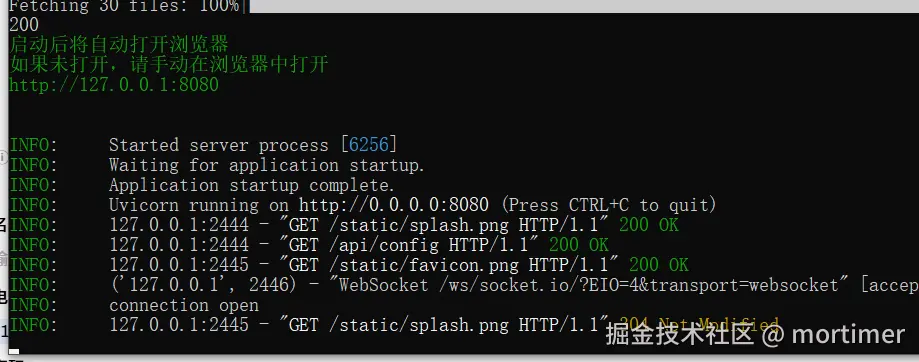
After deployment, simply open http://127.0.0.1:8080 in your browser to start chatting with your AI assistant:

For Windows Users: One-Click Integrated Package, Say Goodbye to Complicated Setup!
Considering the difficulties Windows users might face when configuring the Docker environment, we've thoughtfully prepared an integrated package. Just download, extract, and use—truly "out of the box"!
Download and Extract the Integrated Package:
Integrated Package Download Link: https://www.123684.com/s/03Sxjv-JmvJ3
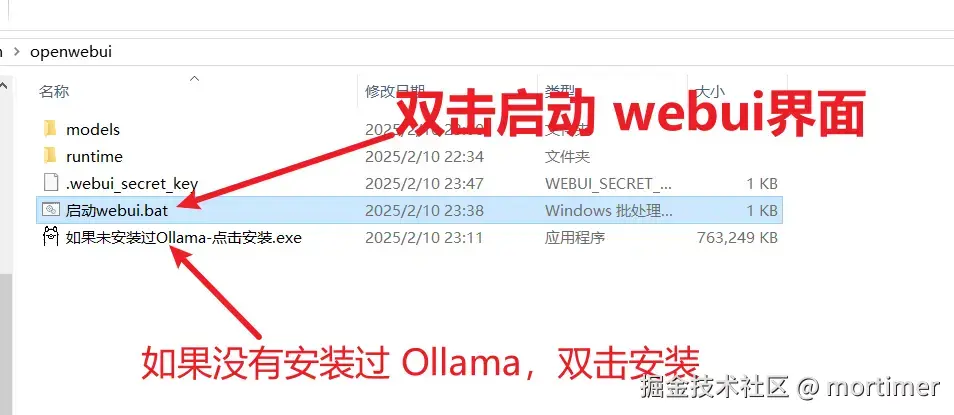
- If you haven't installed Ollama yet, double-click the
ollama-0.1.28-setup.exefile inside the package to install it. The installation process is very simple—just click "Next" all the way through.
- If you haven't installed Ollama yet, double-click the
Start WebUI:
- Double-click the
启动webui.batfile inside the integrated package to start Open WebUI.
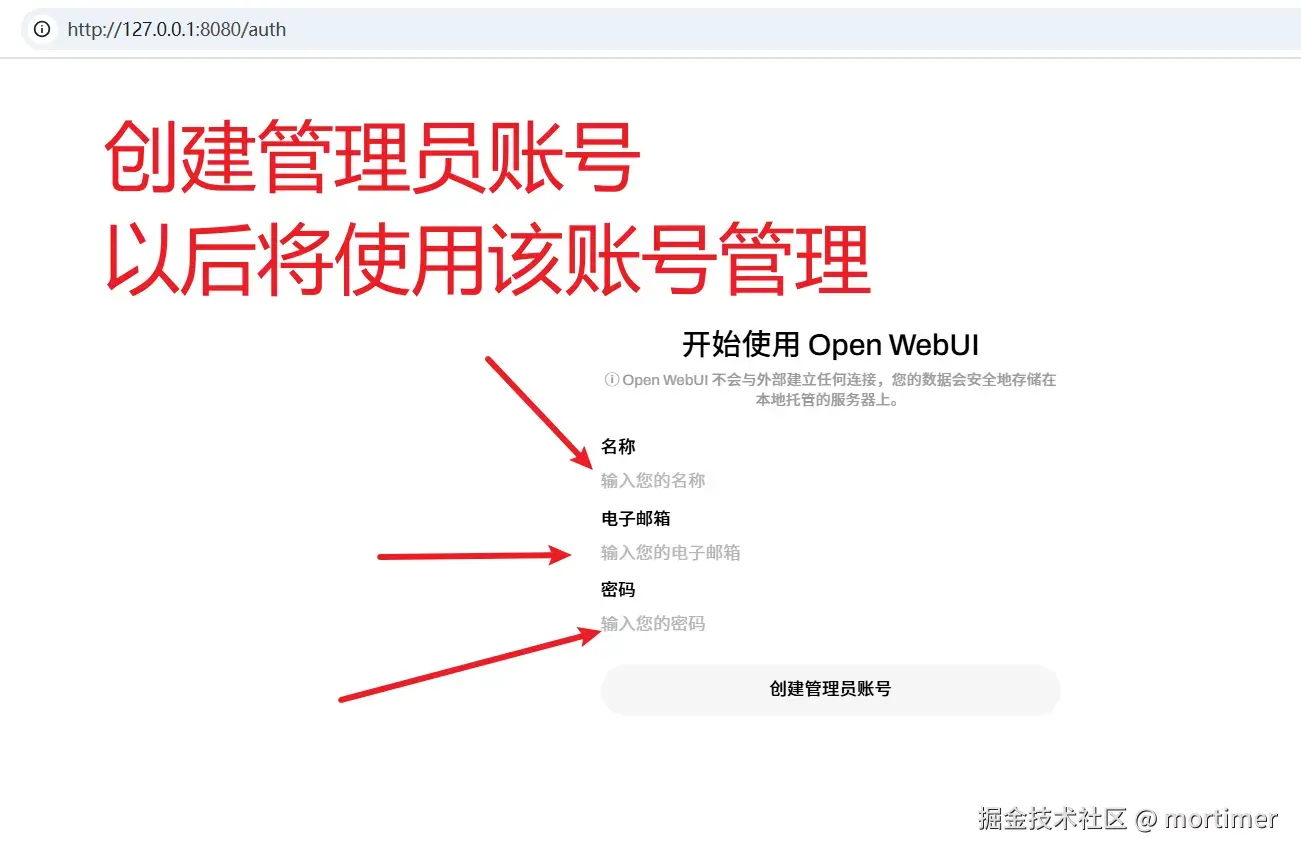
- On the first startup, you'll be prompted to set up an administrator account. Please follow the instructions to complete the registration.
- Double-click the
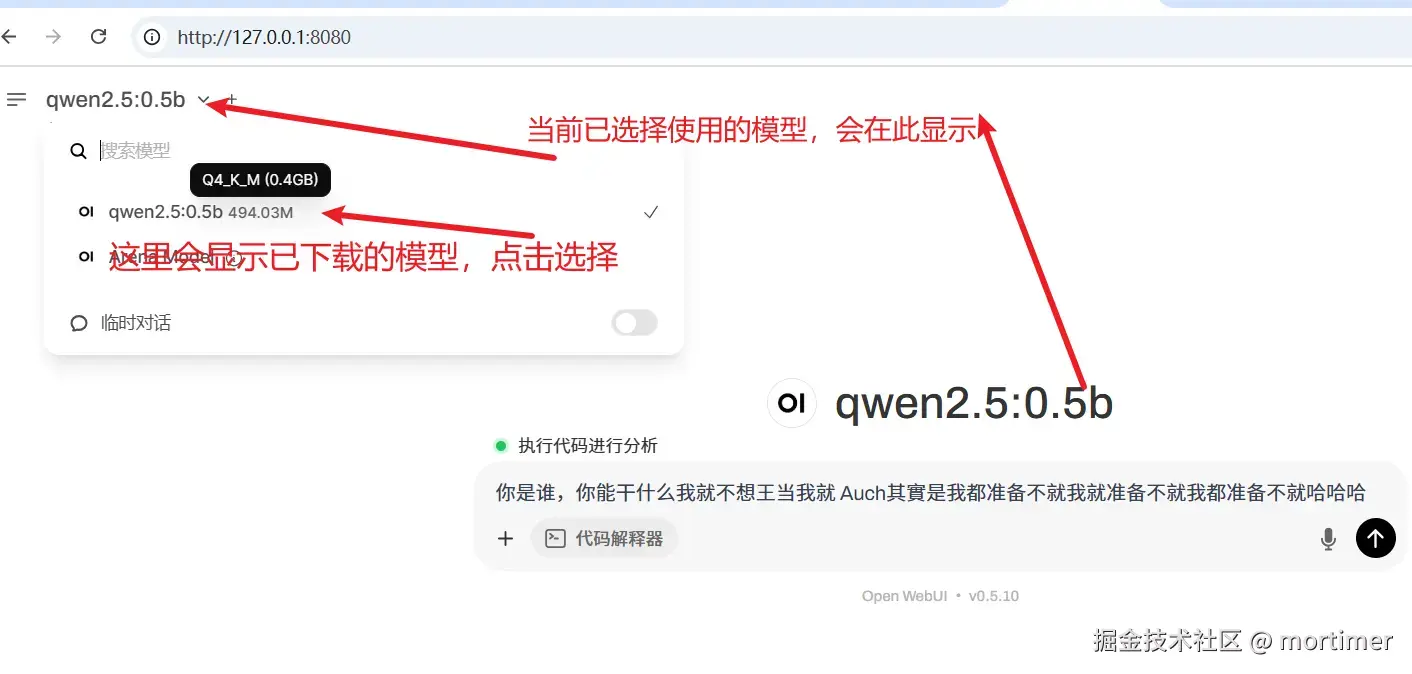
Choose the Model You Want to Use
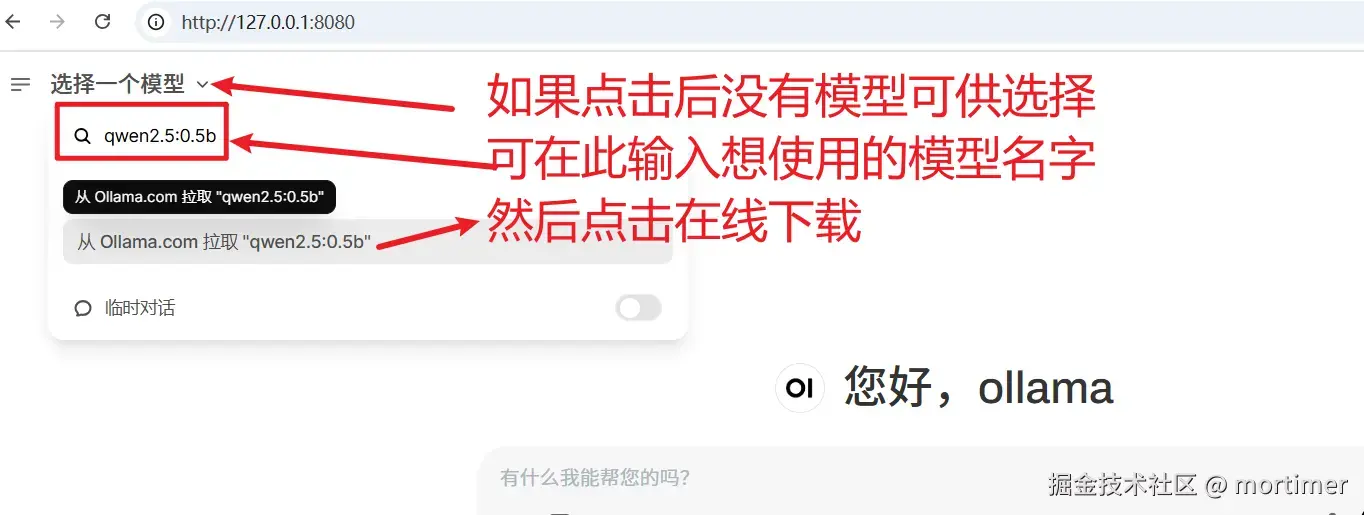
After entering Open WebUI, you'll see the model selection area in the top-left corner. If no models are listed, don't worry—it means you haven't downloaded any models yet.
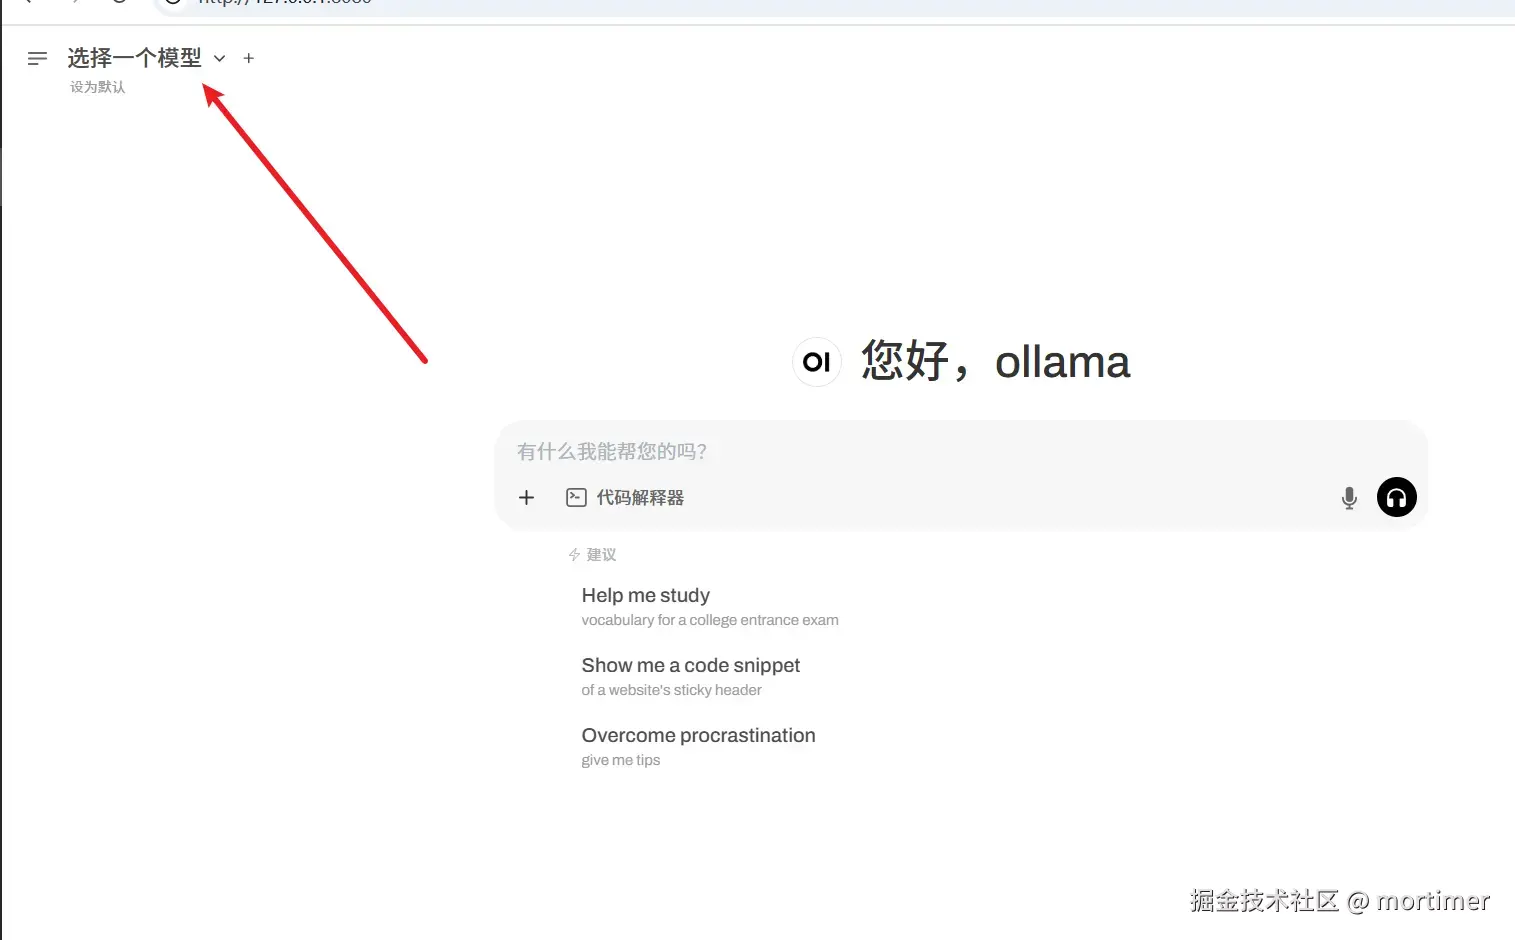
You can directly enter the model name in the input box to download it online from Ollama.com:
Model Selection Tips:
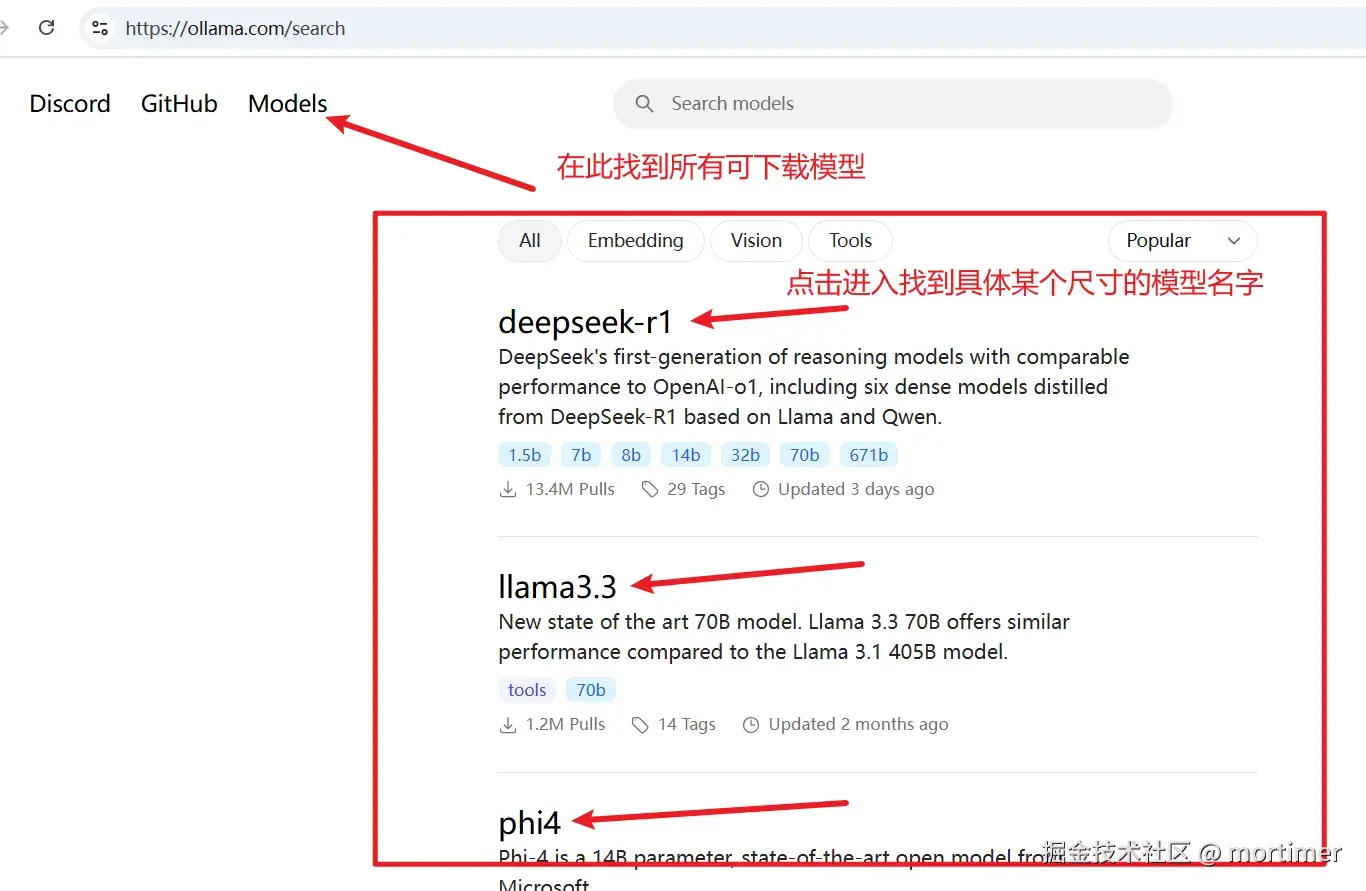
- Model Repository: Visit https://ollama.com/models to browse the rich model resources officially provided by Ollama.
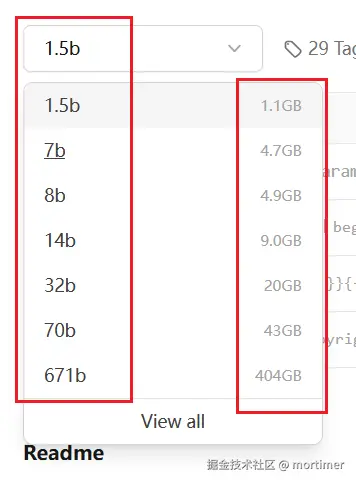
- Parameter Scale: Each model has different versions (e.g., 1.3B, 7B, 67B, etc.), representing different parameter scales. More parameters usually mean a more powerful model, but they also require more computational resources (memory and VRAM).
- Choose According to Your Capabilities: Select a model that fits your hardware configuration. Generally, if your "RAM + VRAM" size is larger than the model file size, you can run the model smoothly.
- Choosing Deepseek-R1: Search for
deepseek-r1in Ollama's model library to find it.
Taking the deployment of the deepseek-r1 model as an example:
Select Model Specification: On the https://ollama.com/library page, find the model version you want to deploy (e.g.,
deepseek-r1).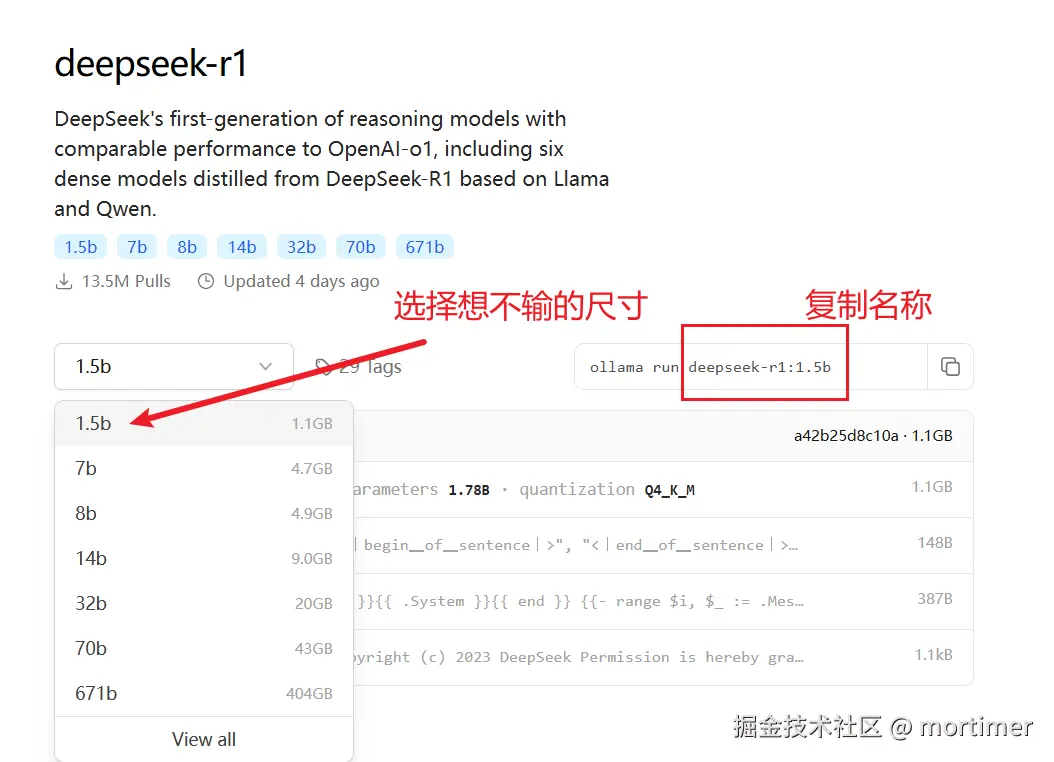
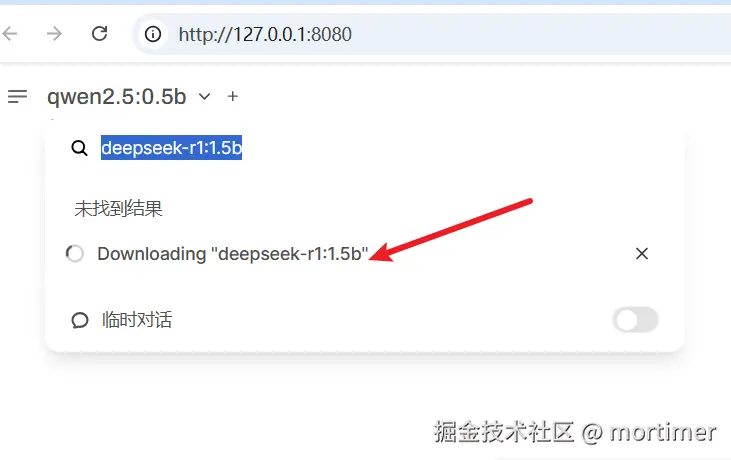
Download the Model: Paste the model name (e.g.,
deepseek-r1) into the input box in the top-left corner of Open WebUI, then click the "Pull from ollama.com" button to start the download.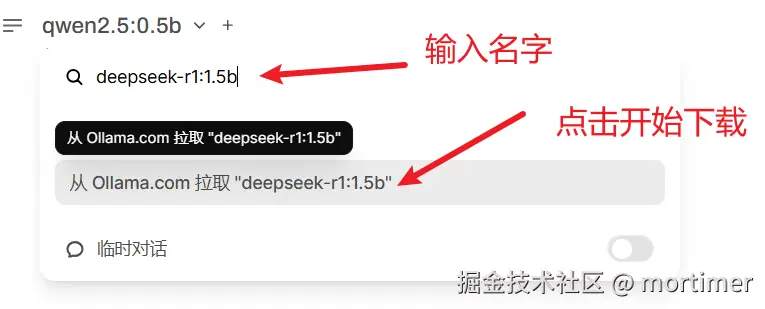
Wait for the Download to Complete: The download time depends on your network speed and the model size, so please be patient.
Start Your AI Journey
Once the model download is complete, you can freely chat with DeepSeek-R1 in Open WebUI! Explore its powerful features to your heart's content!
If the model supports it, you can also upload images, files, etc., for multimodal interaction. Let your AI assistant not only talk but also "read images"!
Advanced Exploration: Hidden Treasures of Open WebUI
Open WebUI's features go far beyond this! Click the menu button in the top-left corner to discover more surprises:
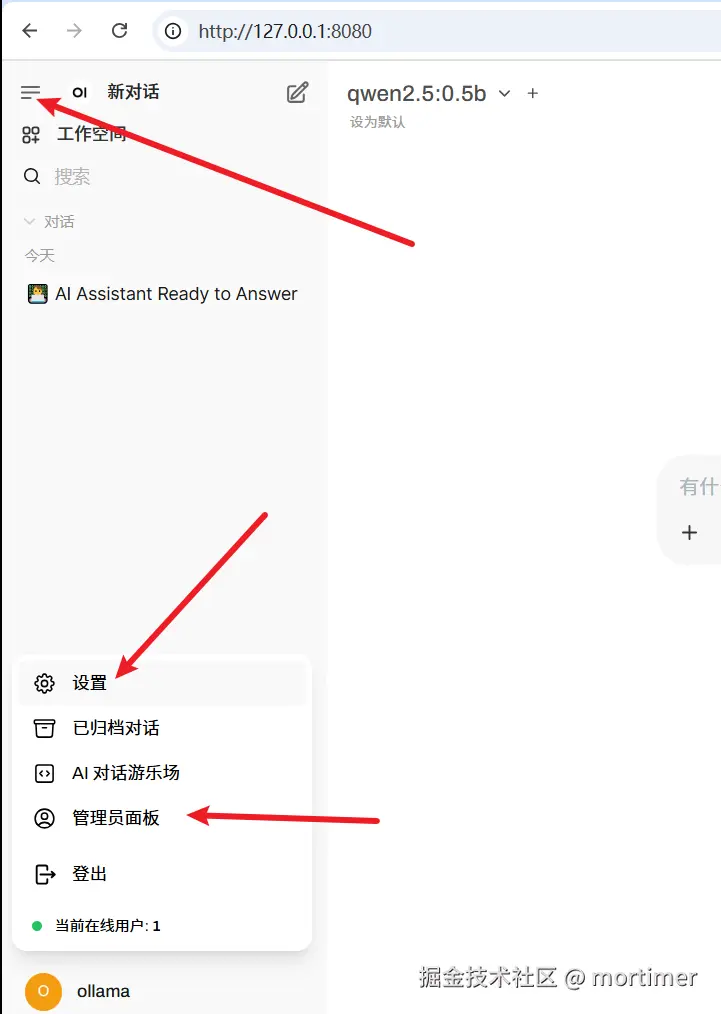
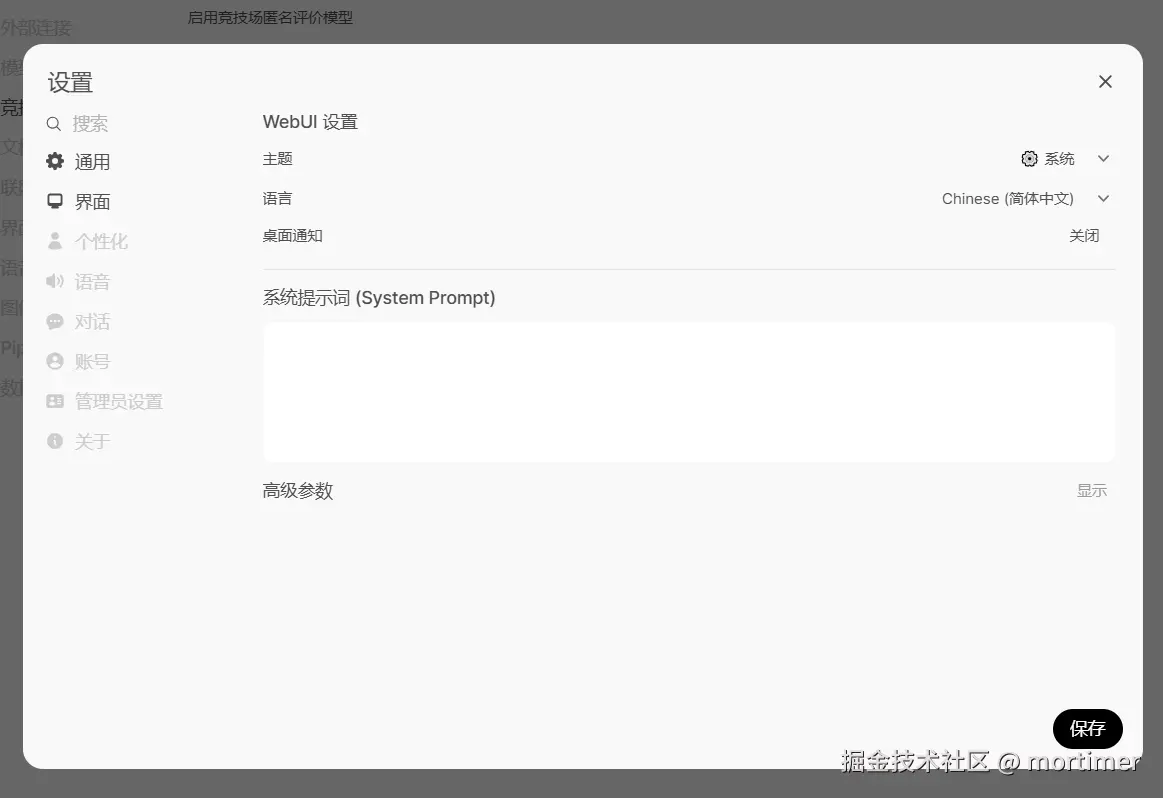
Personalization: In the "Settings" panel, you can adjust the interface theme, font size, language, etc., according to your preferences to create a personalized AI interaction experience.
- You can also customize prompts to make the AI assistant understand you better!
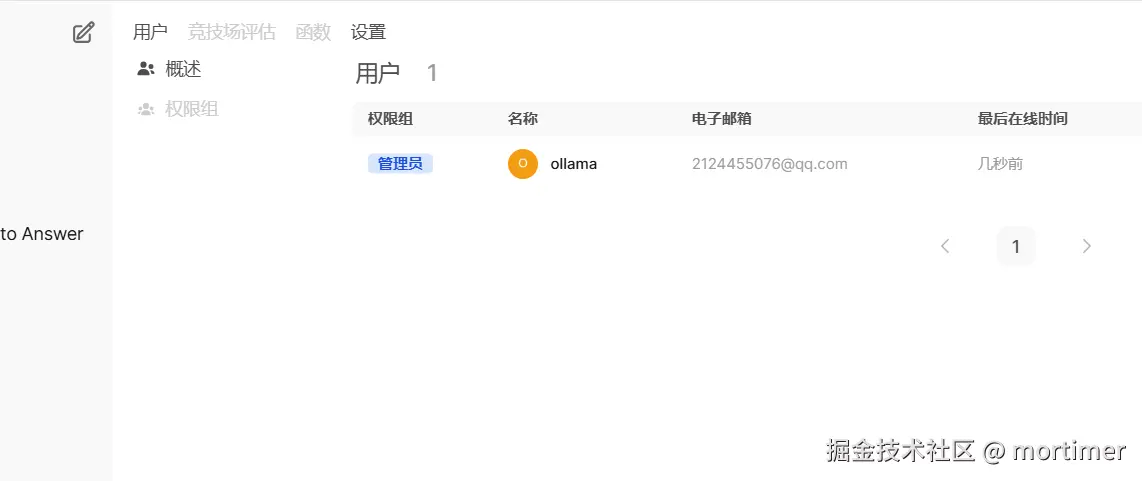
Multi-User Management: In the "Admin" panel, you can set user registration methods, permissions, etc., making it easy for multiple people to share your local AI resources.
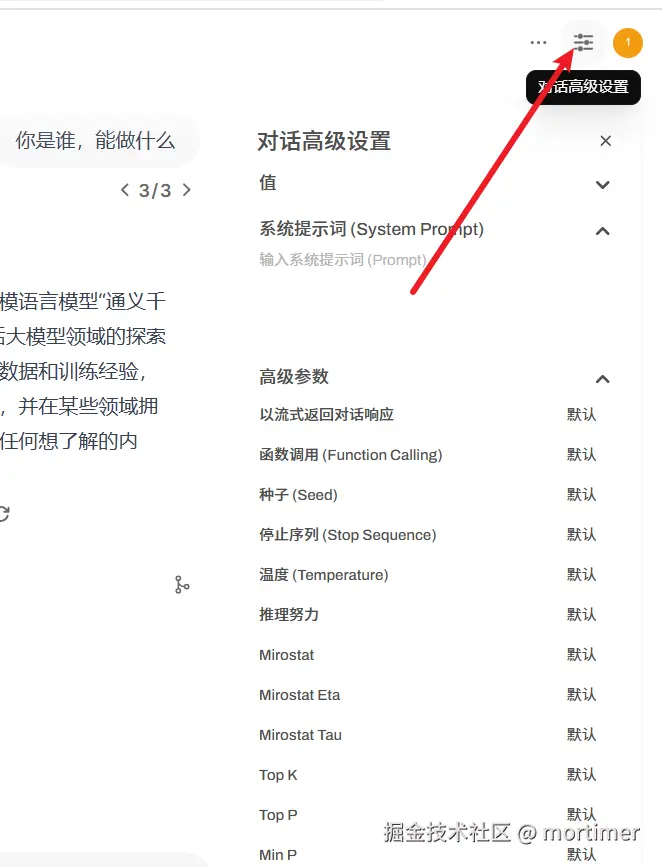
Adjust Detailed Parameters: Click the top-right corner to set advanced parameters.
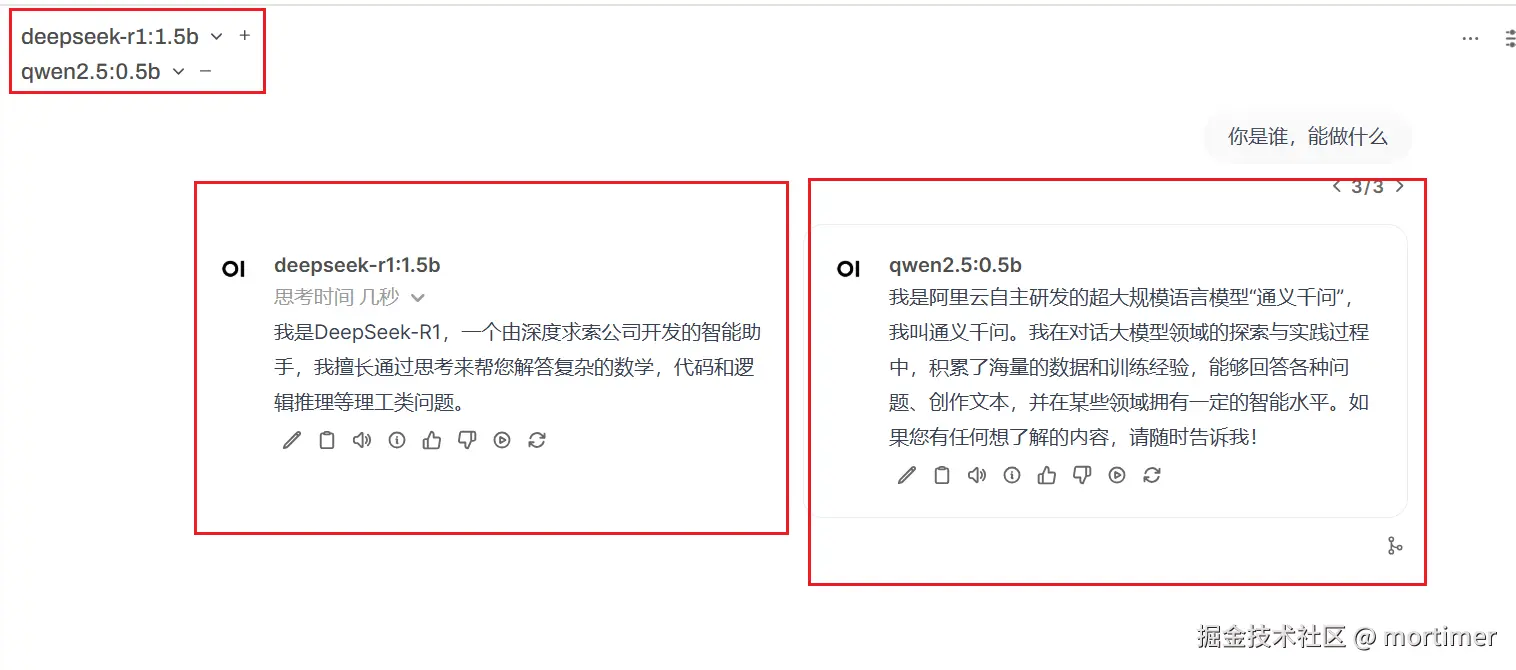
Multi-Model Comparison: Which One Performs Better?
Open WebUI also supports multi-model comparison, allowing you to easily compare the outputs of different models and find the one that best meets your needs!
GPU Acceleration: Maximize Your Graphics Card Performance! (Optional)
If you have an NVIDIA graphics card and have already installed the CUDA environment, congratulations! You can easily make Ollama use GPU acceleration for model inference, significantly boosting your AI assistant's response speed!
- Double-click the
GPU-cuda支持.batfile inside the integrated package to install CUDA dependencies.
Ollama + Open WebUI, this golden duo, opens a door to the world of local AI for you. Now, you can break free from cloud constraints, build your very own AI think tank, and explore the endless possibilities of AI!