想本地部署 Qwen 2.5、Llama 3、DeepSeek-R1 这些强大的开源 AI 模型,却苦于没有简单易用的方法?
别担心!Ollama + Open WebUI 这对黄金组合,将为你扫清一切障碍。
本文将提供保姆级教程,详细介绍如何利用 Ollama + Open WebUI,轻松搭建本地 AI 环境,让你拥有一个专属的、强大的 AI 助手,尽情探索 AI 的无限可能!
温馨提示: 受限于硬件条件,本地部署通常无法运行 DeepSeek-R1 的最大版本(如 67B)。但别担心,较小规模的模型(如 1.3B 或 7B)在大多数个人电脑上也能流畅运行,并提供出色的推理能力。更重要的是,你可以根据自己的需求,选择最适合你的版本!
为什么选择 Ollama + Open WebUI?
在众多本地部署方案中,Ollama + Open WebUI 组合脱颖而出,成为众多 AI 爱好者的首选。它们究竟有何魅力?
- Ollama:化繁为简的模型引擎
- Ollama 就像一个“AI 模型百宝箱”,只需一条命令,就能下载、安装、运行各种主流的大型语言模型,如 Llama 3、DeepSeek-R1!
- Open WebUI:优雅易用的交互界面
- Open WebUI 为 Ollama 披上了一层华丽的外衣。它提供了一个美观、直观的 Web 界面。
- 完全开源且免费
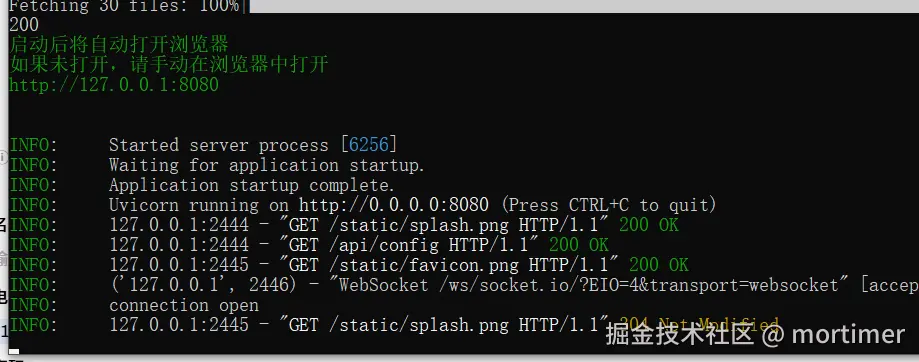
。部署完成后,只需在浏览器中打开 http://127.0.0.1:8080,即可开始与你的 AI 助手对话:

Windows 用户专享:一键启动整合包,告别繁琐配置!
考虑到 Windows 用户在配置 Docker 环境时可能遇到的困难,我们贴心地准备了整合包,下载解压即可使用,真正做到“开箱即用”!
下载整合包并解压:
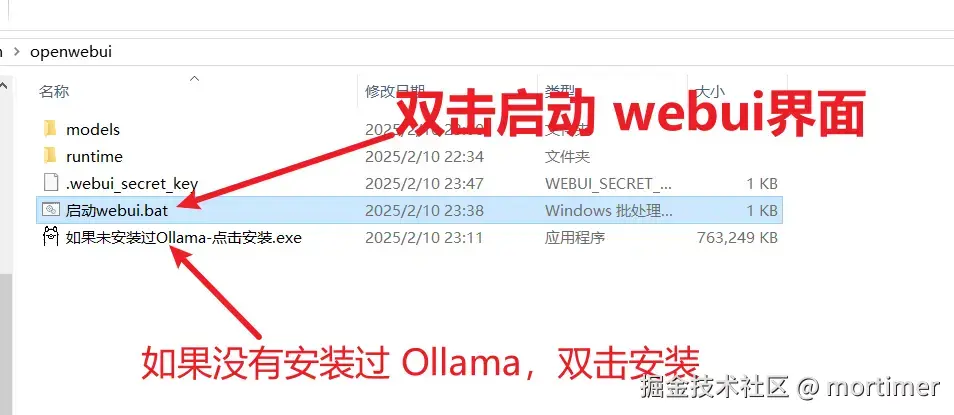
- 如果你尚未安装过 Ollama,请先双击整合包内的
ollama-0.1.28-setup.exe文件进行安装。安装过程非常简单,只需一路点击“Next”(下一步)即可。
- 如果你尚未安装过 Ollama,请先双击整合包内的
启动 WebUI:
- 双击整合包内的
启动webui.bat文件,即可启动 Open WebUI。
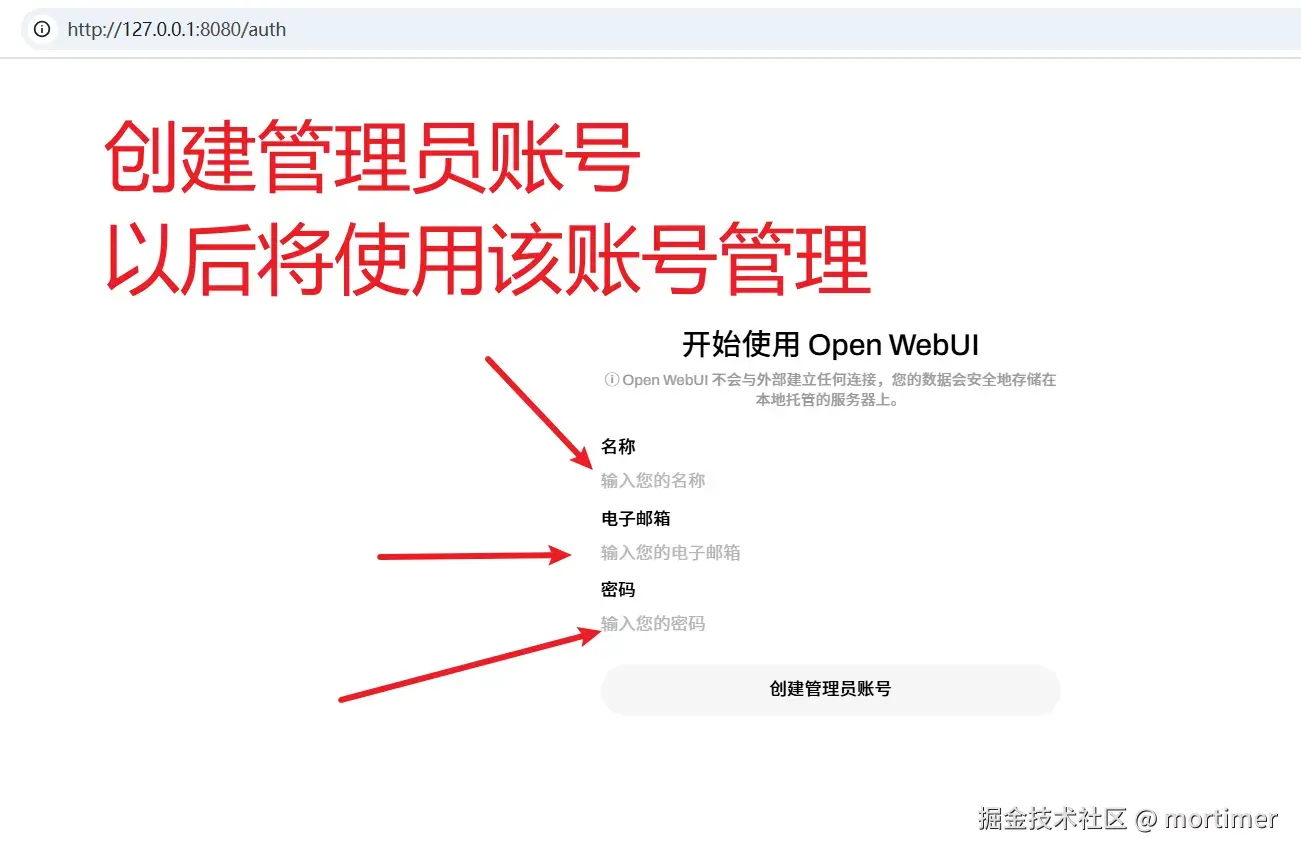
- 首次启动时,系统会提示你设置一个管理员账号。请按照提示完成注册。
- 双击整合包内的
选择想使用的模型
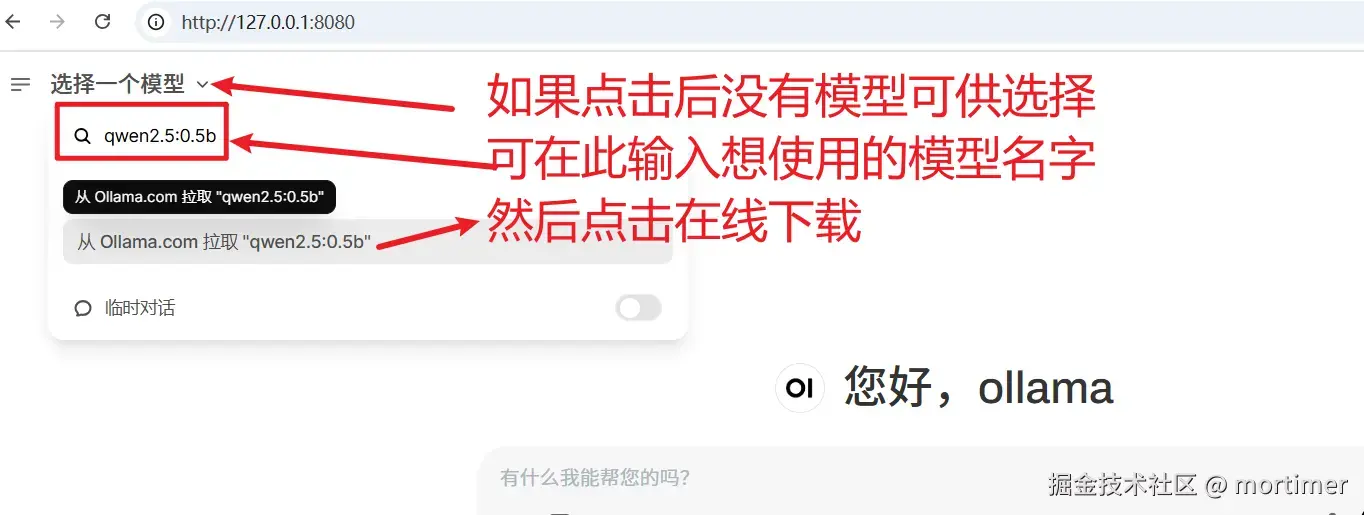
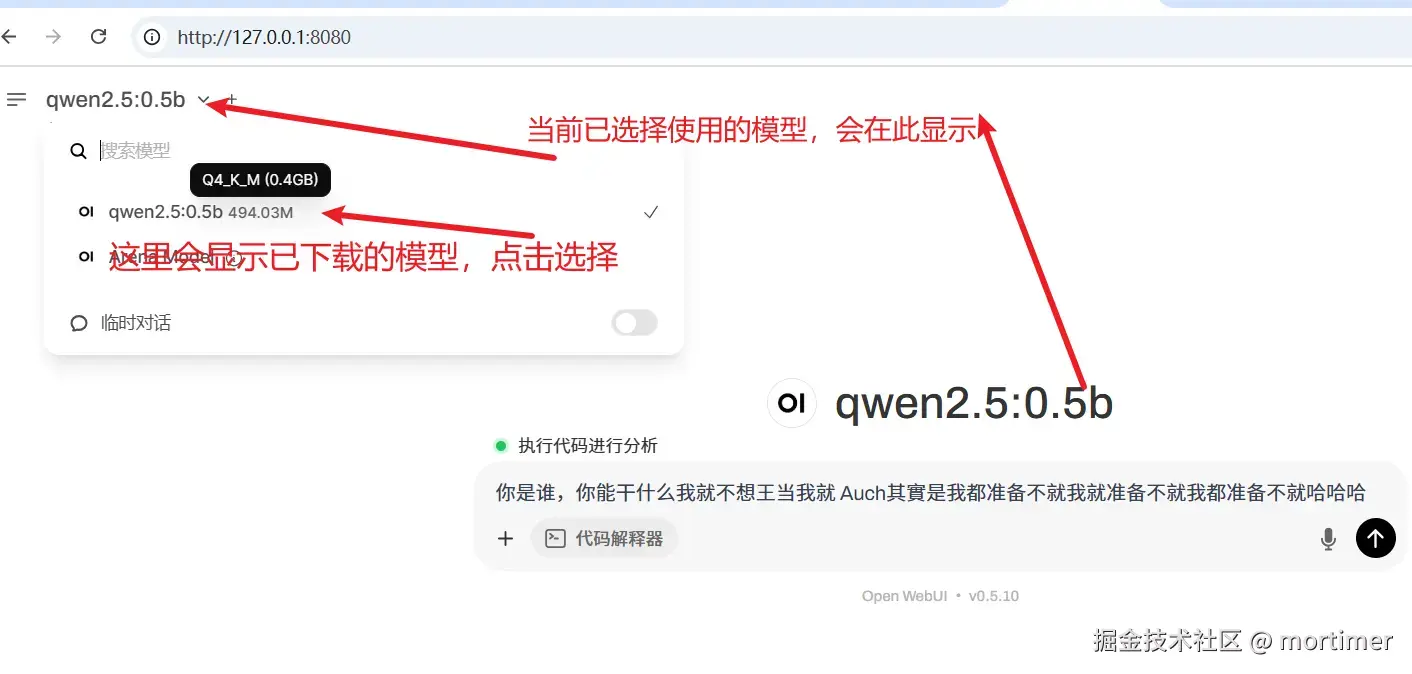
进入 Open WebUI 后,你将在左上角看到模型选择区域。如果列表中没有模型,别担心,这说明你还没有下载过任何模型。
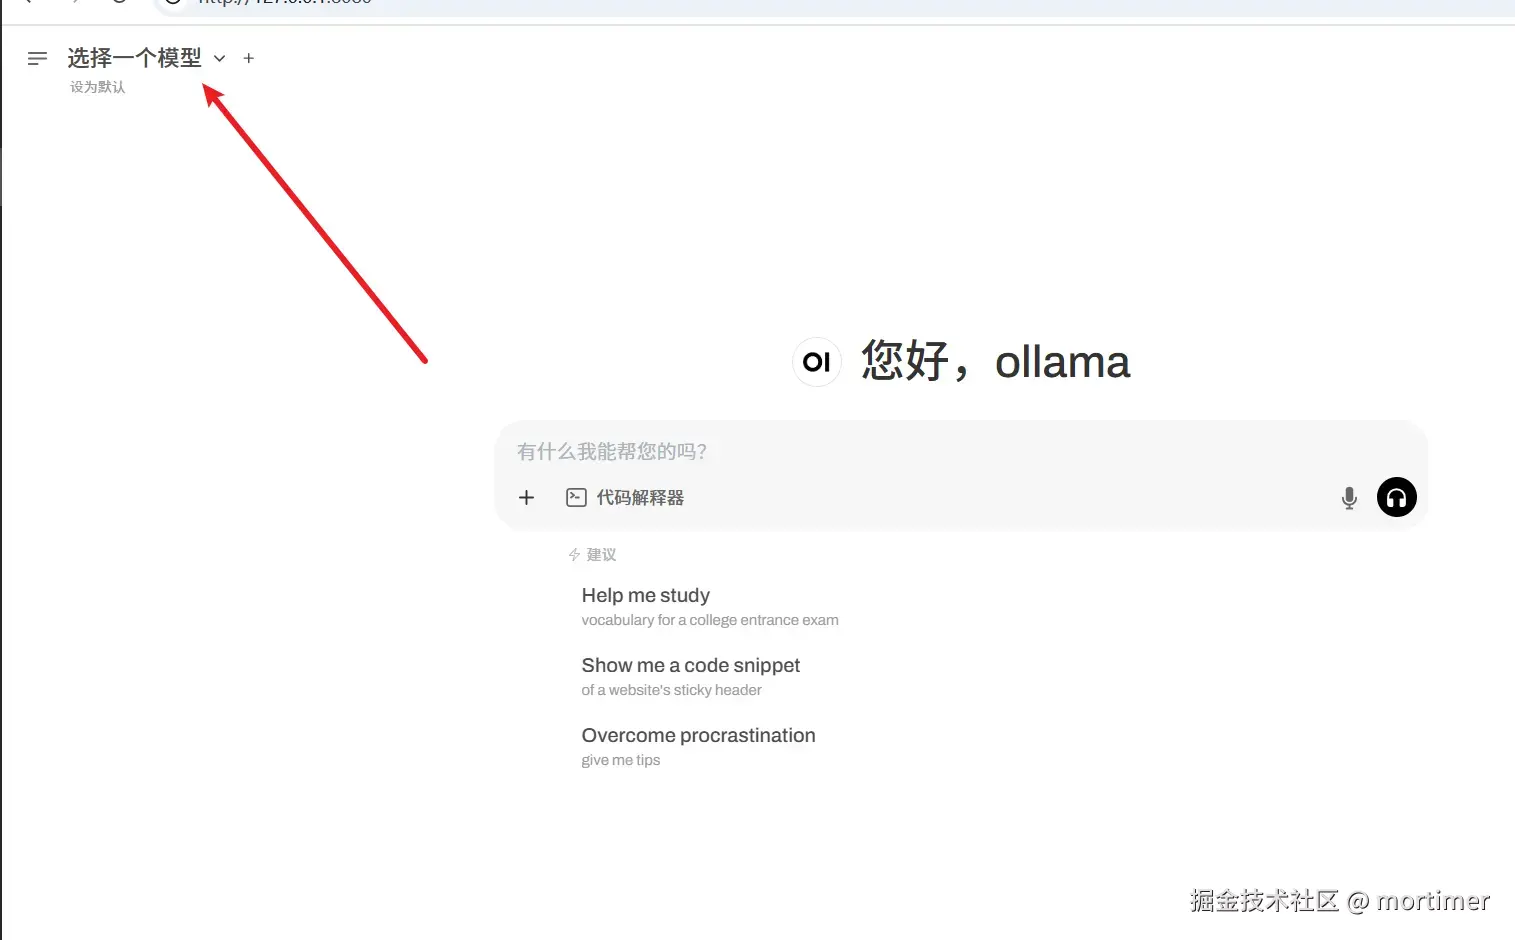
你可以直接在输入框中输入模型名称,从 Ollama.com 在线下载:
模型选择小贴士:
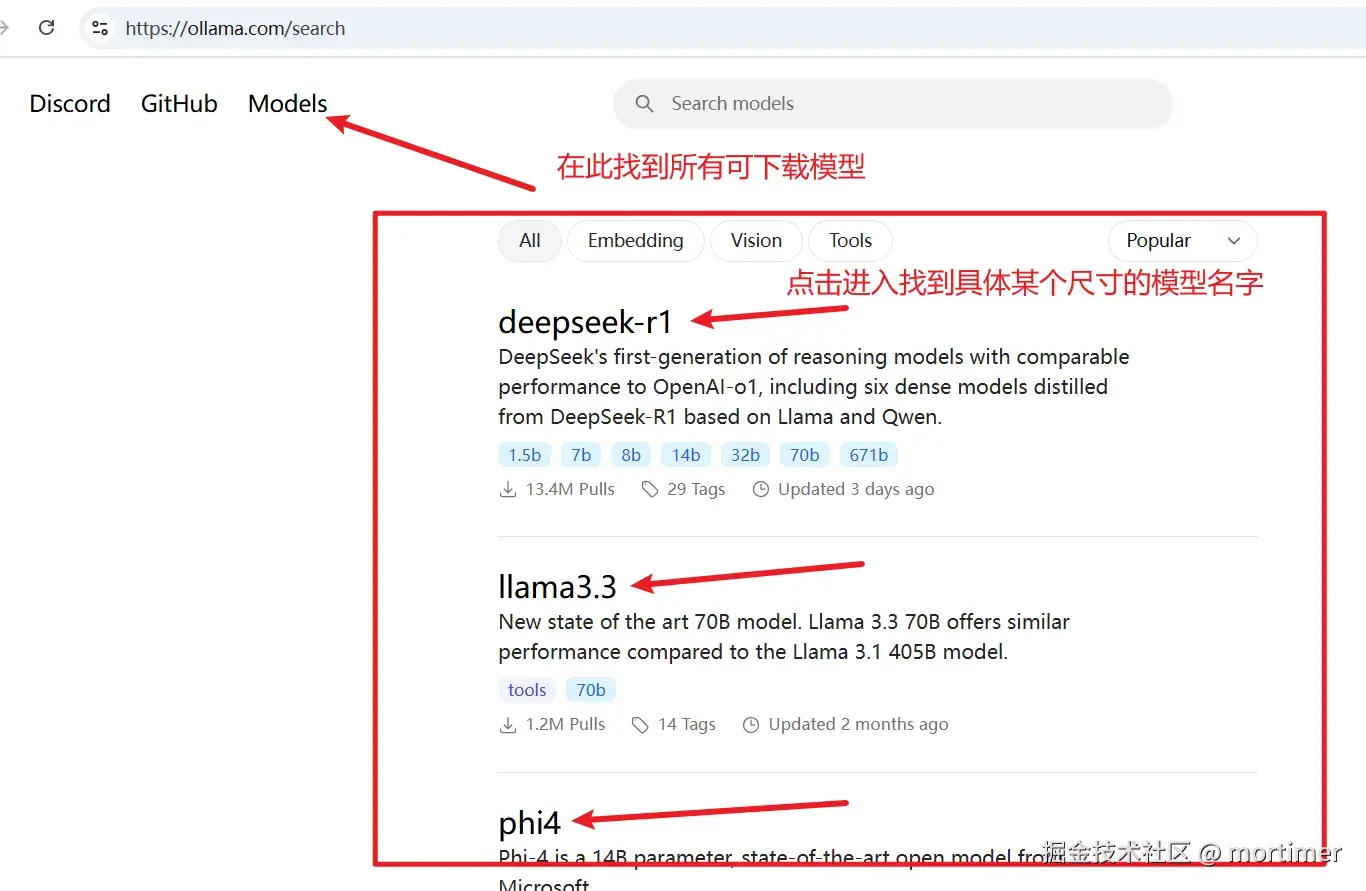
- 模型宝库: 前往 https://ollama.com/models 浏览 Ollama 官方提供的丰富模型资源。
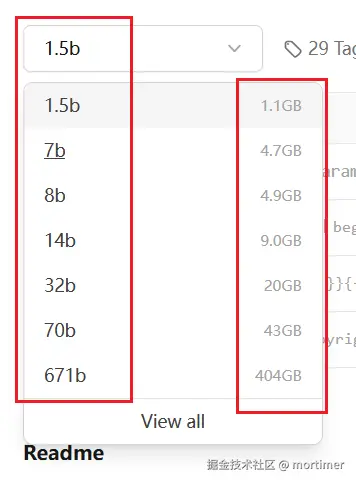
- 参数规模: 每个模型都有不同版本(例如 1.3B、7B、67B 等),代表不同的参数规模。参数越多,模型通常越强大,但也需要更多的计算资源(内存和显存)。
- 量力而行: 根据你的硬件配置选择合适的模型。一般来说,如果你的“内存 + 显存”大小大于模型文件大小,就可以流畅运行该模型。
- Deepseek-R1的选择: 在Ollama的模型库中搜索
deepseek-r1即可找到
以部署 deepseek-r1 模型为例:
选择模型规格: 在 https://ollama.com/library 页面,找到你想要部署的模型版本(例如
deepseek-r1)。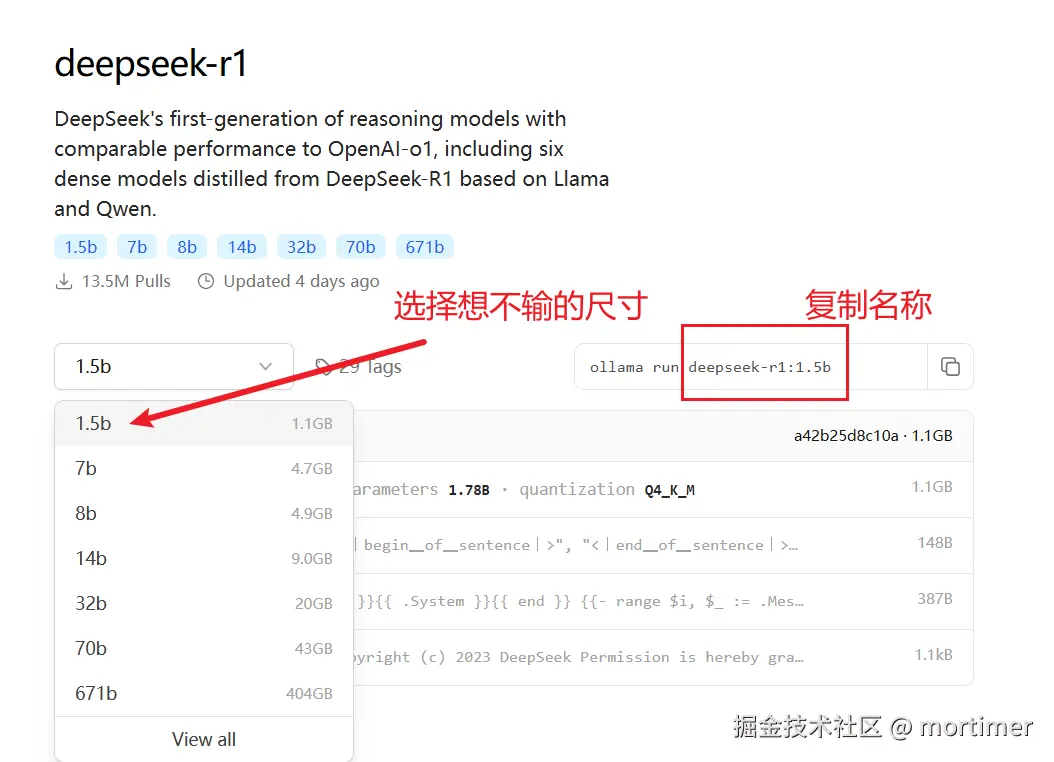
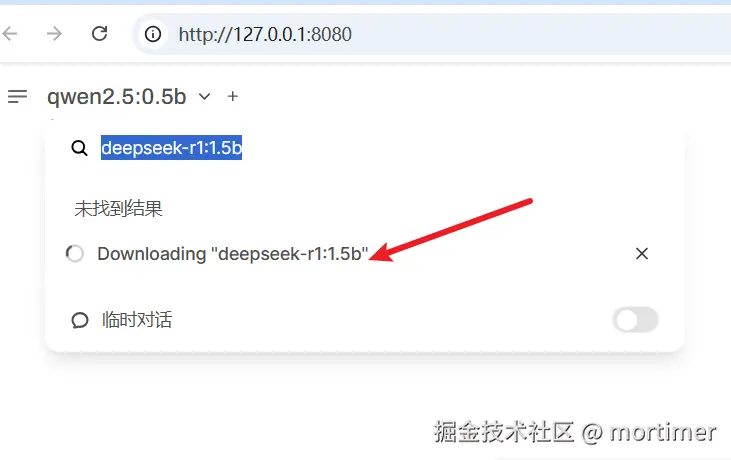
下载模型: 将模型名称(例如
deepseek-r1)粘贴到 Open WebUI 左上角的输入框中,点击“从 ollama.com 拉取”按钮,开始下载。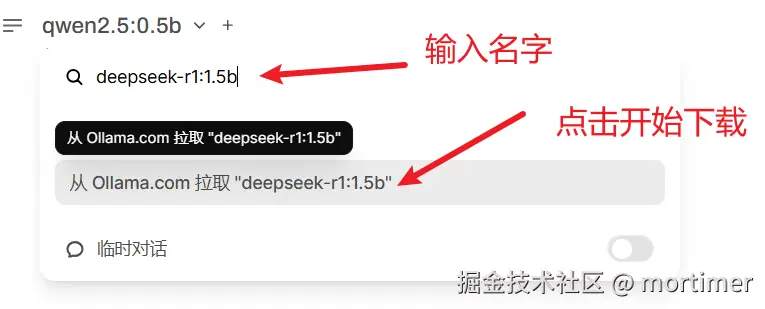
等待下载完成: 下载时间取决于你的网络速度和模型大小,请耐心等待。
开启你的 AI 之旅
模型下载完成后,你就可以在 Open WebUI 中与 DeepSeek-R1 畅快对话了!尽情探索它的强大功能吧!
如果模型支持,你还可以上传图片、文件等,进行多模态交互。让你的 AI 助手不仅能说会道,还能“看图识字”!
进阶探索:Open WebUI 的隐藏宝藏
Open WebUI 的功能远不止于此!点击左上角的菜单按钮,你会发现更多惊喜:
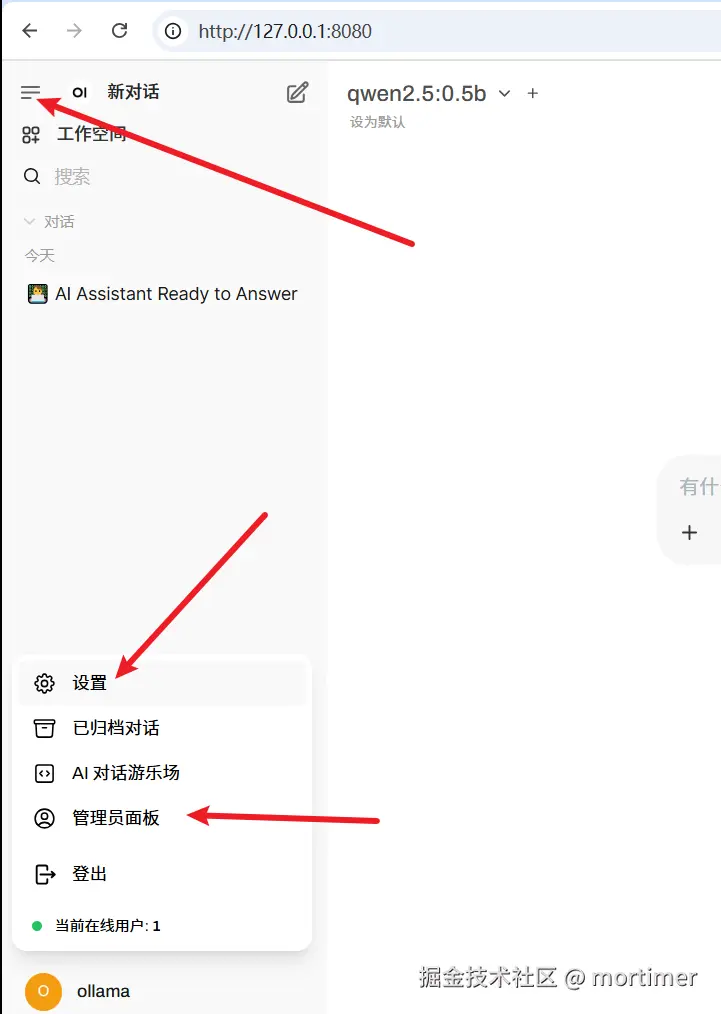
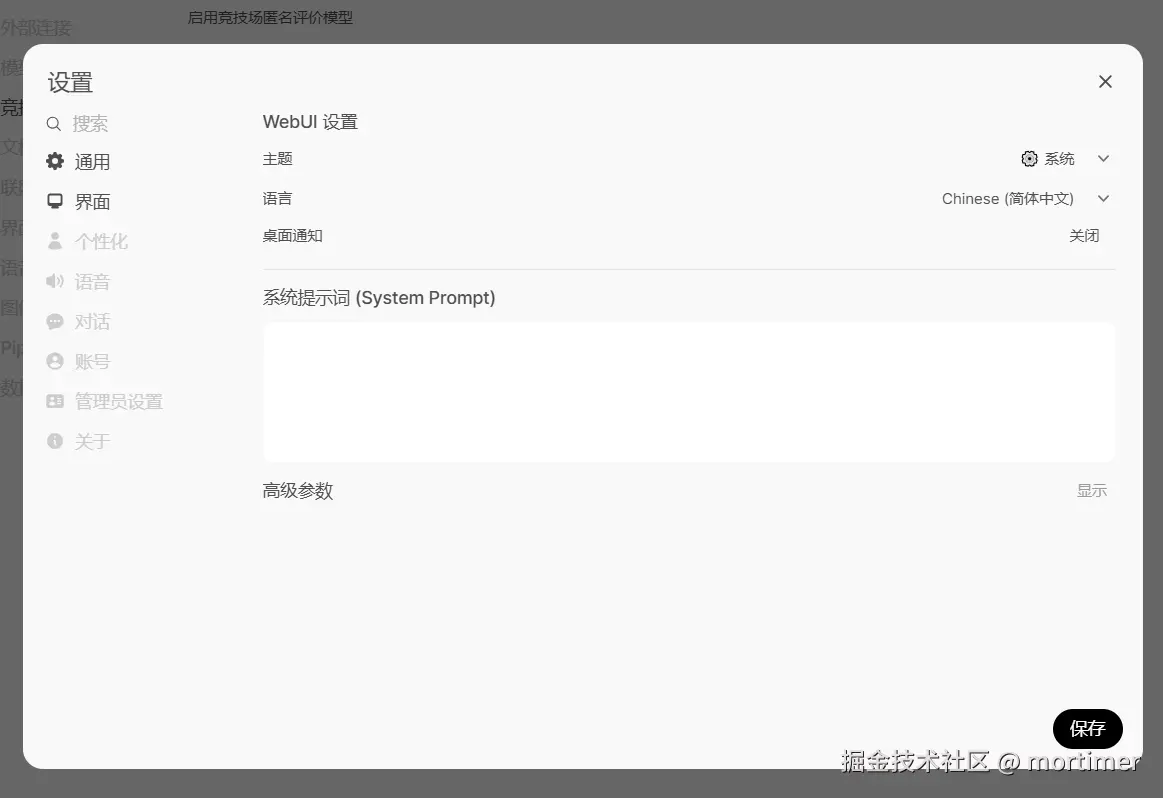
个性化定制: 在“设置”面板中,你可以根据自己的喜好调整界面主题、字体大小、语言等,打造专属的 AI 交互体验。
- 你还可以自定义提示词,让 AI 助手更懂你的心意!
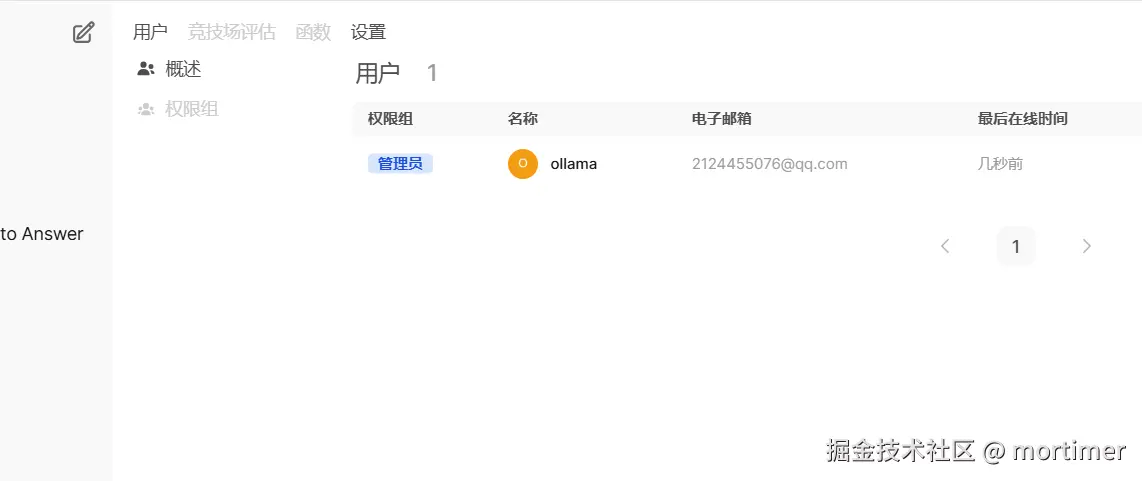
多用户管理: 在“管理员”面板中,你可以设置用户注册方式、权限等,方便多人共享你的本地 AI 资源。
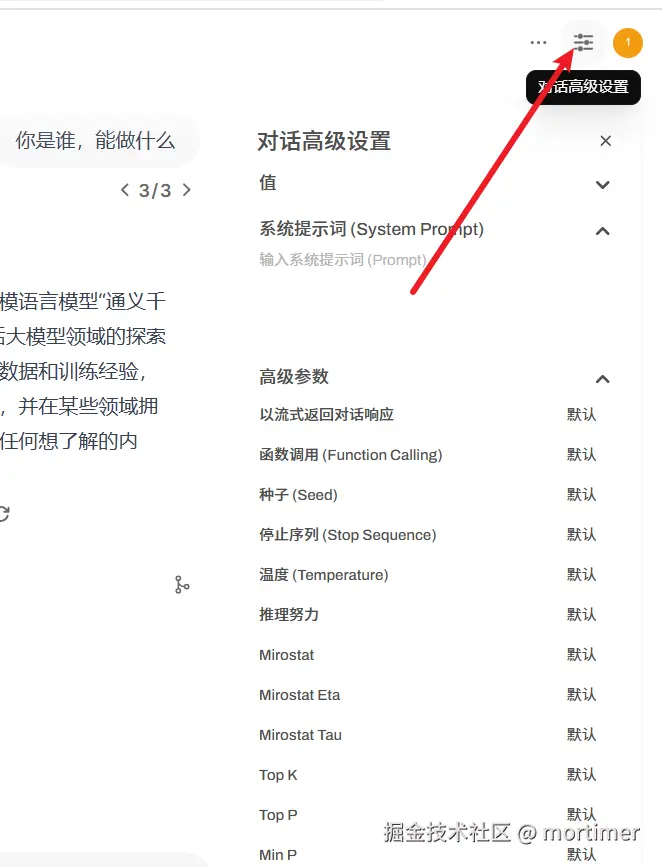
调整详细参数: 右上角点击可设置高级参数
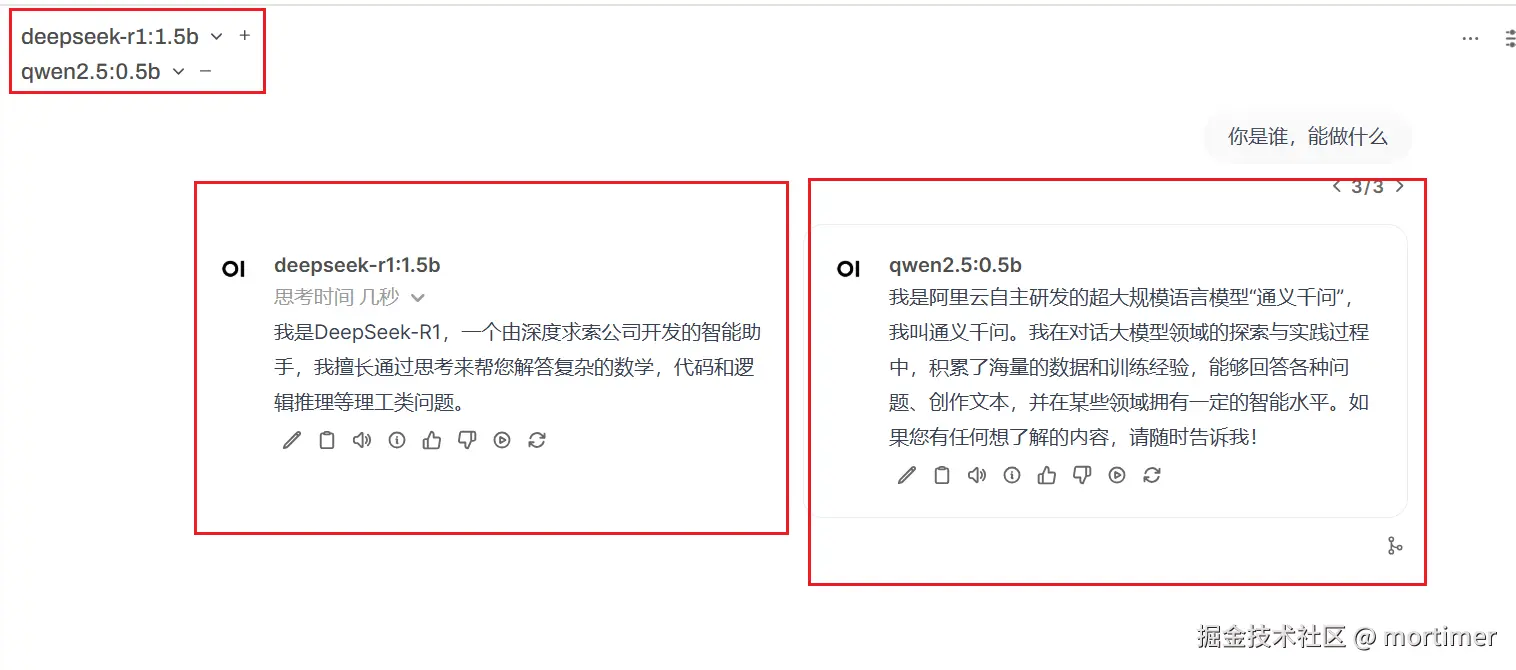
多模型对比:谁更胜一筹?
Open WebUI 还支持多模型对比功能,让你轻松比较不同模型的输出结果,找出最符合你需求的那个!
GPU 加速:榨干你的显卡性能!(可选)
如果你拥有 NVIDIA 显卡,并且已经安装了 CUDA 环境,那么恭喜你,你可以通过简单的操作,让 Ollama 利用 GPU 加速模型推理,大幅提升 AI 助手的响应速度!
- 双击整合包内的
GPU-cuda支持.bat文件,安装 CUDA 依赖。
Ollama + Open WebUI,这对黄金组合,为你打开了一扇通往本地 AI 世界的大门。现在,你可以摆脱云端束缚,打造真正属于自己的 AI 智囊团,尽情探索 AI 的无限可能!