Building a Ready-to-Use Windows Package for Index-TTS: From Environment Isolation to Solving Dependency Challenges
Index-TTS is an excellent open-source zero-shot text-to-speech (TTS) project, especially excelling in Chinese processing. It effectively corrects the pronunciation of polyphonic characters and delivers outstanding audio quality and voice similarity. For users looking to integrate high-quality speech capabilities into their applications or simply experience cutting-edge AI technology, Index-TTS is undoubtedly a treasure.
However, for many Windows users unfamiliar with Python and complex compilation environments, running such a project is not easy. From environment configuration and installing numerous dependencies to handling special libraries that are difficult to install directly on Windows, each step can be a barrier. To allow more people to easily experience the charm of Index-TTS, I decided to create a "one-click launch" package. This article documents the challenges encountered during the process, problem-solving approaches, and noteworthy details, hoping to provide some reference for those with similar needs.
Foundation: Choosing a Portable Python Environment
The primary goal of creating the package is "ready-to-use," meaning it should not require users to pre-install a specific version of Python or configure complex environment variables. It needs to be independent and portable.
The key to achieving this is using the Windows embeddable package provided by Python officially.
Unlike the standard Python installer, the embeddable package is a minimal ZIP archive. After extraction, it contains a minimal Python runtime environment without complex package management tools or documentation. Its advantages are clear:
- Environment Isolation: It does not conflict with other Python versions that may exist on the user's system.
- No Installation Required: No administrator privileges are needed; it works right after extraction and can be placed in any directory, even on a USB drive.
- Easy Distribution: The entire application and its Python environment can be packaged together and distributed conveniently to others.
Embedded Python 3.10 download address: https://www.python.org/downloads/release/python-31011/ > Select the
Windows embeddable package (64-bit)version.
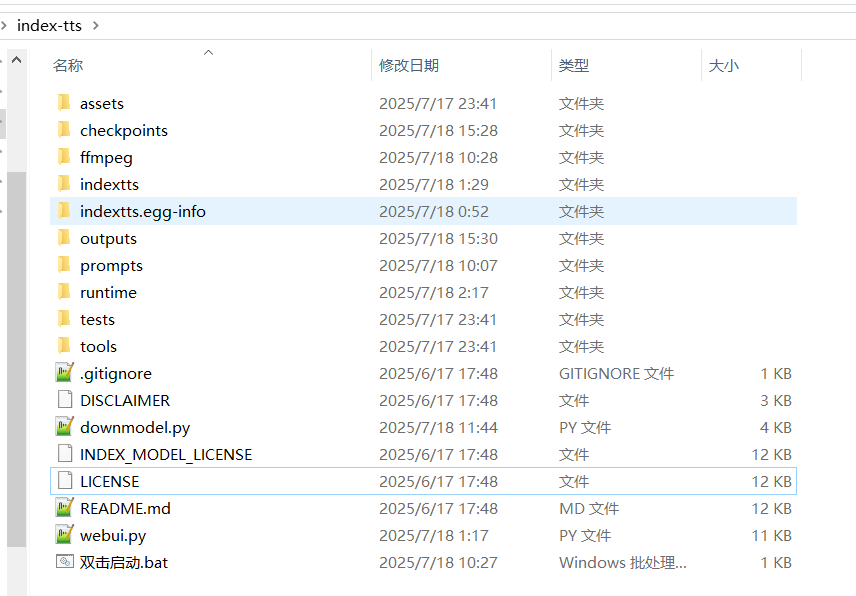
For this project, I chose the 64-bit embeddable package for Python 3.10.11 to ensure compatibility with the dependency library versions required by Index-TTS. I extracted it into the runtime folder in the project root directory, e.g., D:/index-tts/runtime.
Obtaining this embeddable package is just the first step; it doesn't even include pip by default. We need to manually "enable" package management capabilities. First, download the get-pip.py script, then enter the runtime folder, paste get-pip.py there, open a command prompt window, and execute python.exe get-pip.py. This installs the pip module into the runtime\Lib\site-packages directory.
Download
get-pip.pyhere: https://bootstrap.pypa.io/get-pip.py
The next crucial step is modifying the runtime\python310._pth file. This file is the path configuration file for the embedded environment, telling the Python interpreter where to find modules. By default, its content is limited, preventing it from recognizing newly installed libraries. To ensure the site-packages directory is correctly loaded and project source code is recognized, its path needs to be added. Open the file with a text editor, delete the default content, and replace it with the following:
python310.zip
.
./Lib/site-packages
./Scripts
../
../indexttsAfter these steps, a standalone, portable, and fully functional Python environment located at D:/index-tts/runtime is ready.
Core Challenge: Overcoming Installation Issues with pynini and WeTextProcessing
While preparing to install Index-TTS dependencies, we encountered the biggest obstacle in the packaging process: the libraries pynini and WeTextProcessing.
pynini is a powerful tool for compiling, optimizing, and applying grammar rules, built on OpenFst. In speech and language processing, it is often used for underlying tasks like text normalization and grammar parsing. WeTextProcessing is a toolkit focused on Chinese text normalization and denormalization, which also heavily relies on pynini.
The official pynini documentation clearly states that pynini is not designed or tested for Windows. Directly attempting pip install pynini often triggers a lengthy compilation process and ultimately fails.
The reason for failure is typical: such libraries contain a large amount of C++ source code that needs to be compiled locally into dynamic link libraries (.pyd files) that Python can call. This process depends on a specific C++ compiler environment and a series of complex library files (like OpenFst). For average users' computers, these conditions are usually not met, leading to compilation errors like:
error: subprocess-exited-with-error

× Building wheel for pynini (pyproject.toml) did not run successfully.
│ exit code: 1
╰─> [104 lines of output]
    ...
    error: command 'C:\\Program Files\\Microsoft Visual Studio\\...\\cl.exe' failed with exit code 2
    [end of output]

note: This error originates from a subprocess, and is likely not a problem with pip.
ERROR: Failed building wheel for pyniniEven after installing Visual Studio and build tools including
cl.exe, this error may still occur.
The workaround is: "Pre-compile" them on a system with a properly configured compilation environment, then directly copy the compiled files into our package.
Miniconda became the perfect tool for this task. It can easily create isolated environments on Windows and install pynini via its powerful package management, as it directly downloads pre-compiled binaries from the conda-forge channel instead of compiling from source locally.
Specific steps:
- Create a Conda Environment: Set up an independent conda environment with Python version 3.10 to match our embedded package.bash
conda create -n index-tts python=3.10 conda activate index-tts - Install in Conda: Use the conda-forge channel to install
pynini, then use pip to installWeTextProcessing.bashconda install -c conda-forge pynini==2.1.6 pip install WeTextProcessing --no-deps - Transfer Files: This step is the core of the solution. We need to find all relevant files for these two libraries in the conda environment and copy them to the corresponding locations in our portable Python environment. Pay close attention to paths to avoid confusion.
- Library Files: Navigate to the conda environment's
envs\index-tts\Lib\site-packagesdirectory, and copy the folderspynini,WeTextProcessing-1.0.4.1.dist-info,tn,pywrapfst, and the two key compiled products_pynini.cp310-win_amd64.pydand_pywrapfst.cp310-win_amd64.pydto our package'sD:/index-tts/runtime/Lib/site-packagesdirectory. - Dynamic Link Libraries (DLLs): The underlying OpenFst library that
pyninidepends on exists as DLL files. These files are located in the conda environment's\envs\index-tts\Library\bindirectory. Copy all DLL files starting withfstto the root directory of our package,D:/index-tts/runtime, so the Python interpreter can find them upon startup.
- Library Files: Navigate to the conda environment's
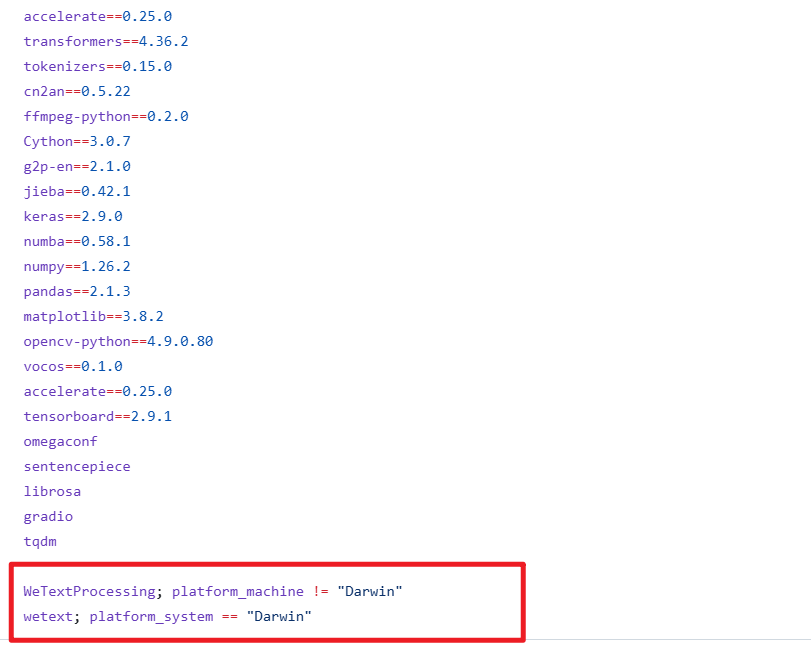
After completing this "transfer" work, we successfully bypassed the challenge of compiling on end-users' machines. Additionally, to prevent pip from attempting to compile them again during subsequent dependency installations, we must open the requirements.txt file located in D:/index-tts and delete the two lines related to WeTextProcessing.
Automation and User Experience: The Use of Scripts
After resolving the environment and core dependency issues, the remaining tasks are how to allow users to start the program in the simplest way and how to handle model file downloads.
Model Download Script downmodel.py
Index-TTS model files are quite large. Including all model files directly in the package would make the entire software package huge, which is not ideal for distribution. A better approach is to let the program automatically download the models upon first launch. For this purpose, I wrote the downmodel.py script, which offers several clear benefits:
- Reduces Package Size: Users download a lightweight launcher, and models are downloaded on-demand.
- Solves Network Access Issues: As is well known, direct access to Hugging Face Hub may face network difficulties in some regions. By setting the environment variable
HF_ENDPOINT=https://hf-mirror.comin the script, the download address is redirected to a mirror site, significantly improving download stability and speed. - Smart Checking: The script checks if model files already exist in the local
checkpointsdirectory. If files exist, it skips the download to avoid duplication. After downloading, it also verifies that files exist and are not zero-sized, ensuring model integrity.
A Hidden Trap: Outdated config.yaml
During debugging, I discovered a subtle but critical issue. The Index-TTS GitHub source repository might include a default config.yaml file in the checkpoints folder. This configuration file might be incompatible with the latest model version (e.g., version 1.5). If this old file remains and the download script skips downloading a new config.yaml because it detects the file exists, the WebUI will throw an error due to model layer dimension mismatches when started.
To avoid this issue, the download logic in downmodel.py needs to be more refined. I added a check: even if config.yaml exists, if core model files like bigvgan_discriminator.pth do not exist (indicating a first-time download), then config.yaml still needs to be forcibly re-downloaded and overwritten to ensure configuration consistency with the model version.
Here is the complete code for downmodel.py, implementing the above logic:
import json
import os
import sys
import time
from pathlib import Path
from huggingface_hub import hf_hub_download

def download_model_files():
    """
    Download files required for the IndexTTS-1.5 model from Hugging Face Hub.
    """
    repo_id = "IndexTeam/IndexTTS-1.5"
    local_dir = "checkpoints"

    # Ensure the local directory exists
    if not os.path.exists(local_dir):
        print(f"Creating directory: {local_dir}")
        os.makedirs(local_dir)

    # List of files to download
    files_to_download = [
        "config.yaml",
        "bigvgan_discriminator.pth",
        "bigvgan_generator.pth",
        "bpe.model",
        "dvae.pth",
        "gpt.pth",
        "unigram_12000.vocab"
    ]

    is_bigvgan_discriminator=Path(f'./{local_dir}/bigvgan_discriminator.pth').exists()
    for filename in files_to_download:
        # Check if the file already exists; skip download if it does
        is_exists = Path(f'{local_dir}/{filename}').exists()
        if is_exists:
            if filename !='config.yaml' or is_bigvgan_discriminator:
                # If config.yaml exists but bigvgan_discriminator.pth does not, re-download config.yaml
                # Otherwise, skip
                print(f"File {filename} already exists, skipping download.")
                continue

        print(f"Downloading {filename} to {local_dir}...")
        try:
            # Use hf_hub_download to download the file
            hf_hub_download(
                repo_id=repo_id,
                filename=filename,
                local_dir=local_dir,
                # resume_download=True  # Enable if needed for resuming interrupted downloads
            )
            print(f"Download of {filename} completed.")
        except Exception as e:
            print(f"Failed to download {filename}: {e}")
            # You can decide here whether to continue downloading other files or abort
            # return False # Uncomment this line if you want to abort on download failure

    for filename in files_to_download:
        # Check if the file exists and is not empty
        local_file_path = Path(f'./{local_dir}/{filename}')
        if not local_file_path.exists() or local_file_path.stat().st_size==0:
            print(f"File {filename} does not exist or has zero size. Please ensure network connectivity and delete the file to restart the download.")
            return False

    print("All model files downloaded and checked!\n")
    return True

os.environ['HF_HUB_DISABLE_SYMLINKS_WARNING'] = 'true'
os.environ['HF_ENDPOINT']='https://hf-mirror.com'


print("\n----Checking if IndexTTS-1.5 model is already downloaded...")
download_success = download_model_files()

if not download_success:
    print("\n\n############Model file download failed. Please check your network connection or download manually. The program will exit shortly.\n")
    time.sleep(5)
    sys.exit()

# After download completes, proceed to start the WebUI
print("\nModel files are ready. Starting WebUI...")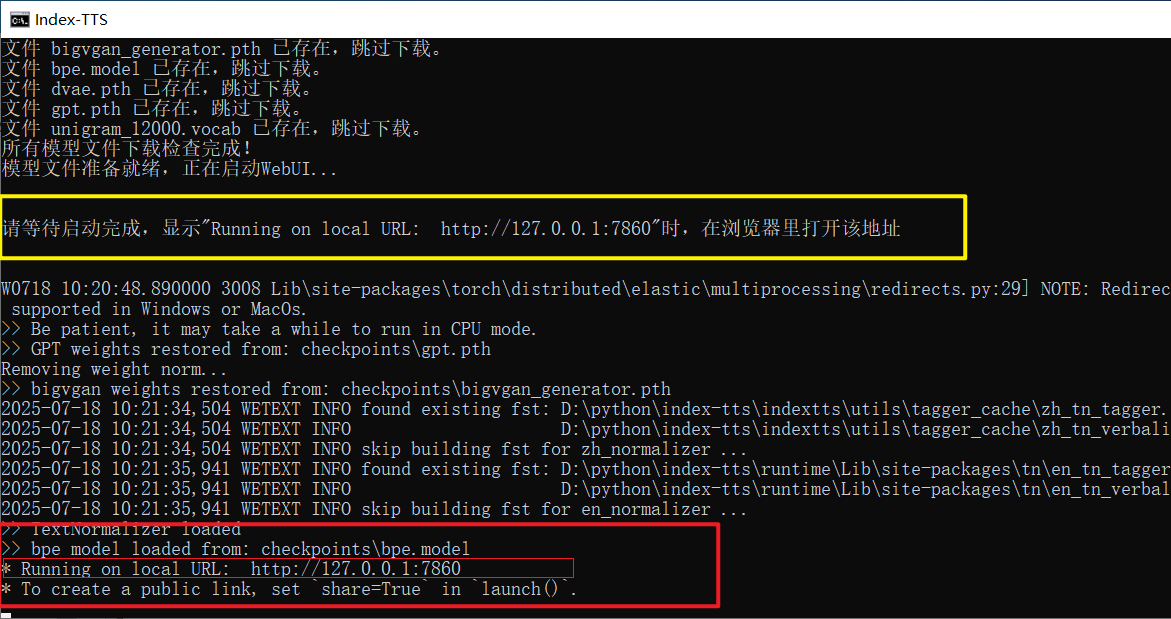
print("\n\n********Please wait for startup to complete. When you see \" Running on local URL: http://127.0.0.1:7860 \", open this address in your browser.********\n\n")One-Click Launch Script Double-Click to Start.bat
 Finally, to achieve true "double-click and run," a simple batch script is essential. The content of
 Double-Click to Start.bat is brief but completes all preparation work:
@echo off
rem Set the current code page to UTF-8 to correctly display Chinese characters.
chcp 65001 > nul

TITLE Index-TTS Windows Package Made by pvt9.com

set HF_HUB_DISABLE_SYMLINKS_WARNING=true
set HF_ENDPOINT=https://hf-mirror.com
set ROOT_DIR=%~dp0
set ROOT_DIR=%ROOT_DIR:~0,-1%
set PATH=%ROOT_DIR%;%ROOT_DIR%\ffmpeg;%PATH%

call %cd%/runtime/python downmodel.py

call %cd%/runtime/python webui.py
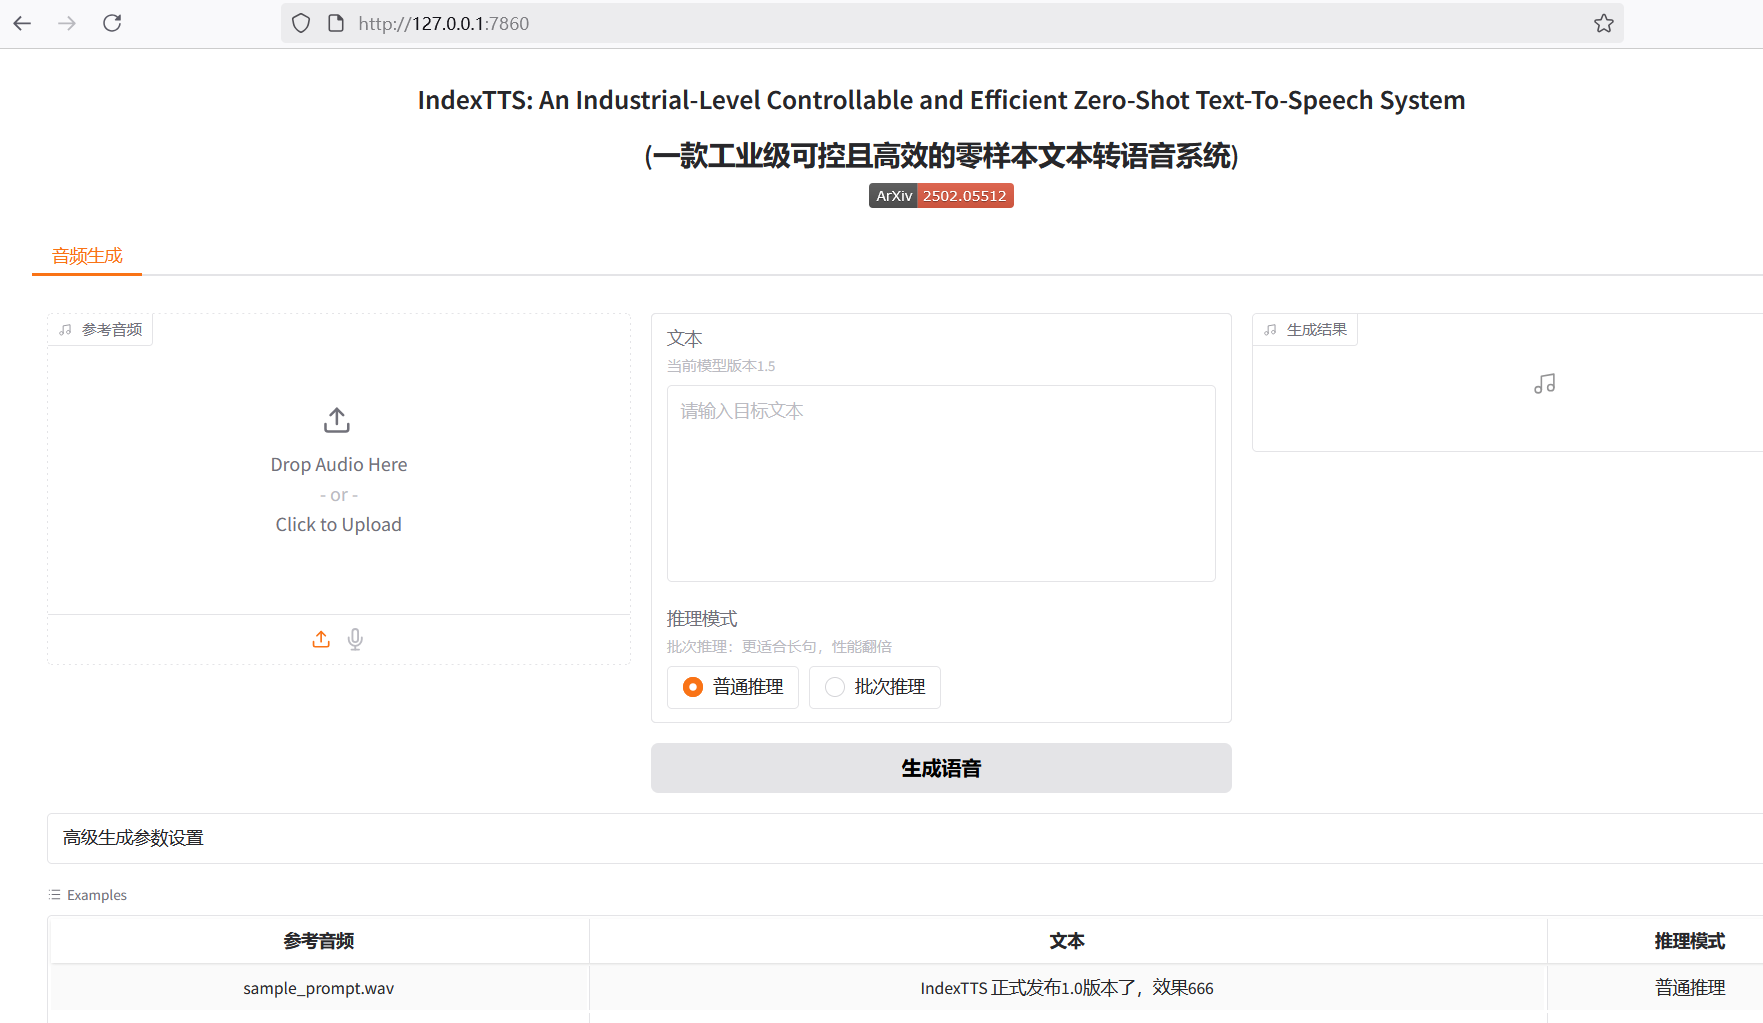
pauseIt first sets the window title and UTF-8 code page for correct Chinese display. Then, it sets necessary environment variables (like the mirror address) and temporarily adds the path to the ffmpeg tool to the PATH. Next, it sequentially calls downmodel.py to check and download models, and finally executes webui.py to start the Gradio interface. When everything is ready, users will see the familiar Running on local URL: http://127.0.0.1:7860 prompt in the command window, and they can open that address in their browser to start the experience.
Through this series of operations, a Python project that originally required complex configuration is ultimately packaged into a user-friendly package for average Windows users.
Just double-click to enjoy the convenience brought by AI technology.