为 Index-TTS 打造一个开箱即用的 Windows 整合包:从环境隔离到依赖难题的解决思路
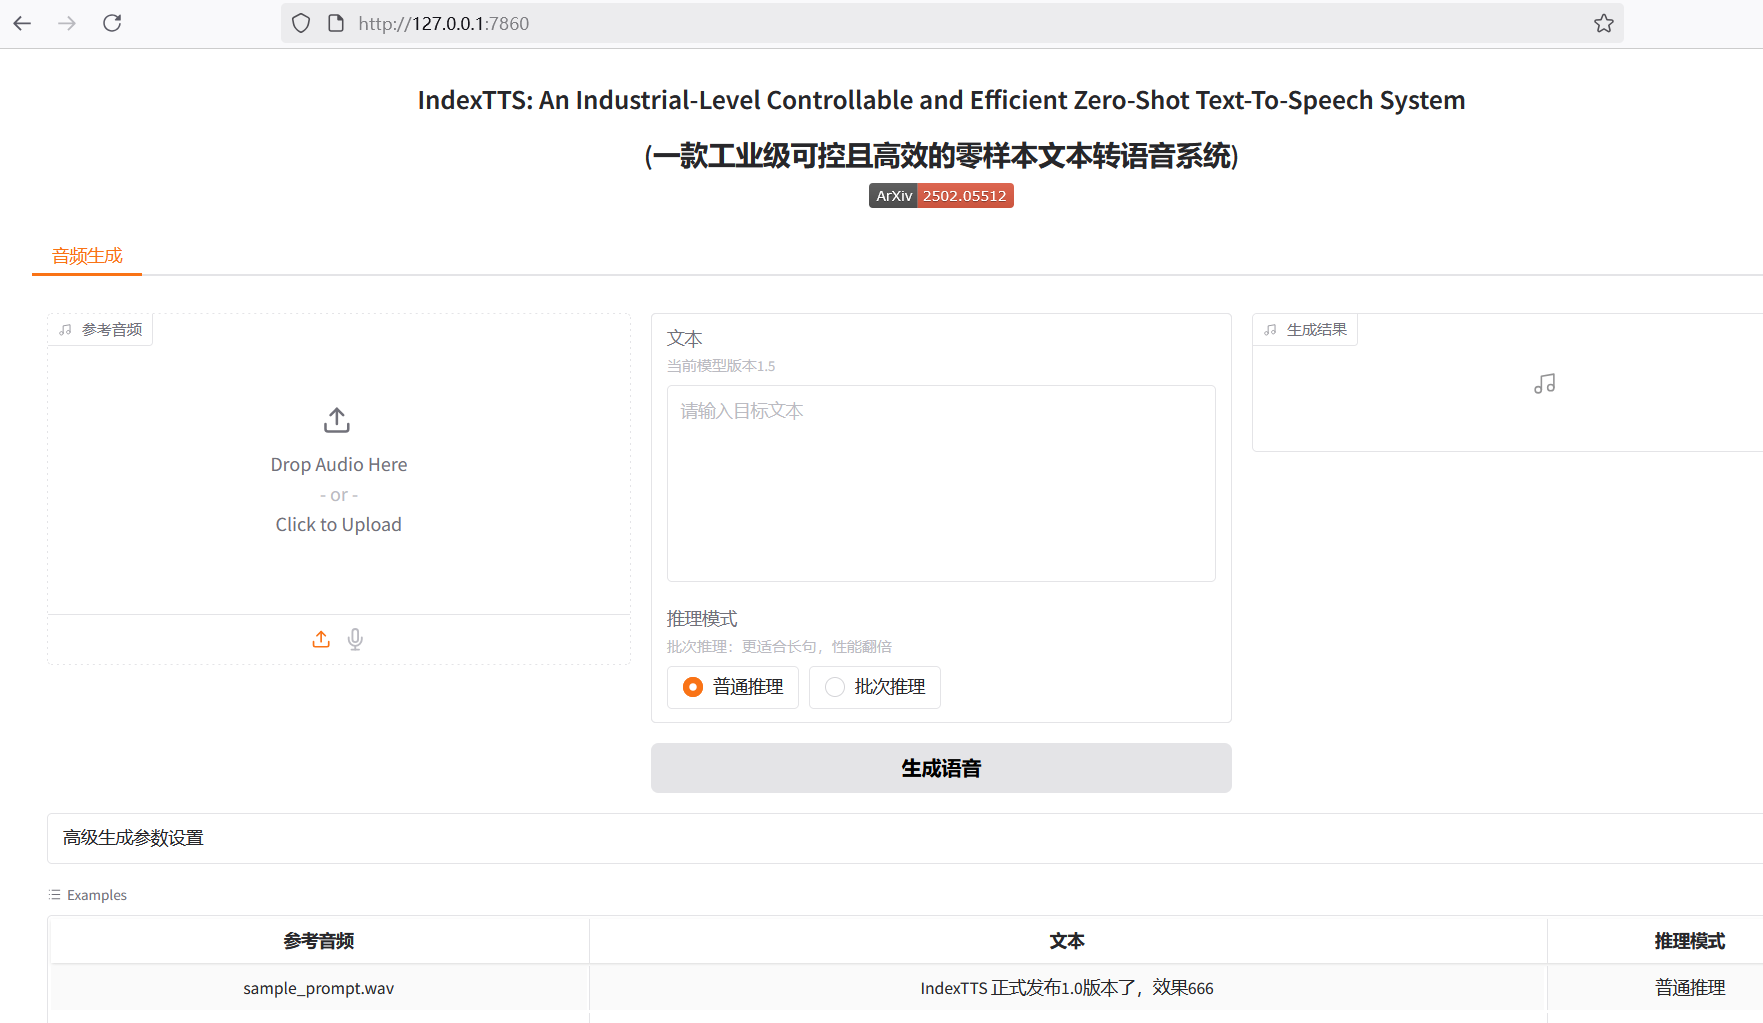
Index-TTS 是一个非常优秀的开源零样本语音合成(TTS)项目,特别是在中文处理方面,能够有效纠正多音字的读音,并且音质和声音相似度都表现优异。 对于希望在自己应用中集成高质量语音能力,或者纯粹想体验前沿AI技术的用户来说,Index-TTS 无疑是一个宝藏。
然而,对于许多不熟悉Python和复杂编译环境的Windows用户来说,想要运行这样一个项目并非易事。从环境配置、安装大量依赖,到处理那些难以在Windows上直接安装的特殊库,每一步都可能成为劝退的门槛。为了让更多人能轻松体验 Index-TTS 的魅力,我决定制作一个“一键启动”的整合包。这篇文章记录了制作过程中遇到的挑战、解决问题的思路以及一些值得注意的细节,希望能为有类似需求的朋友提供一些参考。
根基:选择可移植的 Python 环境
制作整合包的首要目标是“开箱即用”,意味着它不能要求用户预先安装特定版本的 Python 或配置复杂的环境变量。它需要是独立的、绿色的。
实现这一点的关键在于使用 Python 官方提供的 Windows embeddable package (嵌入式包)。
与标准的 Python 安装程序不同,嵌入式包是一个精简的 ZIP 压缩文件。解压后,它包含一个最小化的 Python 运行环境,没有附带复杂的包管理工具和文档。它的优势显而易见:
- 环境隔离:它不会与用户系统中可能存在的其他 Python 版本产生冲突。
- 免安装:无需管理员权限,解压即可用,可以放在任何目录下,甚至U盘里。
- 分发便捷:整个应用和它的 Python 环境可以打包在一起,方便地分发给其他人。
嵌入式 python3.10下载地址: https://www.python.org/downloads/release/python-31011/ > 选择这个版本
Windows embeddable package (64-bit)
我为这个项目选择了 Python 3.10.11 的 64位嵌入式包,这能确保与 Index-TTS 项目所需的依赖库版本兼容。我将其解压到了项目根目录下的 runtime 文件夹内,例如 D:/index-tts/runtime。
拿到这个嵌入式包只是第一步,它默认甚至不包含 pip。我们需要手动为其“启用”包管理能力。首先,下载 get-pip.py 脚本,然后进入 runtime 文件夹内,将get-pip.py粘贴到此,打开cmd命令窗口,执行 python.exe get-pip.py,这样 pip 模块就被安装到了 runtime\Lib\site-packages 目录中。
在此地址下载
get-pip.py: https://bootstrap.pypa.io/get-pip.py
接下来是至关重要的一步,即修改 runtime\python310._pth 文件。这个文件是嵌入式环境的路径配置文件,它告诉 Python 解释器去哪里寻找模块。默认情况下,它的内容很有限,导致无法识别新安装的库。为了让 site-packages 目录被正确加载,并能识别到项目源码等,需要将其路径添加进去。 使用记事本打开该文件,删掉默认内容,替换为如下:
python310.zip
.
./Lib/site-packages
./Scripts
../
../indextts通过这几步操作,一个位于 D:/index-tts/runtime 的、独立的、便携且功能完备的 Python 环境就准备就绪了。
核心挑战:攻克 pynini 与 WeTextProcessing 的安装难题
在准备安装 Index-TTS 的依赖时,我们遇到了整个打包过程中最大的一个障碍:pynini 和 WeTextProcessing 这两个库。
pynini 是一个用于编译、优化和应用语法规则的强大工具,它基于 OpenFst构建。 在语音和语言处理中,它常被用于文本正则化、语法解析等底层任务。 WeTextProcessing 则是一个专注于中文文本正则化和反正则化的工具包,它同样严重依赖于 pynini。
pynini 官方文档也明确指出,pynini 并没有针对 Windows 进行设计和测试。 直接尝试 pip install pynini 往往会触发漫长的编译过程,并最终以失败告终。
失败的原因很典型:这类库包含了大量的 C++ 源码,需要在本地编译成 Python 可以调用的动态链接库(.pyd 文件)。这个过程依赖于特定的 C++ 编译器环境以及一系列复杂的库文件(如 OpenFst)。 对于普通用户的电脑来说,这些条件通常是不具备的,从而导致类似下面的编译错误:
error: subprocess-exited-with-error

× Building wheel for pynini (pyproject.toml) did not run successfully.
│ exit code: 1
╰─> [104 lines of output]
    ...
    error: command 'C:\\Program Files\\Microsoft Visual Studio\\...\\cl.exe' failed with exit code 2
    [end of output]

note: This error originates from a subprocess, and is likely not a problem with pip.
ERROR: Failed building wheel for pynini即便安装了 Visual Studio 和 生成工具包括
cl.exe,仍会报此错
曲线救国的思路是:在一个已经配置好编译环境的系统上将它们“预编译”,然后将编译好的成品文件直接复制到我们的整合包中。
Miniconda 成为了实现这一目标的完美工具,它能够轻松地在 Windows 上创建隔离的环境,并通过其强大的包管理能力安装 pynini,因为它会直接下载 conda-forge 渠道提供的预编译好的二进制文件,而不是在本地进行源码编译。
具体步骤如下:
- 创建 Conda 环境:建立一个独立的 conda 环境,并指定 Python 版本为 3.10,以匹配我们的嵌入式包。bash
conda create -n index-tts python=3.10 conda activate index-tts - 在 Conda 中安装:使用 conda-forge 渠道安装
pynini,然后用 pip 安装WeTextProcessing。bashconda install -c conda-forge pynini==2.1.6 pip install WeTextProcessing --no-deps - 移植文件:这一步是整个方案的核心。我们需要找到 conda 环境中这两个库的所有相关文件,然后将它们复制到我们便携 Python 环境的对应位置。要特别注意路径,避免混淆。
- 库文件:进入 conda 环境的
envs\index-tts\Lib\site-packages目录内,将pynini、WeTextProcessing-1.0.4.1.dist-info、tn、pywrapfst这几个文件夹,以及_pynini.cp310-win_amd64.pyd、_pywrapfst.cp310-win_amd64.pyd这两个关键的编译产物,全部复制到我们整合包的D:/index-tts/runtime/Lib/site-packages目录下。 - 动态链接库 (DLLs):
pynini依赖的底层 OpenFst 库是以 DLL 文件的形式存在的。这些文件位于 conda 环境的\envs\index-tts\Library\bin目录下。需要将所有以fst开头的 DLL 文件复制到我们整合包的D:/index-tts/runtime根目录下,以便 Python 解释器在启动时能够找到它们。
- 库文件:进入 conda 环境的
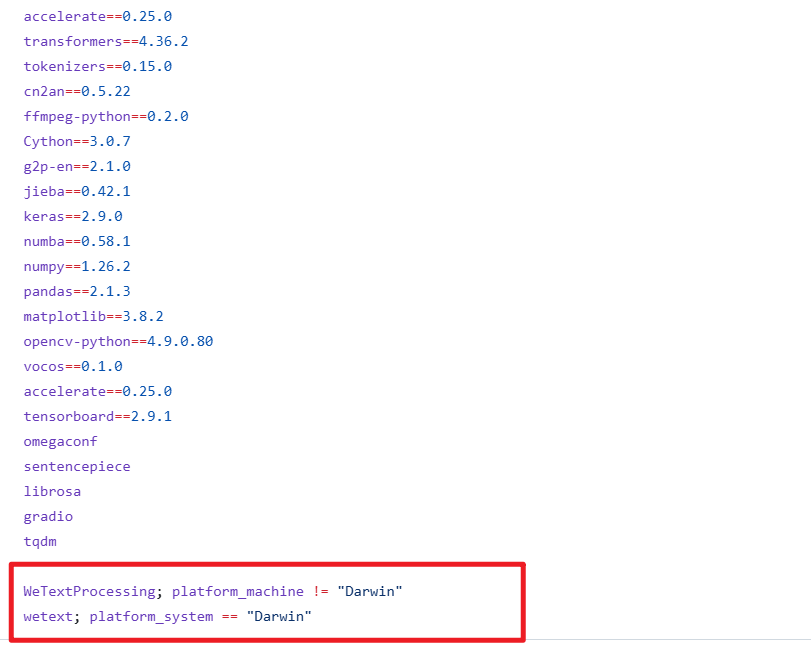
完成这些“搬运”工作后,我们便成功地绕过了在终端用户机器上进行编译的难题。同时,为了避免在后续安装其他依赖时 pip 再次尝试编译它们,必须打开位于 D:/index-tts 的 requirements.txt 文件,将与 WeTextProcessing 相关的两行删掉。
自动化与用户体验:脚本的妙用
环境和核心依赖问题解决后,剩下的工作就是如何让用户以最简单的方式启动程序,以及如何处理模型文件的下载。
模型下载脚本 downmodel.py
Index-TTS 的模型文件体积不小。如果将所有模型文件直接打包到整合包中,会导致整个软件包体积巨大,不利于分发。更好的方式是让程序在首次启动时自动下载模型。为此,我编写了 downmodel.py 脚本,它有几个明确的好处:
- 减小整合包体积:用户下载的是一个轻量级的启动器,模型按需下载。
- 解决网络访问问题:众所周知,直接访问 Hugging Face Hub 在国内可能存在网络困难。脚本中通过设置环境变量
HF_ENDPOINT=https://hf-mirror.com,将下载地址指向了镜像站,极大地提高了下载的稳定性和速度。 - 智能化检查:脚本会检查本地
checkpoints目录中是否已存在模型文件。如果文件已存在,则跳过下载,避免重复操作。下载完成后还会校验文件是否存在且大小不为零,确保模型的完整性。
一个隐蔽的陷阱:过时的 config.yaml
在调试过程中,我发现了一个微妙但致命的问题。Index-TTS 的 GitHub 源码仓库中,checkpoints 文件夹内可能包含一个默认的 config.yaml 文件。这个配置文件可能与最新版的模型(如 1.5 版本)不兼容。如果保留了这个旧文件,并且下载脚本因为检测到文件存在而跳过了下载新的 config.yaml,那么在启动 WebUI 时,程序会因为模型层维度不匹配而报错。
为了规避这个问题,downmodel.py 脚本的下载逻辑需要更精细一些。我增加了一个判断:即使 config.yaml 存在,但如果像 bigvgan_discriminator.pth 这样的核心模型文件不存在(意味着是首次下载),那么 config.yaml 仍然需要被强制重新下载覆盖,以确保配置与模型版本一致。
以下是 downmodel.py 的完整代码,它实现了上述逻辑:
import json
import os
import sys
import time
from pathlib import Path
from huggingface_hub import hf_hub_download

def download_model_files():
    """
    从Hugging Face Hub下载IndexTTS-1.5模型所需的文件。
    """
    repo_id = "IndexTeam/IndexTTS-1.5"
    local_dir = "checkpoints"

    # 确保本地目录存在
    if not os.path.exists(local_dir):
        print(f"创建目录: {local_dir}")
        os.makedirs(local_dir)

    # 需要下载的文件列表
    files_to_download = [
        "config.yaml",
        "bigvgan_discriminator.pth",
        "bigvgan_generator.pth",
        "bpe.model",
        "dvae.pth",
        "gpt.pth",
        "unigram_12000.vocab"
    ]

    is_bigvgan_discriminator=Path(f'./{local_dir}/bigvgan_discriminator.pth').exists()
    for filename in files_to_download:
        # 检查文件是否已存在,如果存在则跳过下载
        is_exists = Path(f'{local_dir}/{filename}').exists()
        if is_exists:
            if filename !='config.yaml' or is_bigvgan_discriminator:
                # 如果 config.yaml 已存在,但不存在 bigvgan_discriminator.pth,此时需重新下载 config.yaml
                # 否则跳过
                print(f"文件 {filename} 已存在,跳过下载。")
                continue

        print(f"正在下载 {filename} 到 {local_dir}...")
        try:
            # 使用hf_hub_download下载文件
            hf_hub_download(
                repo_id=repo_id,
                filename=filename,
                local_dir=local_dir,
                # resume_download=True  # 如果需要,可以开启断点续传
            )
            print(f"下载 {filename} 完成。")
        except Exception as e:
            print(f"下载 {filename} 失败: {e}")
            # 你可以在这里决定是继续下载其他文件还是中止程序
            # return False # 如果希望下载失败时中止,可以取消这行注释

    for filename in files_to_download:
        # 检查文件是否已存在,如果存在则跳过下载
        local_file_path = Path(f'./{local_dir}/{filename}')
        if not local_file_path.exists() or local_file_path.stat().st_size==0:
            print(f"文件 {filename} 不存在或尺寸为0,请保证网络连接正常,然后删掉该文件后重新启动下载。")
            return False

    print("所有模型文件下载检查完成!\n")
    return True

os.environ['HF_HUB_DISABLE_SYMLINKS_WARNING'] = 'true'
os.environ['HF_ENDPOINT']='https://hf-mirror.com'


print("\n----正在检查是否已下载 IndexTTS-1.5 模型...")
download_success = download_model_files()

if not download_success:
    print("\n\n############模型文件下载失败,请检查网络连接或手动下载。程序即将退出。\n")
    time.sleep(5)
    sys.exit()

# 下载完成后,继续启动WebUI
print("\n模型文件准备就绪,正在启动 WebUI...")
print("\n\n********请等待启动完成,显示\" Running on local URL: http://127.0.0.1:7860 \"时,在浏览器里打开该地址********\n\n")一键启动脚本 双击启动.bat
 最后,为了实现真正的“双击即用”,一个简单的批处理脚本是必不可少的。
双击启动.bat 的内容虽然简短,但完成了所有准备工作:
@echo off
rem 将当前代码页设置为UTF-8,以正确显示中文字符。
chcp 65001 > nul

TITLE Index-TTS Windows整合包  pvt9.com 制作

set HF_HUB_DISABLE_SYMLINKS_WARNING=true
set HF_ENDPOINT=https://hf-mirror.com
set ROOT_DIR=%~dp0
set ROOT_DIR=%ROOT_DIR:~0,-1%
set PATH=%ROOT_DIR%;%ROOT_DIR%\ffmpeg;%PATH%

call %cd%/runtime/python downmodel.py

call %cd%/runtime/python webui.py
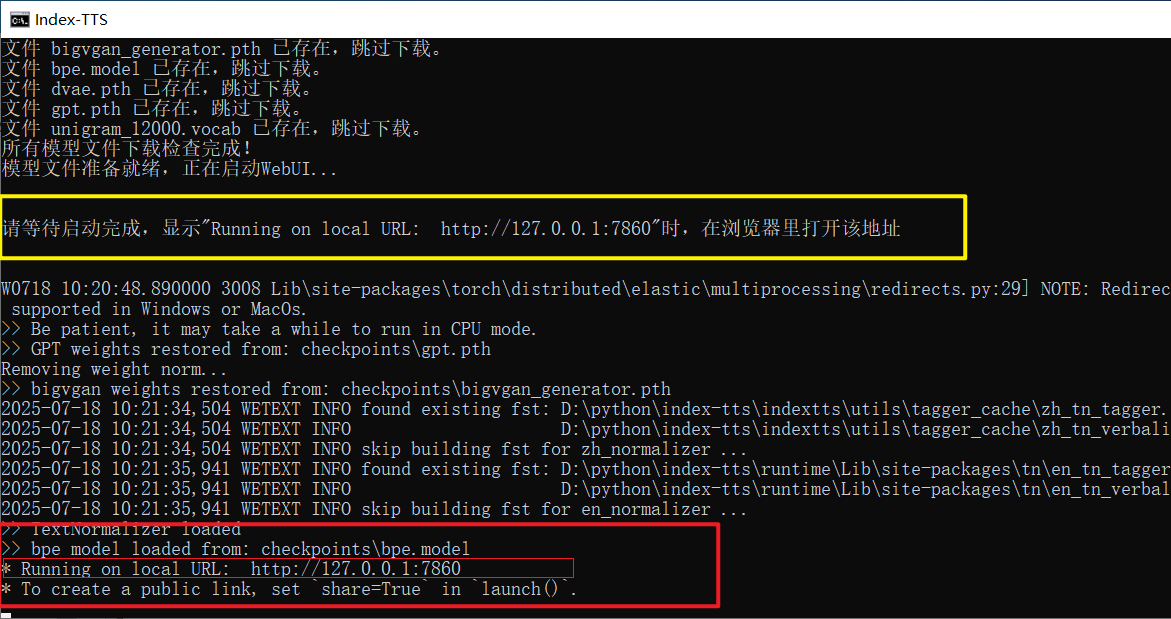
pause它首先设置了窗口标题和UTF-8代码页以正确显示中文。接着,它设置了必要的环境变量(如镜像地址),并将 ffmpeg 工具的路径临时加入到 PATH 中。然后,它依次调用 downmodel.py 检查和下载模型,最后执行 webui.py 启动 Gradio 界面。当一切就绪,用户会在命令行窗口看到熟悉的 Running on local URL: http://127.0.0.1:7860 提示,此时在浏览器中打开该地址即可开始体验。
通过这一系列操作,一个原本需要繁琐配置的 Python 项目,最终被封装成了一个对普通 Windows 用户极其友好的整合包。
只需双击一下,即可享受 AI 技术带来的便利。