How to Use the Original Voice Tone for Dubbing
In dubbing operations, we typically select a fixed voice tone, such as "yunxi," "xiaoyi," or "narrator Xiaoshuai," and use only that tone throughout the entire dubbing process. However, for scenarios with multiple speakers, using a single voice tone may not be ideal. A better approach is to assign a specific voice tone to each speaker, ideally matching the original speaker's voice tone from the video. For example, if Bajie is speaking in the original video, the English translation should still retain Bajie's voice tone, which requires the use of the original voice cloning feature.
Currently, the software supports three dubbing channels for original voice cloning: clone-voice, CosyVoice, and F5-TTS.
Principle: When dubbing a specific segment (e.g., 00:00:03 --> 00:00:08), the original audio of that segment is first extracted to obtain the corresponding original text and the translated target text. This data is then sent to the dubbing channel, which generates the dubbing for the target text by referencing the voice tone of the original audio.
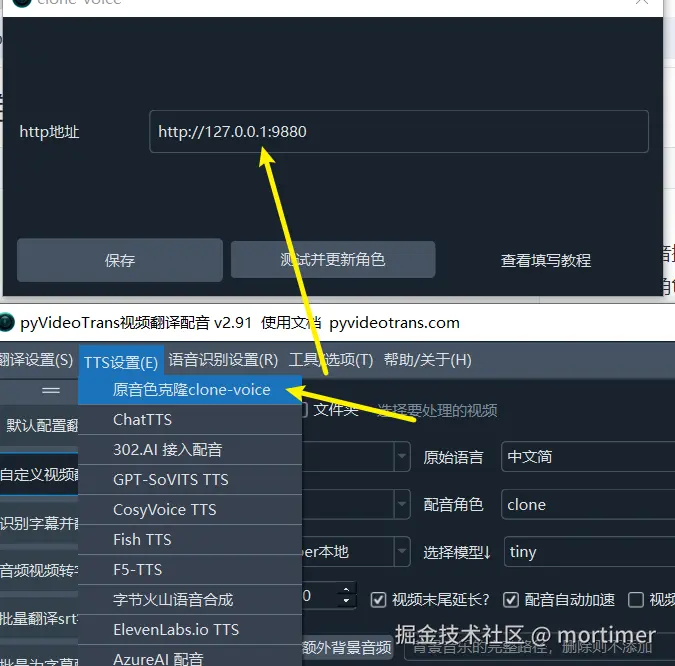
Using the clone-voice Dubbing Channel
You need to install the https://github.com/jianchang512/clone-voice project. After opening the project homepage, carefully read the instructions. You can deploy the clone-voice project using the source code. For Windows systems, you can also find Releases (https://github.com/jianchang512/clone-voice/releases) on the right side of the page and download the integrated package directly. After downloading and extracting, double-click app.exe to start it.
Once it shows a successful startup, enter the default API address http://127.0.0.1:9988 into the video translation software under Menu > TTS Settings > Original Voice Cloning clone-voice in the HTTP address field. After testing without issues, you can start using it.
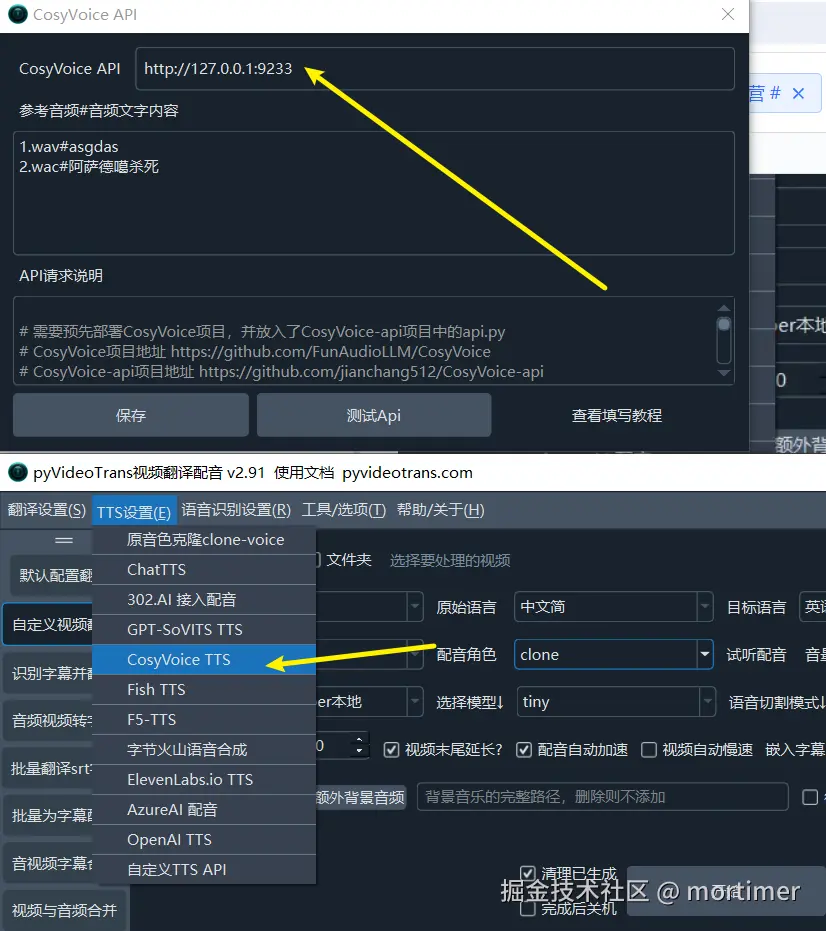
Using the CosyVoice Dubbing Channel
Similarly, you need to install the CosyVoice project. For installation instructions, see https://pyvideotrans.com/cosyvoice.html.
Alternatively, you can use third-party integrated packages, but these do not support voice cloning and only allow specifying a fixed voice tone.
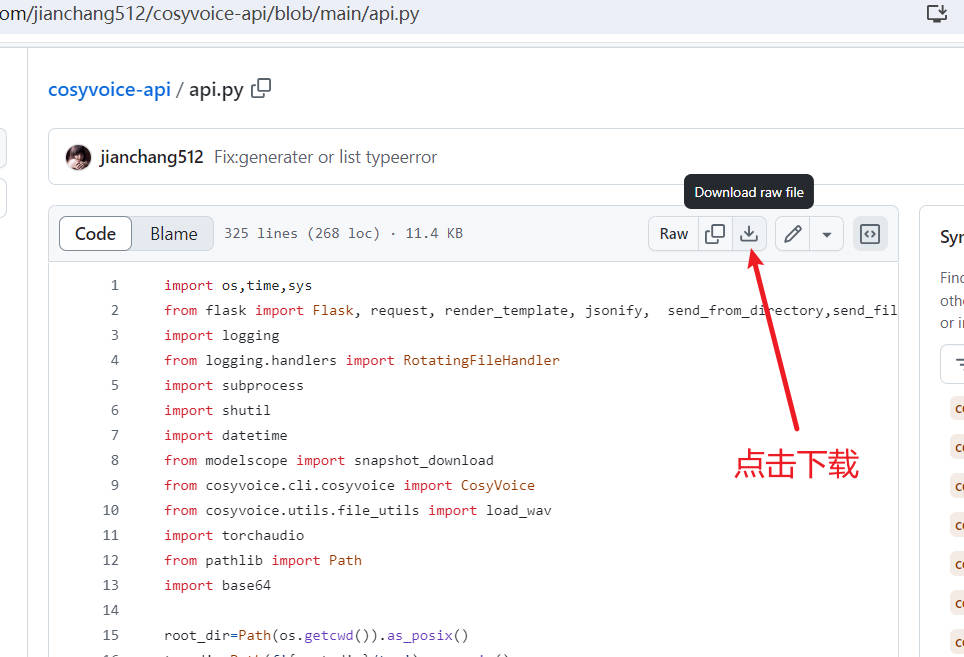
After installation, go to https://github.com/jianchang512/cosyvoice-api/blob/main/api.py to download the api.py file and place it in the CosyVoice project directory, in the same location as the webui.py file.

Then start api.py and enter the API address into the video translation software under Menu > TTS Settings > CosyVoice in the API address field. The default address is http://127.0.0.1:9233.
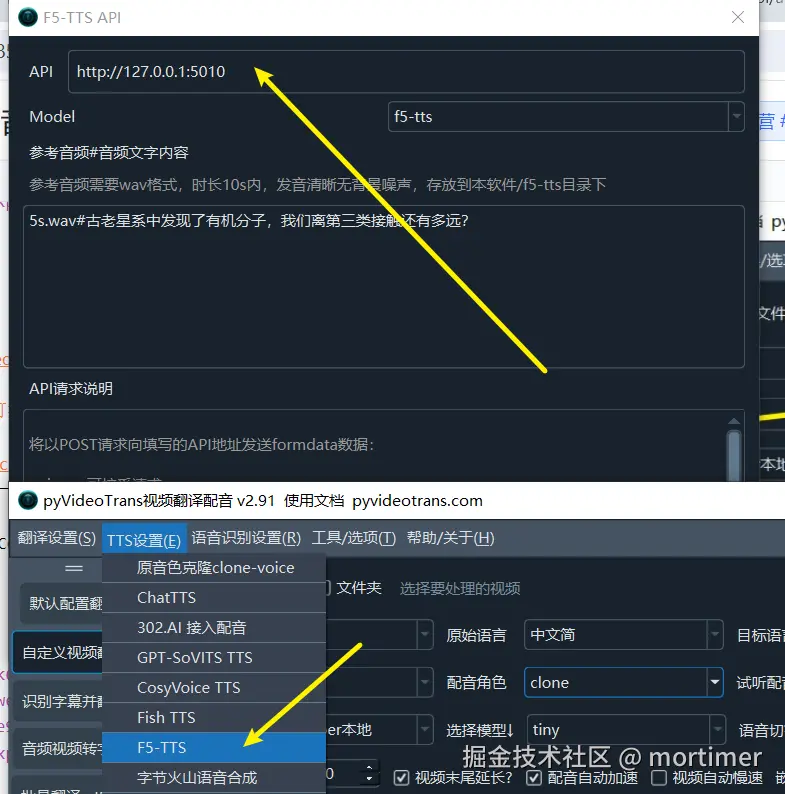
Using the F5-TTS Dubbing Channel
You need to install the F5-TTS project. For detailed installation instructions, see https://pyvideotrans.com/f5tts.html.
You can install it using the source code or, for Windows, use the integrated package. After installation, double-click run-api.bat to start the API service. Then enter the default address http://127.0.0.1:5010 into the video translation software under Menu > TTS Settings > F5-TTS API Address.
Select "clone" in the Main Interface to Enable Voice Cloning Dubbing
Note: While clone-voice supports over ten languages, F5-TTS and CosyVoice only support Chinese and English voice cloning.

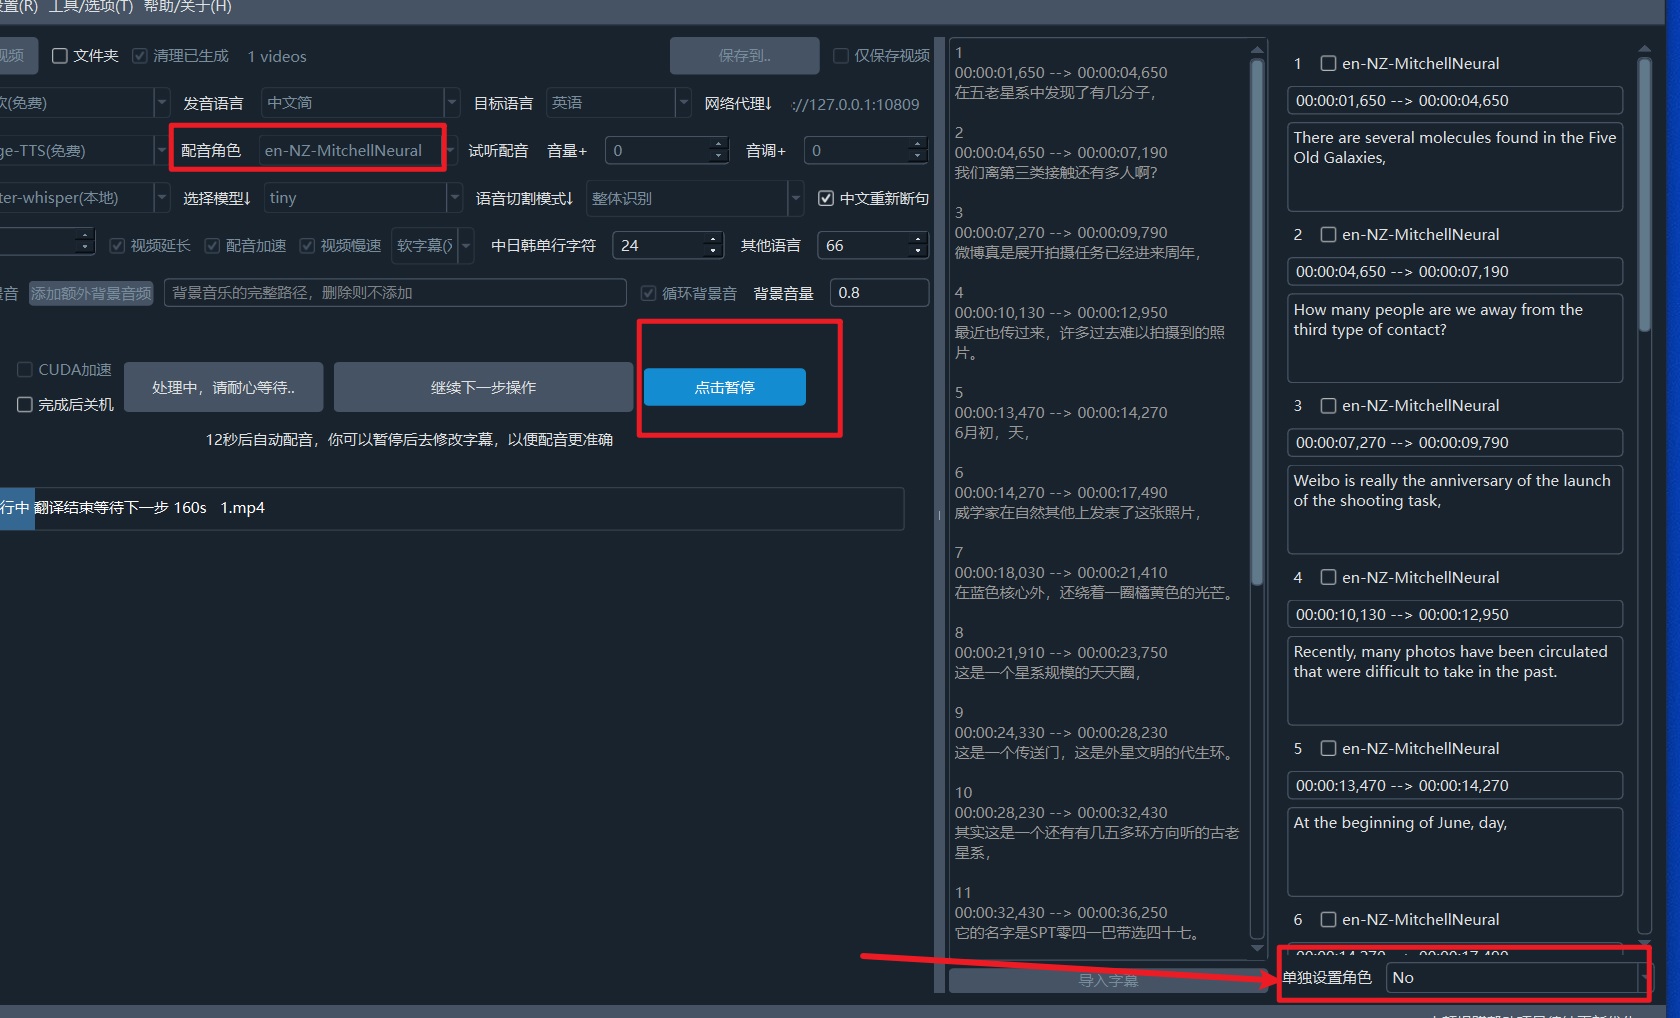
Multi-Role Dubbing
When translating only one video at a time, after the subtitle translation is complete and the pause button appears, click pause. In the subtitle area on the right, you can individually set a dubbing role for each subtitle to achieve multi-role dubbing.
In the main interface, you need to select a default dubbing role. If no individual settings are made, all subtitles will use this default role.