Using zh_recogn Chinese Speech Recognition
This recognition method only supports Chinese speech, uses the Ali Mota community model, provides better support for Chinese, and can compensate for the lack of Chinese support in foreign models.
How to Use
First, deploy the zh_recogn project.
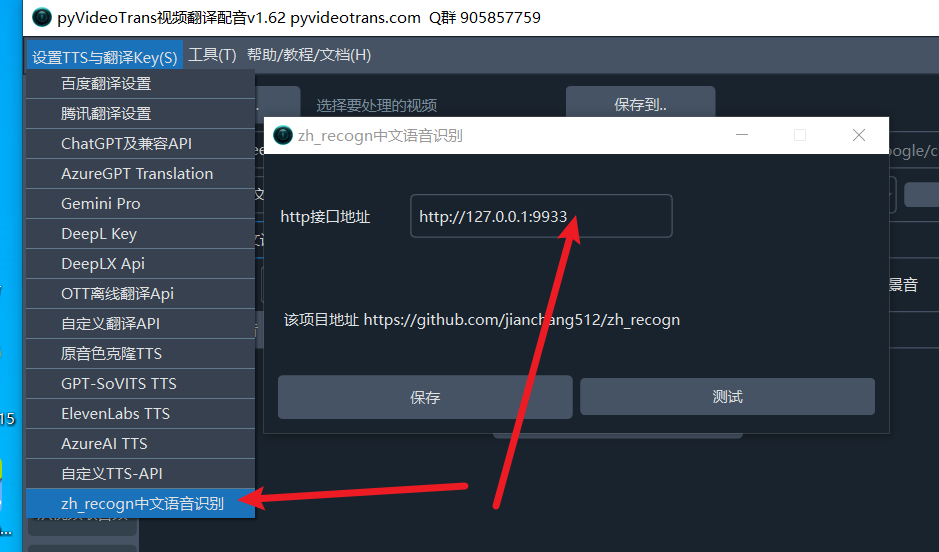
Then start it. Enter the address (default: http://127.0.0.1:9933) in the software's top-left menu → Settings → zh_recogn Chinese Speech Recognition → Address.
Then, in the software interface, select zh_recogn from the "faster mode" dropdown. When this option is selected, there is no need to choose a model or segmentation method. 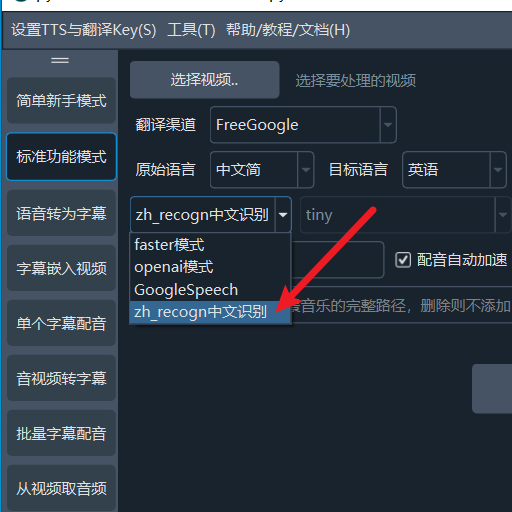
Deploying the zh_recogn Project
Source Code Deployment
First, install Python 3.10, install Git, and install FFmpeg. On Windows, download ffmpeg.exe and place it in the ffmpeg folder of this project. On macOS, use
brew install ffmpegto install.Create an empty English-named directory. Open cmd in this directory on Windows (use Terminal on macOS and Linux), and run the command:
git clone https://github.com/jianchang512/zh_recogn ./Continue with
python -m venv venv, then on Windows run.\venv\scripts\activate, and on macOS and Linux runsource ./venv/bin/activate.Continue with
pip install -r requirements.txt --no-deps.For CUDA acceleration on Windows and Linux, continue by running
pip uninstall torch torchaudio, then runpip install torch torchaudio --index-url https://download.pytorch.org/whl/cu118.Start the project with
python start.py.
Pre-packaged Version / Only for Windows 10 and 11
Download link: https://github.com/jianchang512/zh_recogn/releases
After downloading, extract to an English-named directory and double-click start.exe.
To reduce the package size, the pre-packaged version does not support CUDA. For CUDA acceleration, please use source code deployment.
Using in the pyvideotrans Project
First, upgrade pyvideotrans to v1.62+. Then, in the top-left settings menu, open the zh_recogn Chinese Speech Recognition menu, and enter the address and port, default is "http://127.0.0.1:9933". Do not add /api at the end.
API
API address: http://ip:port/api, default is http://127.0.0.1:9933/api.
Example Python code to request the API:
import requests

audio_file = "D:/audio/1.wav"
file = {"audio": open(audio_file, 'rb')}
res = requests.post("http://127.0.0.1:9933/api", files=file, timeout=1800)

print(res.data)

[
    {
        line: 1,
        time: "00:00:01,100 --> 00:00:03,300",
        text: "Subtitle content 1"
    },
    {
        line: 2,
        time: "00:00:04,100 --> 00:00:06,300",
        text: "Subtitle content 2"
    },
]When entering in pyvideotrans, do not add /api at the end.
Web Interface
Notes
- The first time you use it, the model will be automatically downloaded, which may take some time.
- Only supports Chinese speech recognition.
- You can modify the binding address and port in the set.ini file.