你可能还不知道,Gemini2.5 新增 多说话人文字配音(TTS),可免费使用
你可能还不知道,Google 的 Gemini 2.5 新增了一项非常实用的功能——多说话人文字配音!可在 Google AI Studio 上免费使用。该功能由gemini-2.5-flash-preview-tts和gemini-2.5-pro-preview-tts模型实现。
重要提示:
- 科学上网能力:访问 Google AI 服务,你需要能够访问国际互联网(请自行解决网络问题)。这是使用国外 AI 工具的基础,否则后续步骤无法进行。
- Google 账号:你需要一个免费的 Google 账号。如果还没有,可以前往 Google 官网注册,通常国内手机号即可完成注册。
一、 打开 Gemini 配音网页
你可以通过以下任一方式进入 Gemini 的文字转语音功能页面:
- 直接访问:在浏览器中打开链接 https://aistudio.google.com/generate-speech
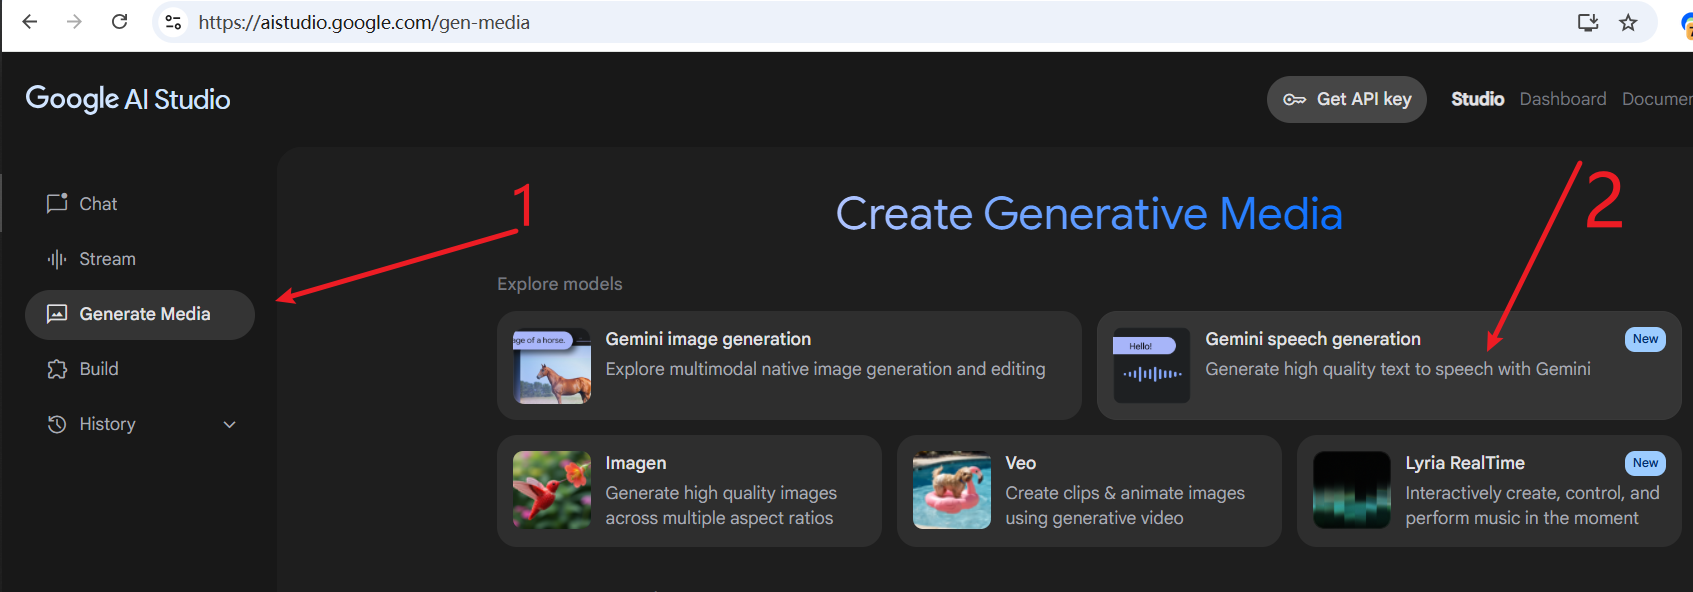
- 通过 AI Studio 主页进入:如果你已经登录 Google AI Studio,也可以按照下图指引找到语音生成功能入口。
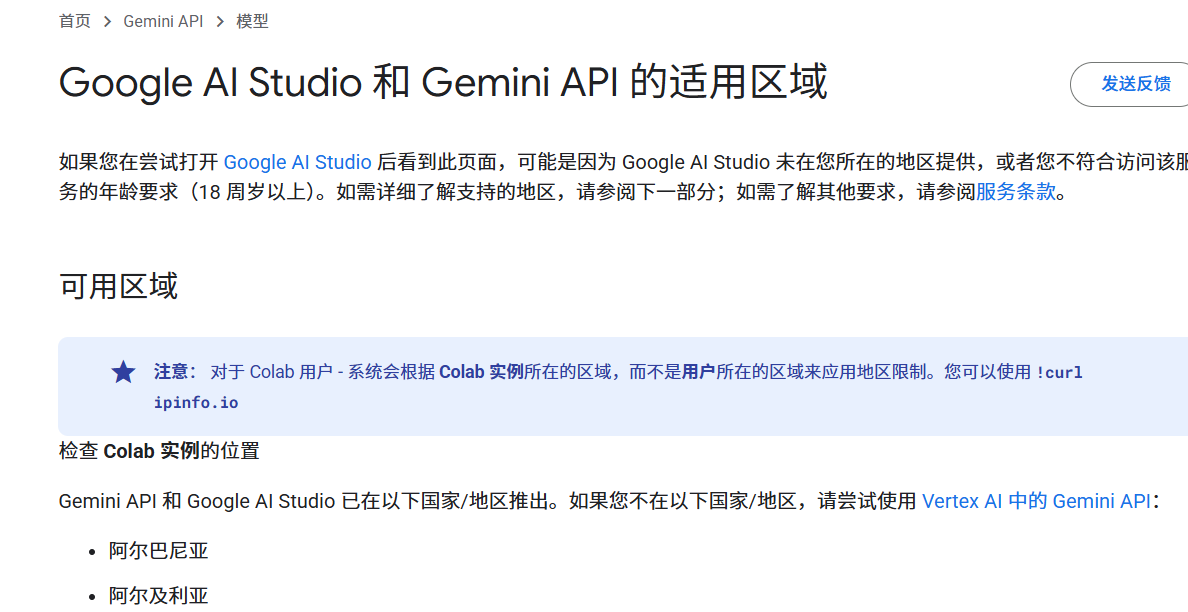
如果页面无法打开,或者打开后看到类似下图提示“当前地区不支持”(例如,使用香港地区的网络节点时常会遇到此问题),请尝试切换你的网络代理节点到其他国家或地区(如美国、新加坡等)。
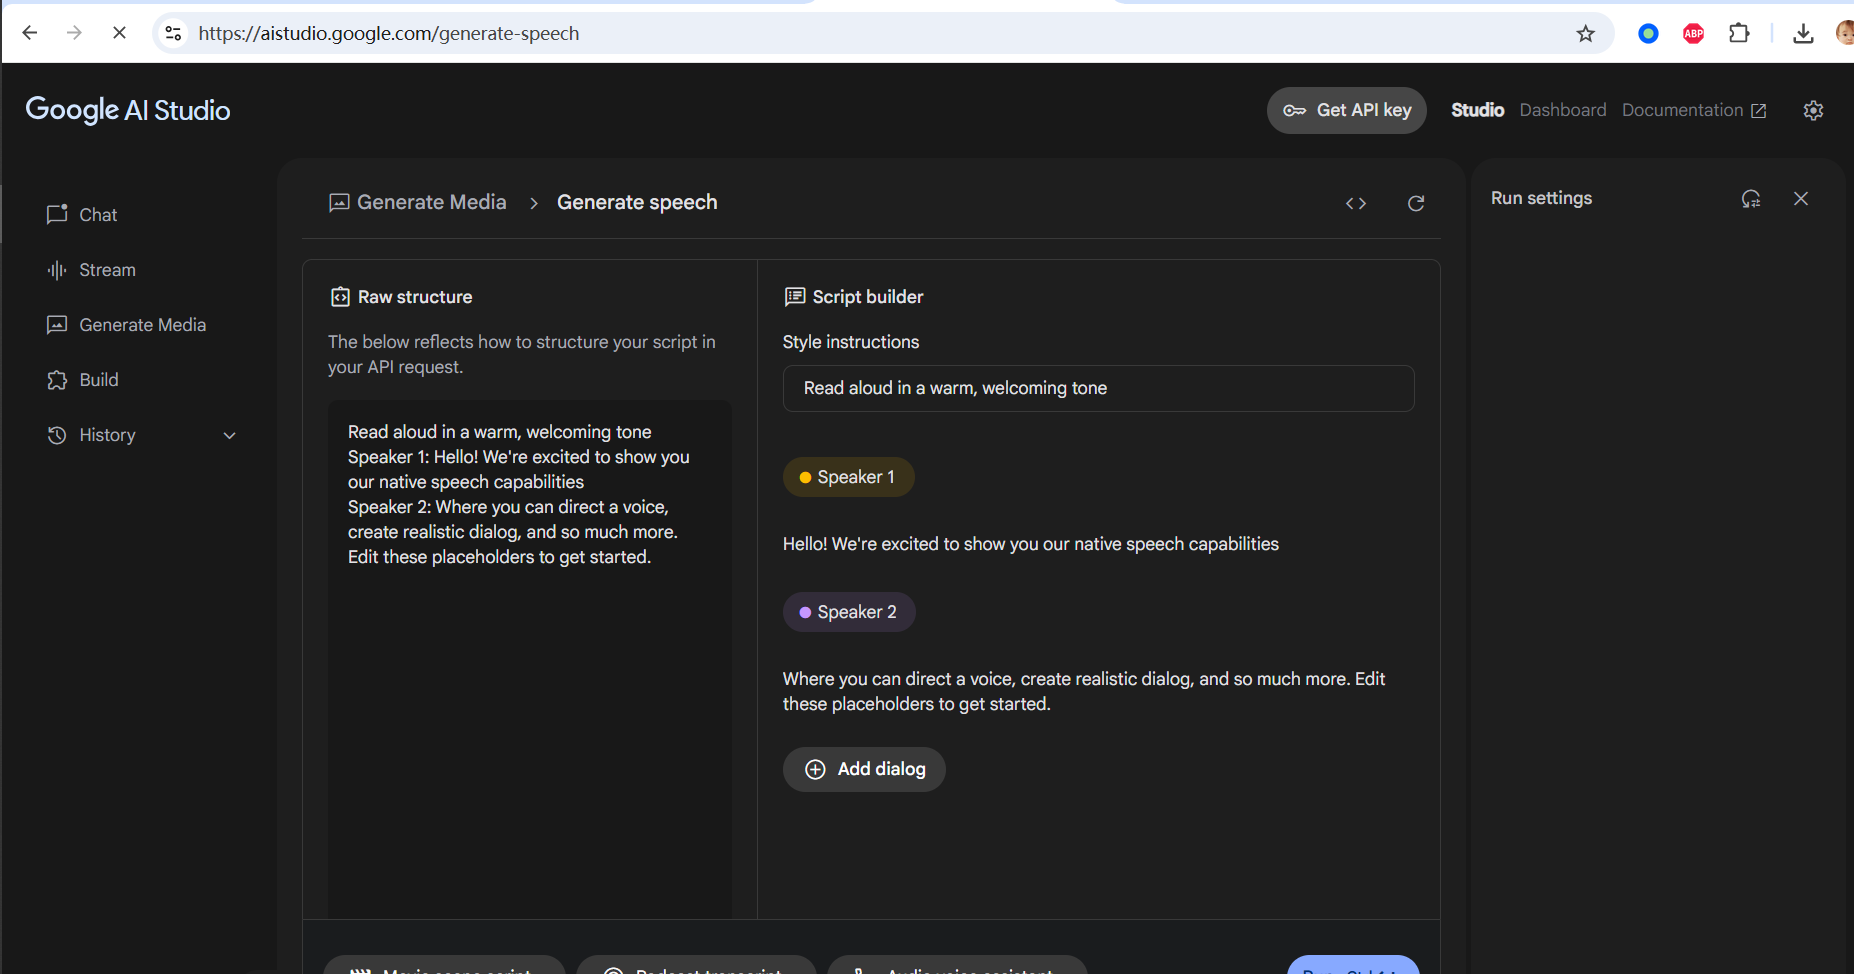
成功打开后,你会看到如下的语音生成界面:
二、 界面概览与模式切换
别担心,虽然是英文界面,但操作起来非常简单。下面我们会一步步说明。
Gemini 的语音生成工具会自动检测你输入的文本语言,目前支持多达 24 种语言(虽文档中未列明支持中文,但实际是支持的)。
默认情况下,你将进入 多说话人 (Multi-speaker audio) 配音界面:
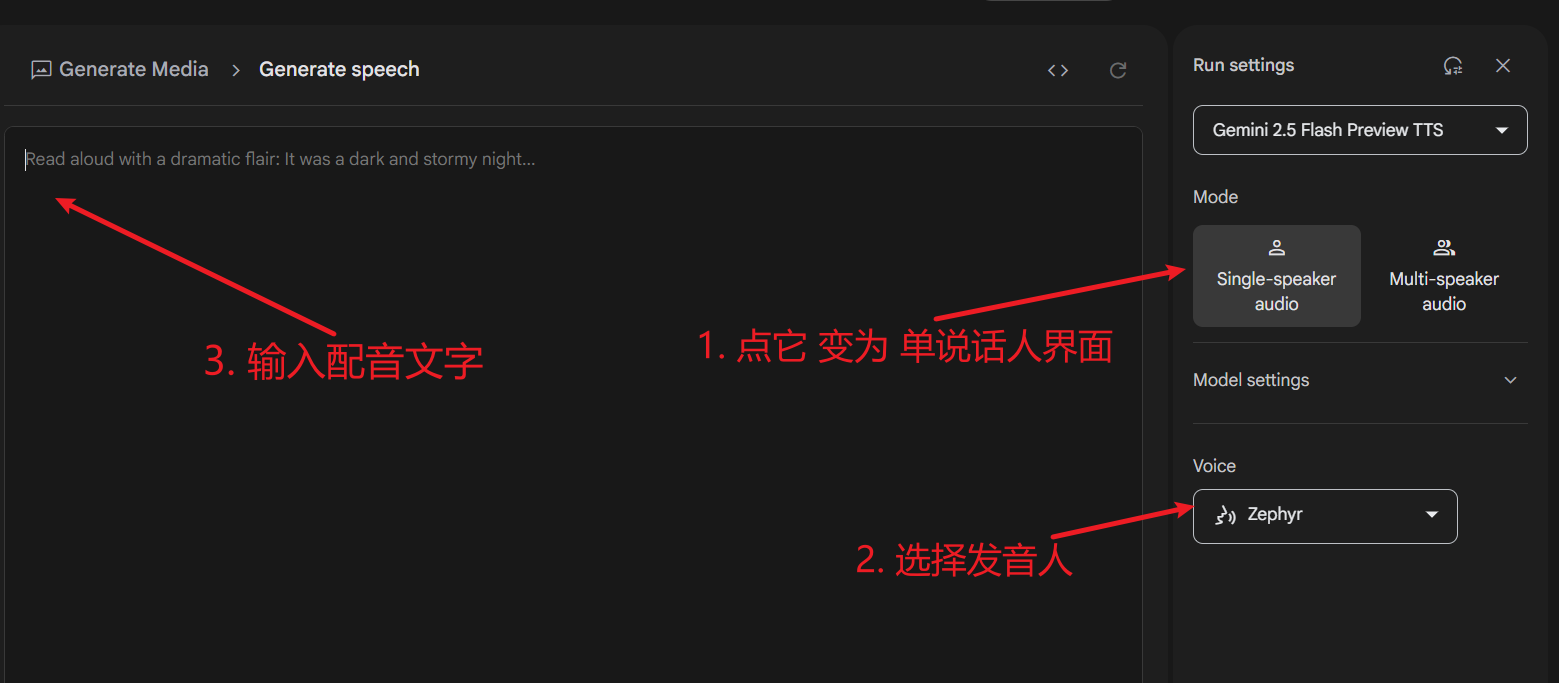
如果你只需要单个声音进行配音,可以点击界面右侧的 Singe-speaker audio 切换到 单说话人 (Single-speaker audio) 模式。单人模式的界面更为简洁:
三、 多说话人配音实操步骤
我们重点介绍功能更丰富的多说话人配音,目前仅 支持2个说话人。
1. 准备并粘贴配音文本
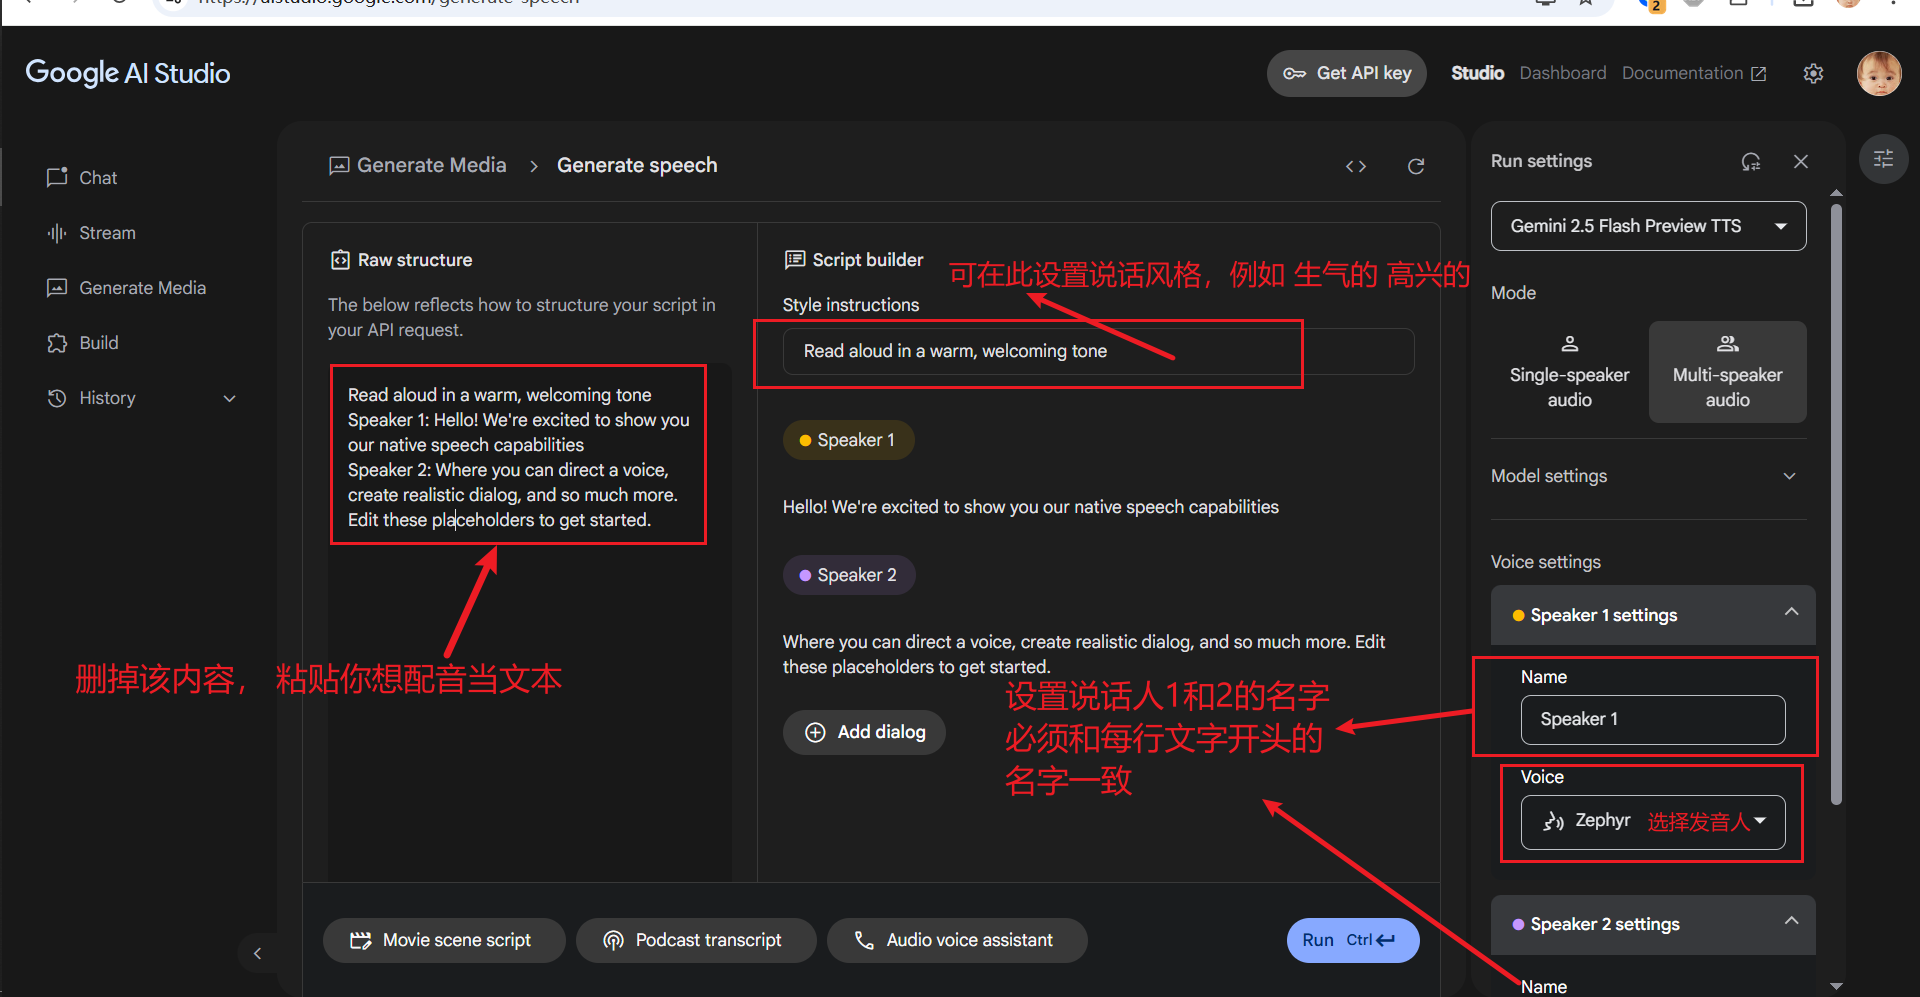
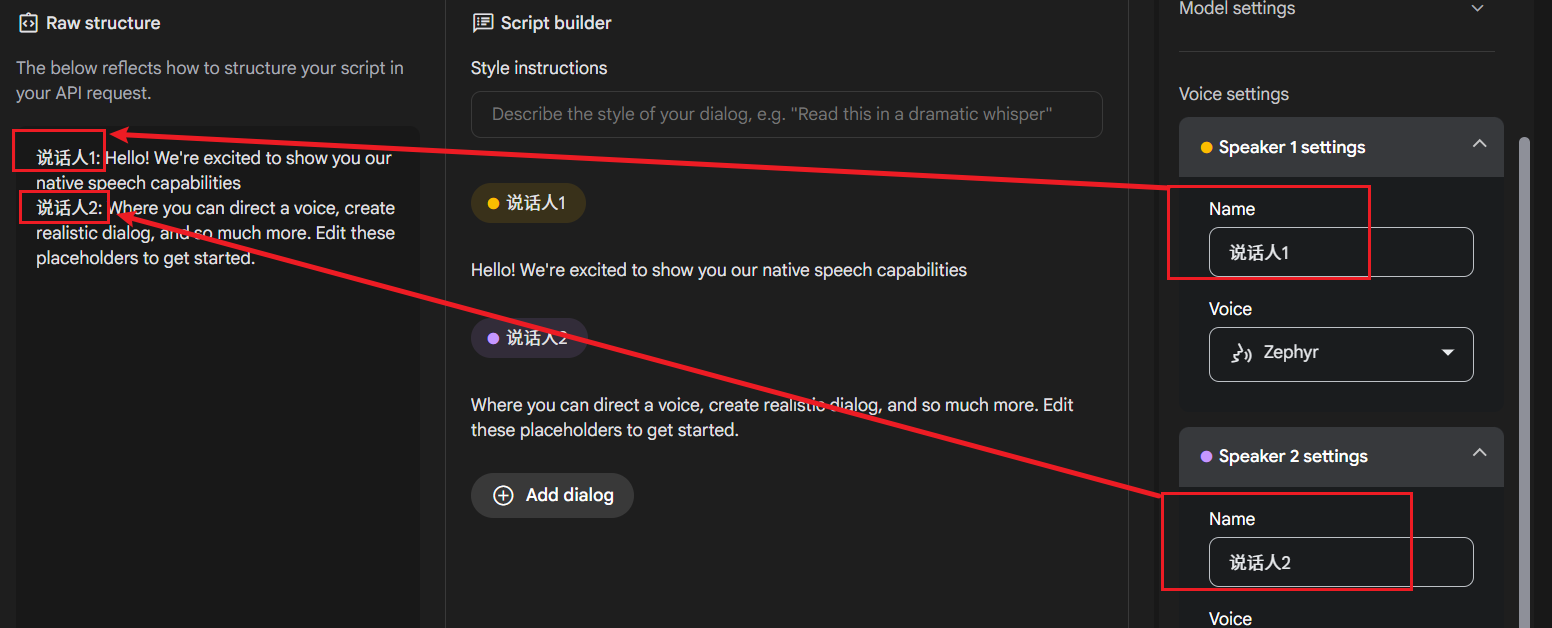
在界面左侧的 Raw structure 文本框中,输入或粘贴你想要配音的文字内容。 关键点:
- 分行:建议每行内容不要过长,以自然的语句停顿为佳。
- 指定说话人:在每一行的开头,使用
说话人X:(英文冒号) 的格式来指定由哪个角色朗读该行。例如:说话人1: 今天是个好日子,风和日丽。说话人2: 是啊,我们去公园散步怎么样? - Gemini 会为标记了不同说话人的行分配不同的声音。目前最多支持两位说话人(例如,你可以定义 "说话人1" 和 "说话人2")。
2. 配置说话人角色 (Voice settings)
在界面右侧的 Voice settings 区域,你需要为每个说话人进行配置:
设置说话人名称 (Name): 如下图所示,在 Name 输入框中填写的名称,必须与你在左侧文本中每行开头的说话人标识(如 "说话人1"、"说话人2")完全一致。大小写、数字、甚至空格都要匹配。
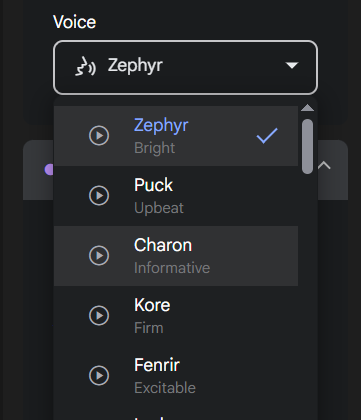
选择发音人 (Voice): 在 Name下方的 Voice 下拉菜单中,你可以为当前选定的说话人选择一个具体的发音人角色。点击每个角色旁边的播放按钮可以试听其音色,选择你最喜欢的声音。
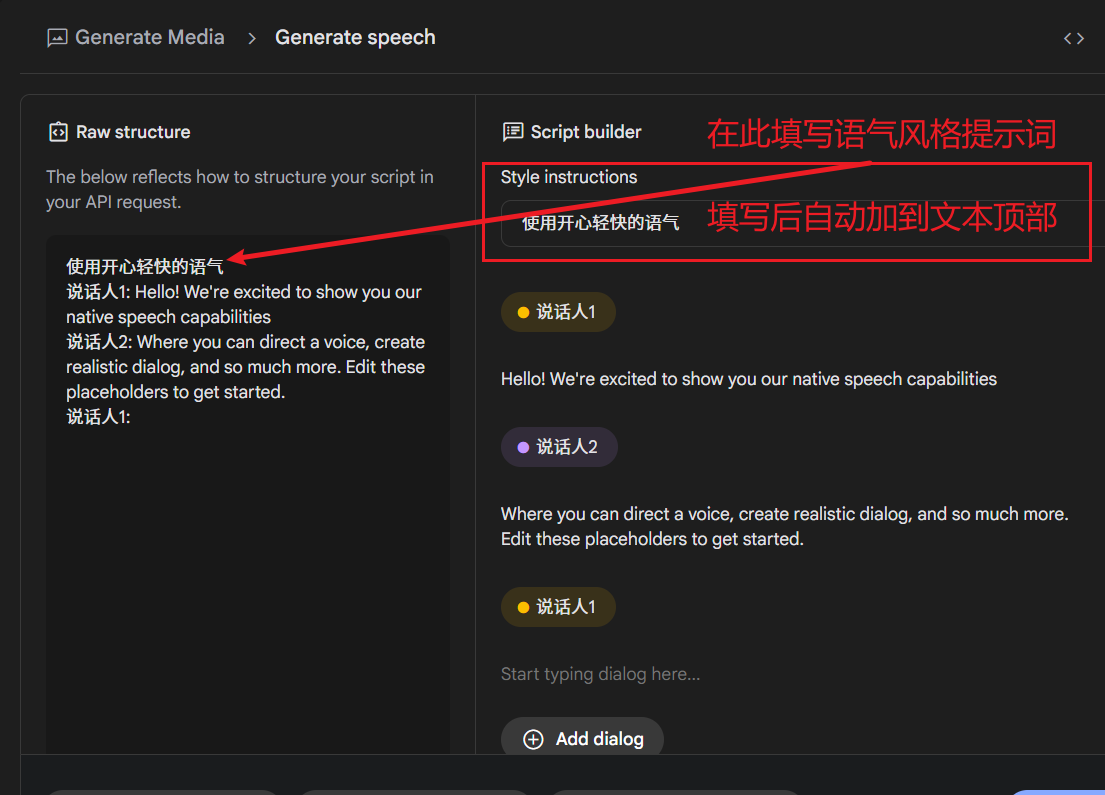
3. (可选) 设置发音风格 (Style instructions)
如果你希望配音带有特定的情感或语气(例如高兴、生气、悲伤等),可以在 Style instructions 文本框中输入风格提示词填写后,这些提示词会自动应用到整个配音项目中,影响所有说话人的整体风格。
提示:右侧的文本预览区也会实时显示你左侧编辑区的内容,并且可以直接在此区域进行修改、删除或添加行,非常方便。
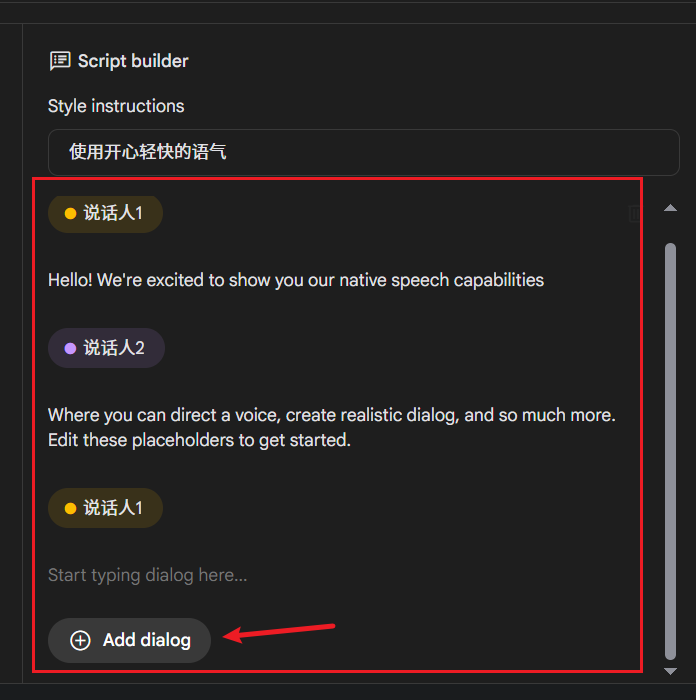
4. 生成与下载配音
完成以上所有设置后,点击界面右下角的蓝色 Run 按钮。Gemini 便会开始处理你的文本并生成语音。 如果一切顺利,稍等片刻,下方就会出现生成的音频播放器。你可以直接在线播放试听,确认效果满意后,点击下载按钮将其保存到你的电脑。

四、 可能遇到的问题及解决方案
目前 Gemini 对 API 的调用频率限制比较严格。当你处理的文本行数较多,特别是使用双说话人模式时,可能会遇到生成失败的情况(尤其当文字是中文时),并看到类似下图的错误提示:
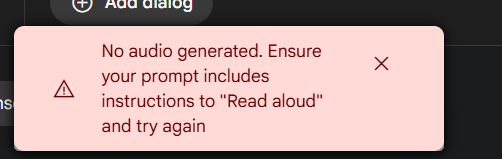
如果遇到此问题,可以尝试以下方法:
- 切换到单说话人模式:如果多说话人不是必须的,切换到
Singe-speaker audio(单说话人) 模式通常能提高成功率。 - 稍后再试:最简单的方法是等待几分钟或更长时间后再重新尝试。