语音识别渠道:WhisperX API
这是什么
WhisperX 是一个非常强大的语音识别模型,还能实现说话人分离(Diarization)。 不过,官方版本只有命令行工具,对新手不太友好,也没提供 API。
于是做了一个增强版:whisperx-api!它在原模型基础上,新增了:
- 本地网页界面 —— 打开浏览器就能用,上传文件一键转录
- OpenAI 兼容 API —— 可替代原 Whisper API,直接接入 pyVideoTrans
- 说话人分离功能 —— 自动识别并标注不同说话人(Speaker1、Speaker2...)
- 一键启动 —— 使用
uv工具,环境配置自动完成
在 pyVideoTrans 项目中使用:
适用场景
- 需要说话人分离功能的用户(多人对话场景)
- 追求高识别准确率的用户
- 想要本地运行、无需云端 API 的用户
- 拥有 NVIDIA 显卡可获得最佳体验
前置条件
| 条件 | 说明 |
|---|---|
| uv | 超快的 Python 包管理器,一条命令搞定环境 |
| FFmpeg | 强大的音视频处理工具,帮助格式转换 |
| 科学上网工具(VPN/代理) | WhisperX 需要从国外服务器下载模型,必须开启 |
| NVIDIA 显卡(推荐) | 有显卡速度提升数十倍,无显卡也可用 CPU 模式(较慢) |
| HuggingFace 账号(说话人分离功能需要) | 需要同意模型协议并获取访问令牌 |
提示:
uv和ffmpeg的安装参考详细教程:https://pyvideotrans.com/blog/uv-ffmpeg
三步搞定,一键启动 API 服务!
第 1 步:下载项目代码
访问项目主页:https://github.com/jianchang512/whisperx-api
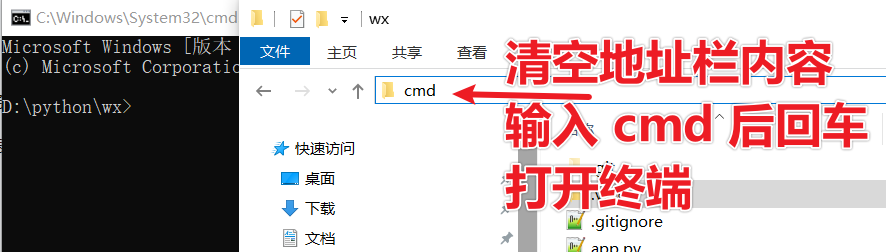
点击绿色的 "Code" → "Download ZIP" 下载压缩包并解压,然后进入到含有 app.py 和 index.html 文件的文件夹内。
清空文件夹地址栏内容,输入 cmd 后回车打开黑色终端窗口。
第 2 步:获取下载"说话人识别"模型的通行证(不需要说话人功能可跳过)
说话人分离模型必须同意他们的协议才能下载,因此需要你先在 Hugging Face 网站上"签署协议"并获取访问令牌。这一步必须科学上网,否则无法打开该网站。
① 注册并登录 Hugging Face
创建一个免费账户并登录。
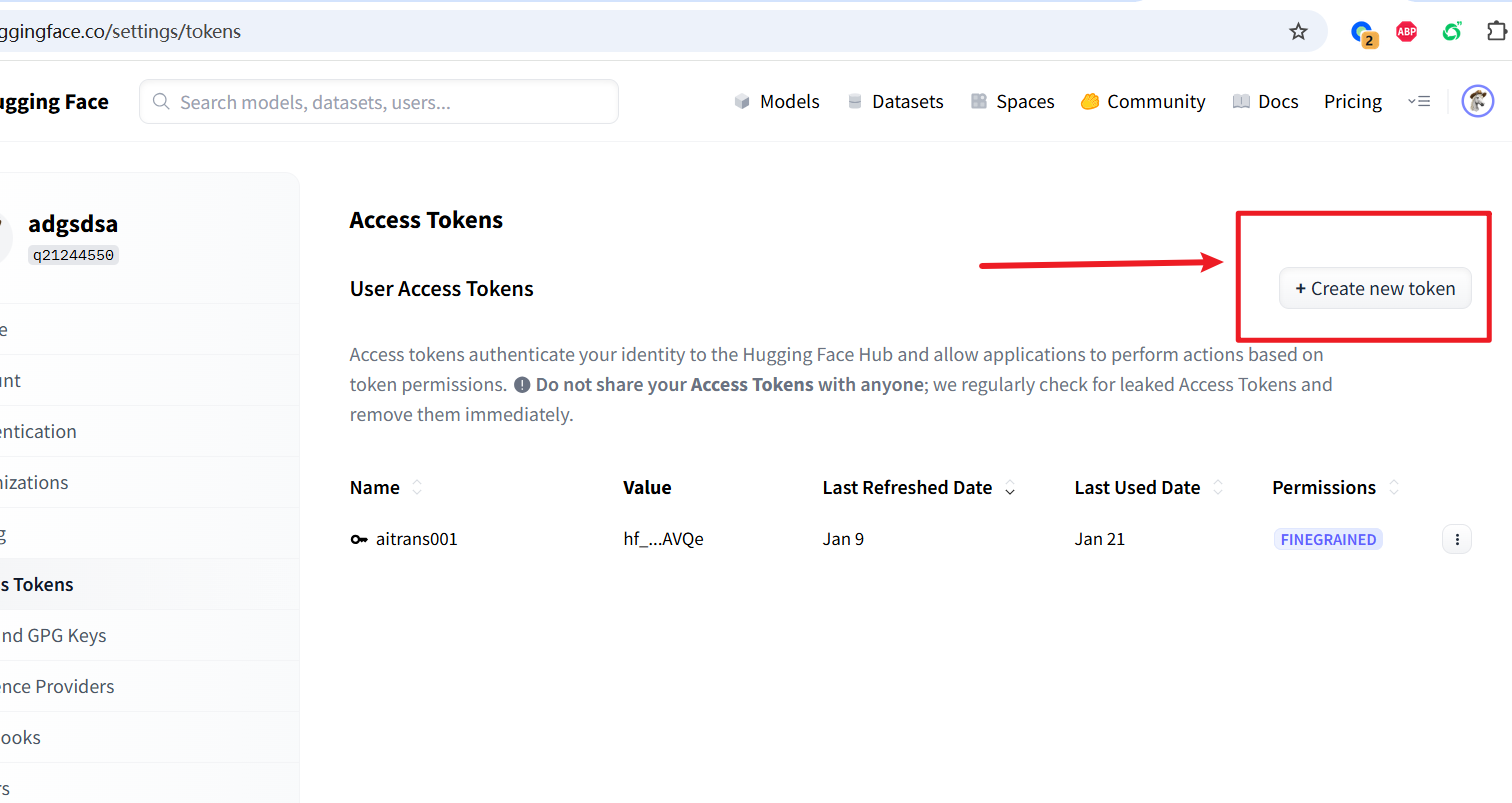
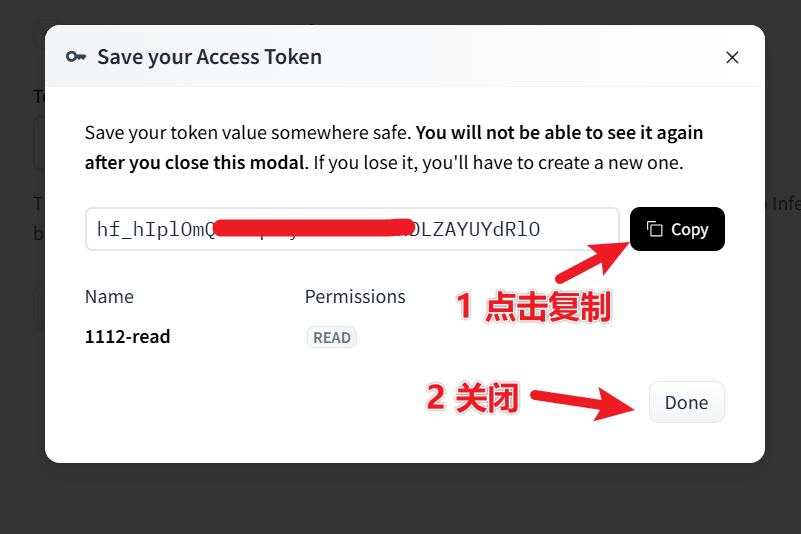
② 创建访问令牌(Token)
访问:https://huggingface.co/settings/tokens
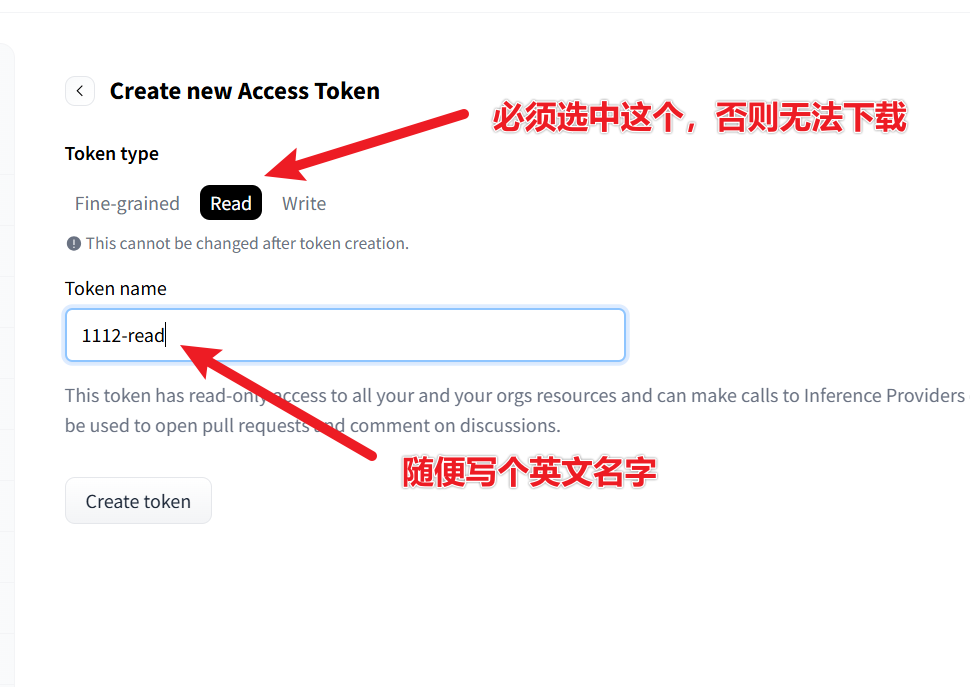
点击 "New token" → 权限选择 read → 创建并复制这串以 hf_ 开头的令牌。
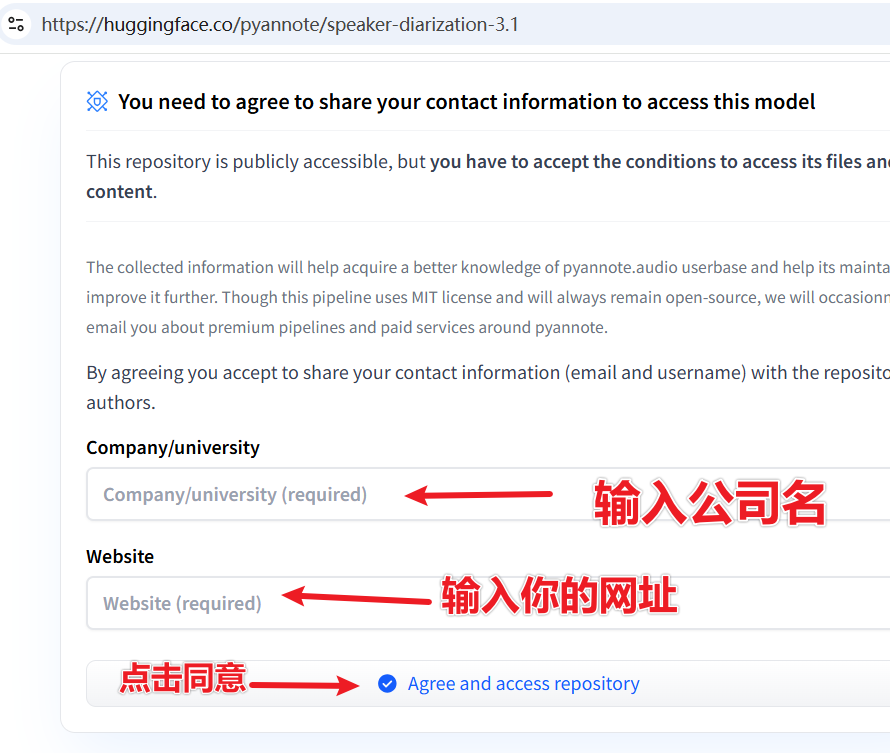
③ 同意模型使用协议(必须勾选!)
依次访问下面两个模型页面并同意协议:
- https://huggingface.co/pyannote/speaker-diarization-3.1
- https://huggingface.co/pyannote/segmentation-3.0
进入页面后,填写显示的 2 个文本框,然后点击按钮提交。
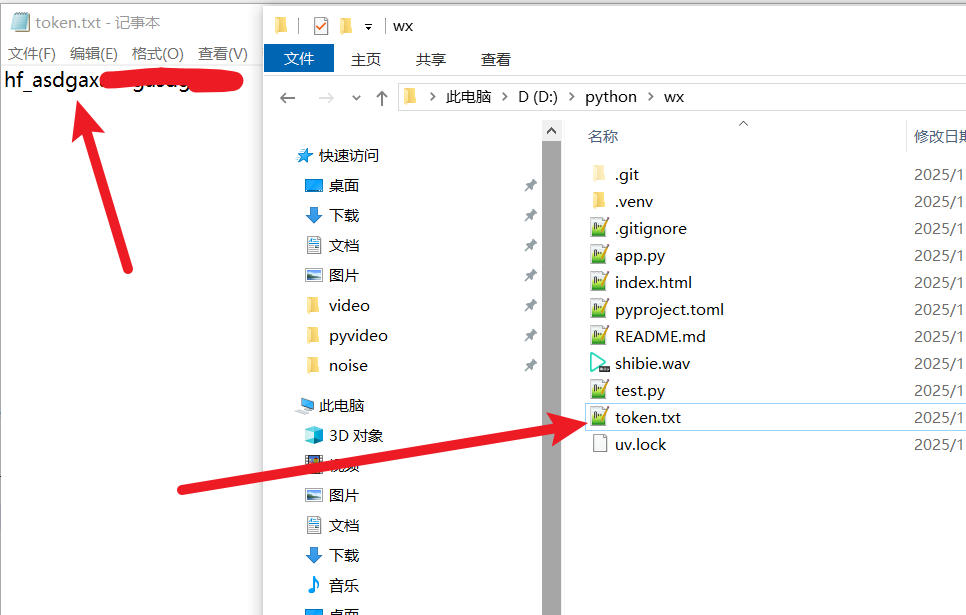
④ 保存令牌
回到你的 whisperx-api 项目文件夹,新建一个文件 token.txt,把刚复制的 hf_ 开头的令牌粘贴进去并保存。
第 3 步:一键启动!
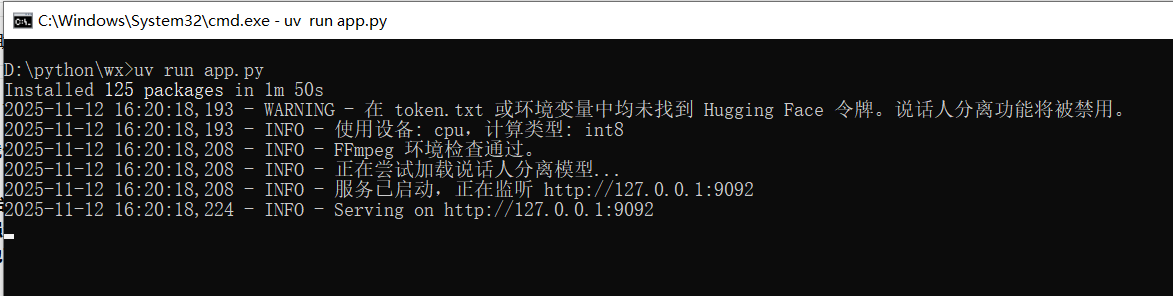
确保你的 cmd 终端仍在 app.py 所在文件夹中,然后执行:
uv run app.py第一次使用时,需要等待一段较长的时间安装模块和依赖,请耐心等待。
当你看到类似下图的输出,就代表启动成功:
浏览器会自动打开这个地址:http://127.0.0.1:9092
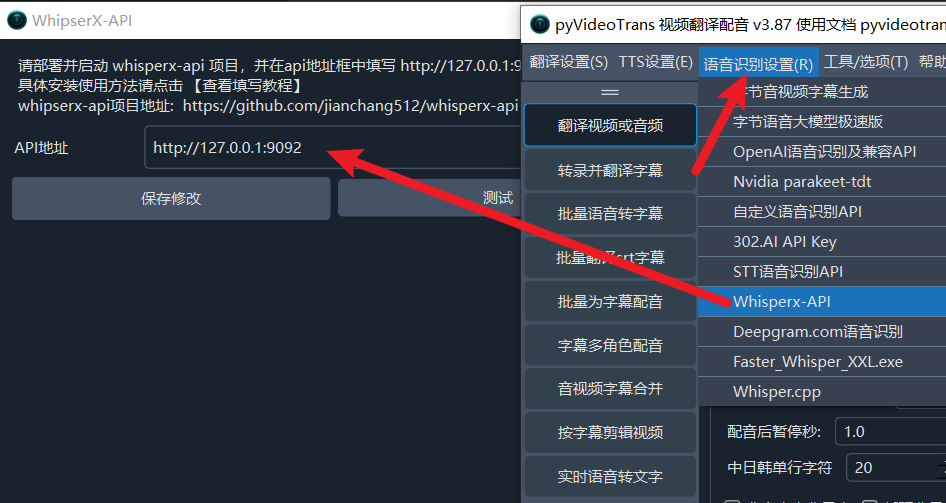
将该地址填写到 pyVideoTrans → 菜单 → 语音识别设置 → whisperxAPI 窗口的 API 地址文本框 内即可。
同时也会在浏览器中看到简洁的网页界面。如果不需要在浏览器中使用,可关掉这个页面,但如果需要 API 调用,不可关闭 cmd 终端。
在 pyVideoTrans 中使用
配置步骤
- 确保
whisperx-api服务正在本地运行(cmd 终端不要关闭) - 打开
pyVideoTrans软件 - 在菜单栏中,选择 语音识别(R) → WhisperX API
- 在弹出的配置窗口中,将 API 地址 设置为:
http://127.0.0.1:9092 - 点击 "保存",即可开始使用
参数说明
| 参数 | 值 | 说明 |
|---|---|---|
| API 地址 | http://127.0.0.1:9092 | whisperx-api 的服务地址,程序会自动拼接 /v1 |
| api_key | 123456(任意值) | 程序内部固定使用,无需修改 |
| max_speakers | -1 / 0 / >0 | -1=不启用说话人分离,0=不限制数量,>0=最大说话人数量 |
说话人分离说明
- 启用说话人分离后,识别结果会自动标注
spk0、spk1等标签 - 说话人信息会保存到缓存文件夹的
speaker.json文件中 - 如果音频中只有一个人说话,不会显示说话人标签
- 需要正确配置 HuggingFace Token 和同意模型协议才能使用此功能
常见连接错误
如果启动 pyVideoTrans 后提示连接失败,请检查:
- whisperx-api 是否已启动 —— cmd 终端窗口是否还在运行
- 端口是否正确 —— 默认端口为
9092 - API 地址格式 —— 填写
http://127.0.0.1:9092,不要加/v1(程序会自动拼接)
使用方法
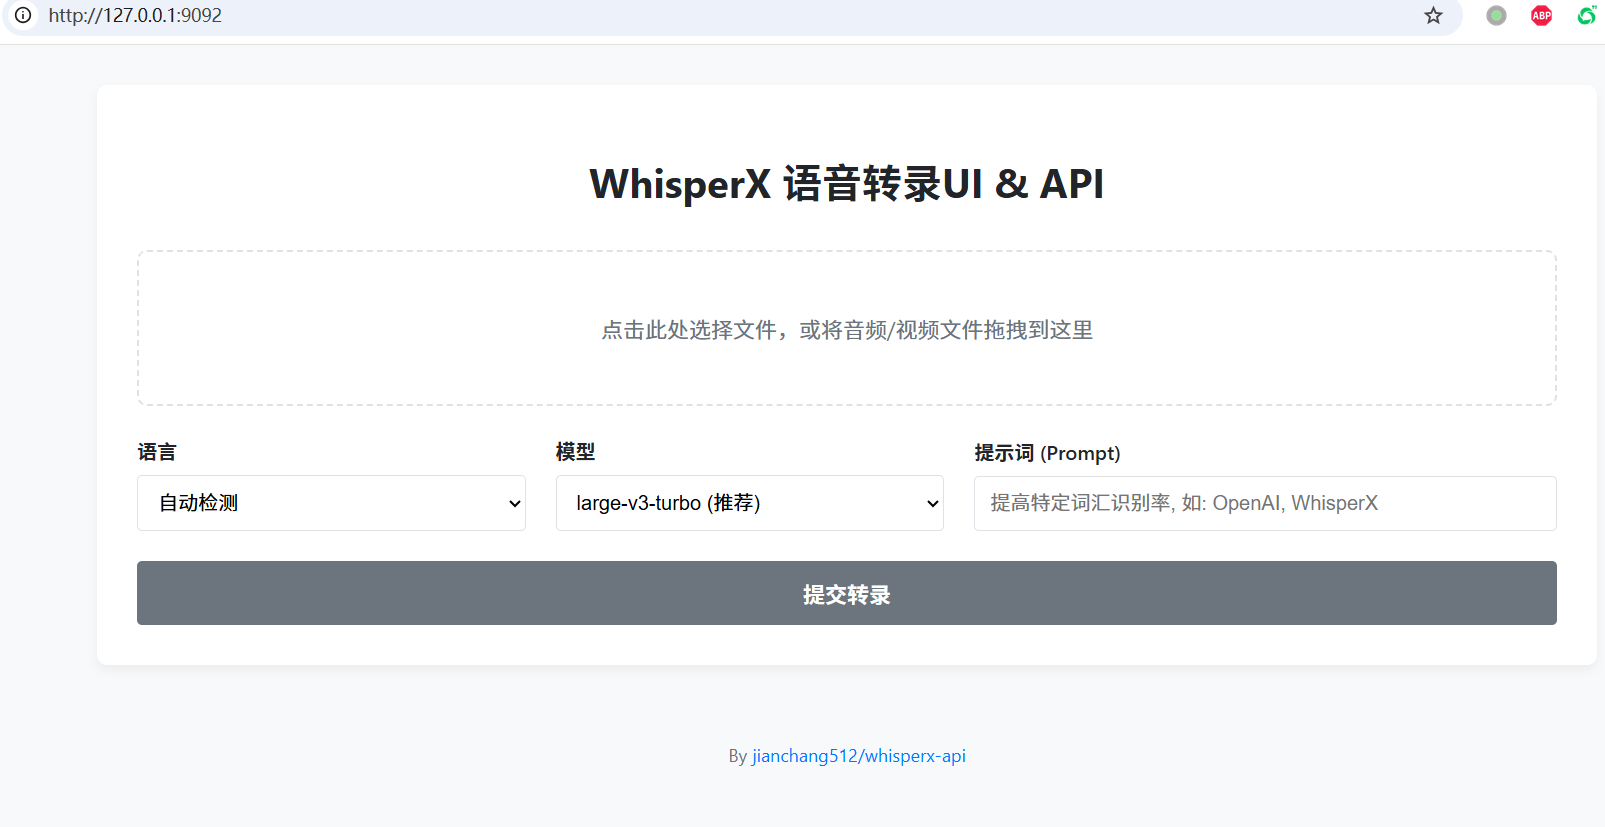
方式一:网页操作界面
- 上传文件 —— 点击或拖拽音频/视频文件到虚线框中
- 设置选项:
- 语言:知道语言就选对应语言,不确定选"自动检测"
- 模型:越大越准,但越慢。推荐
large-v3-turbo - 提示词(Prompt):可填写人名、术语等提高识别率,如
OpenAI, WhisperX, PyTorch
- 开始转录 —— 点击"提交转录",等待处理完成
- 查看与下载 —— 结果会显示在下方,可直接编辑后点击"下载 SRT 文件"保存
方式二:API 调用
将地址 http://127.0.0.1:9092 填写到 pyVideoTrans 的 whisperxAPI 设置中即可。
最佳配置建议
| 配置项 | 推荐值 | 说明 |
|---|---|---|
| 模型 | large-v3-turbo | 准确率和速度的最佳平衡 |
| 语言 | 知道则选对应语言 | 指定语言比自动检测更准确 |
| 计算设备 | GPU(CUDA) | 有 NVIDIA 显卡时强烈推荐 |
| max_speakers | 根据实际情况设置 | 多人对话设为实际人数,单人设 -1 |
| 初始提示词 | 领域术语 | 可提高专业词汇识别准确率 |
常见问题
Q:启动时报 "FFmpeg not found"?
A:没安装或未加入系统环境变量。请重新检查前置条件中的 FFmpeg 安装步骤。
Q:转录按钮点了没反应?
A:第一次运行会下载模型,请耐心等待。如果报错,请查看终端日志,通常是科学上网工具未开启或不稳定。
Q:为什么没有 [Speaker1]、[Speaker2]?
A:
- 音频中只有一个人说话时不会显示
- 或者你的 HuggingFace Token 配置错误、协议未同意,请重查第 2 步
Q:处理速度太慢?
A:如果是 CPU 模式,确实较慢。有 NVIDIA 显卡的用户速度会快数十倍。
Q:模型下载失败?
A:请确保科学上网工具已开启并保持稳定,建议在 VPN 中开启系统代理或全局模式,否则模型无法正常下载。
Q:如何切换不同的 Whisper 模型?
A:在网页界面的"模型"下拉框中选择即可。较大的模型(如 large-v3)准确率更高但速度更慢,较小的模型(如 tiny、base)速度更快但准确率较低。推荐使用 large-v3-turbo。