MaxKB 新手保姆级教程:从零到一,亲手搭建你的专属 AI 知识库助手
你是否曾想过,能拥有一个只回答你自己领域知识的 AI 聊天机器人?一个能 7x24 小时为客户解答产品问题、为公司员工提供内部资料查询的智能客服?MaxKB 就是这样一款强大且开源的工具,它能帮助你轻松实现这个想法。
本文是一篇面向新手的、极其详尽的指南。将手把手带你完成 MaxKB 的安装、配置,并深入讲解如何创建和优化你的知识库,最后还将详细拆解其最强大的“高级应用”功能,让你真正掌握这个利器。
一、安装 MaxKB:三步搞定,小白也能行
对于新手而言,服务器环境配置往往是第一道坎。别担心,我们选用宝塔面板来简化一切操作。
准备 Docker 环境 登录你的宝塔面板,在左侧菜单栏中找到并点击
docker。如果你是第一次使用,系统会提示你安装 Docker。这是一个全自动的过程,你只需要点击确认,然后泡杯茶,等待它安装完成即可。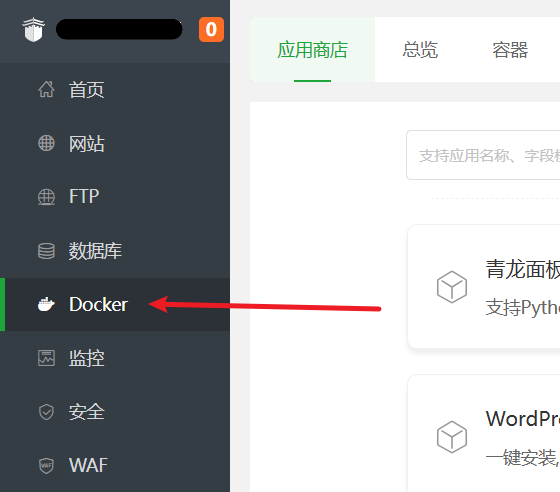
执行安装命令 Docker 环境就绪后,点击面板左侧的
终端,这会打开一个命令输入窗口。复制以下这行命令,粘贴进去,然后按下回车键。
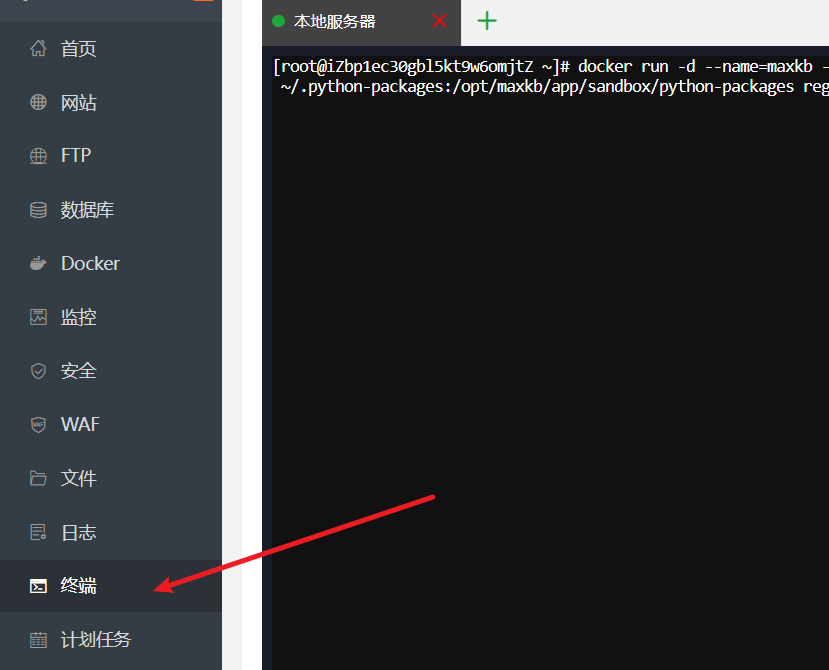
docker run -d --name=maxkb --restart=always -p 8080:8080 -v ~/.maxkb:/var/lib/postgresql/data -v ~/.python-packages:/opt/maxkb/app/sandbox/python-packages registry.fit2cloud.com/maxkb/maxkb这行命令在做什么?
docker run: 这是告诉 Docker 运行一个新容器。-d: 让容器在后台安静地运行。--name=maxkb: 给你的容器取个名字叫maxkb,方便管理。--restart=always: 确保容器在服务器重启后也能自动运行。-p 8080:8080: 将服务器的 8080 端口映射到容器的 8080 端口,让我们能访问到 MaxKB。-v ...: 这是最重要的一步,它将容器内的数据(如数据库和Python包)保存到你的服务器本地,这样即使容器被删除,你的数据也不会丢失。
- 验证安装 等待命令执行完毕。回到宝塔面板的
docker管理界面,点击容器列表。如果你能看到一个名为maxkb的容器,并且状态是“运行中”,那么恭喜你,MaxKB 已经成功安装并启动了!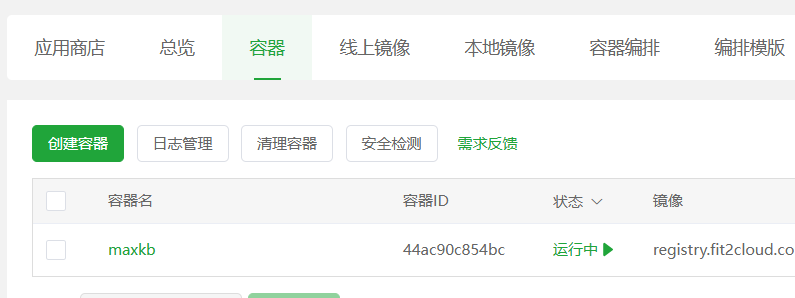
二、配置 Nginx 反向代理:让访问更专业
默认情况下,你需要通过 http://你的服务器IP:8080 这样的地址来访问 MaxKB,这既不方便记忆,也不够专业。下面我们来配置一下,让你可以通过自己的域名(例如 ai.xxx.com)来访问它。
创建站点 在宝塔面板的
网站部分,点击添加站点。创建一个纯静态站点,域名填写你准备好的域名(如ai.xxx.com),根目录会自动生成(如/www/wwwroot/ai.xxx.com),直接创建即可。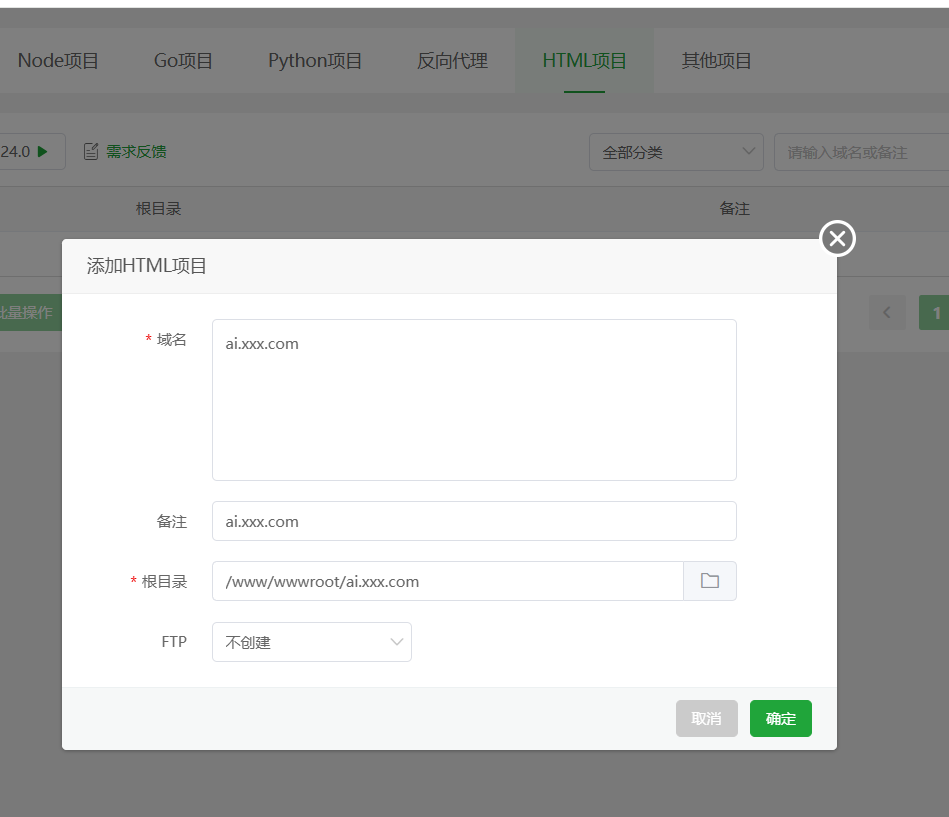 创建成功后,进入该网站的根目录(
/www/wwwroot/ai.xxx.com),在里面手动创建一个名为ui的空文件夹。修改 Nginx 配置文件 回到网站列表,点击你刚创建站点右侧的
设置,切换到配置文件选项卡。找到root /www/wwwroot/ai.xxx.com;这一行,在它的正下方,粘贴以下已经为你准备好的配置代码:nginx# CORS 跨域设置 add_header Access-Control-Allow-Origin '*' always; add_header Access-Control-Allow-Methods 'GET,POST,OPTIONS' always; add_header Access-Control-Allow-Headers 'DNT,X-Mx-ReqToken,Keep-Alive,User-Agent,X-Requested-With,If-Modified-Since,Cache-Control,Content-Type,Authorization,Access-Token,Token,formhash,shebei,token' always; # 处理 OPTIONS 预检请求 if ($request_method = 'OPTIONS') { return 204; } # 规则 1: 优先处理静态 UI 资源,找不到再反代 location ^~ /ui/ { add_header Cache-Control "public, max-age=2592000, immutable"; proxy_hide_header Content-Disposition; try_files $uri $uri/ @backend_proxy; } # 规则 2: 捕获所有其他api请求 location / { # 直接跳转到命名 location 进行代理 try_files $uri @backend_proxy; } location @backend_proxy { proxy_pass http://127.0.0.1:8080; proxy_set_header Host $http_host; proxy_set_header X-Real-IP $remote_addr; proxy_set_header X-Real-Port $remote_port; proxy_set_header X-Forwarded-For $proxy_add_x_forwarded_for; proxy_set_header X-Forwarded-Proto $scheme; proxy_set_header X-Forwarded-Host $host; proxy_set_header X-Forwarded-Port $server_port; proxy_set_header REMOTE-HOST $remote_addr; proxy_connect_timeout 60s; proxy_send_timeout 600s; proxy_read_timeout 600s; proxy_http_version 1.1; proxy_set_header Upgrade $http_upgrade; proxy_set_header Connection $connection_upgrade; }粘贴后,点击保存。
添加 Docker 卷映射(关键一步) 这一步的目的是让 Nginx 能直接访问到 MaxKB 容器内部的前端界面文件,实现动静分离,可以大大加快页面的加载速度。
- 进入宝塔面板
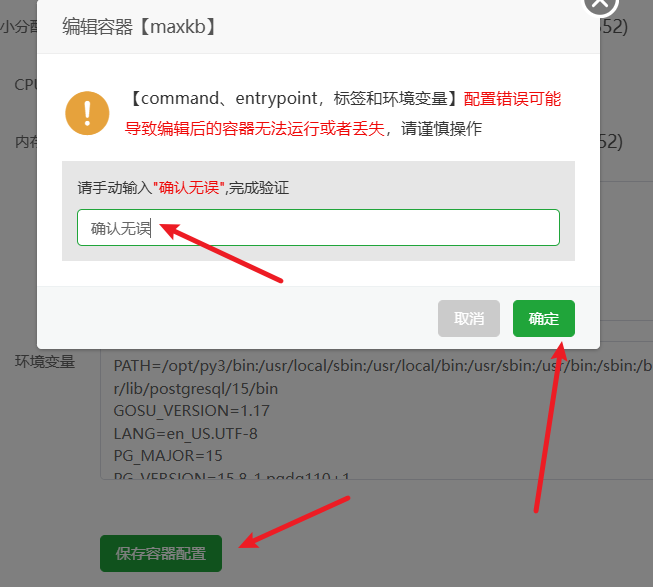
docker->容器-> 找到maxkb容器 -> 点击管理->编辑容器。 - 点击
更多设置,点击查看,找到挂载/映射部分。 - 点击
本机目录,新增一条映射规则:- 本机目录:填入
/www/wwwroot/ai.xxx.com/ui(也就是你在第1步创建的那个ui文件夹) - 容器目录:填入
/opt/maxkb/app/ui/dist/ui(这是 MaxKB 容器内 UI 文件的固定路径,直接复制粘贴即可)

- 本机目录:填入
- 将页面拉到最底部,点击保存。容器会自动重启以应用新的设置。
一切就绪!现在,打开浏览器,输入你的域名
http://ai.xxx.com/ui,你应该就能看到 MaxKB 的登录界面了。- 进入宝塔面板
三、使用自定义向量模型:m3e-base
什么是向量模型? 简单来说,它就像一个“翻译官”,能把我们的文字(比如你的文档和用户的问题)翻译成计算机能理解的数学语言(向量)。只有翻译得准,计算机才能准确地在你的知识库里找到最相关的内容。
虽然 MaxKB 自带了向量模型,但我们可以换一个在中文处理上更优秀的模型,比如 m3e-base。
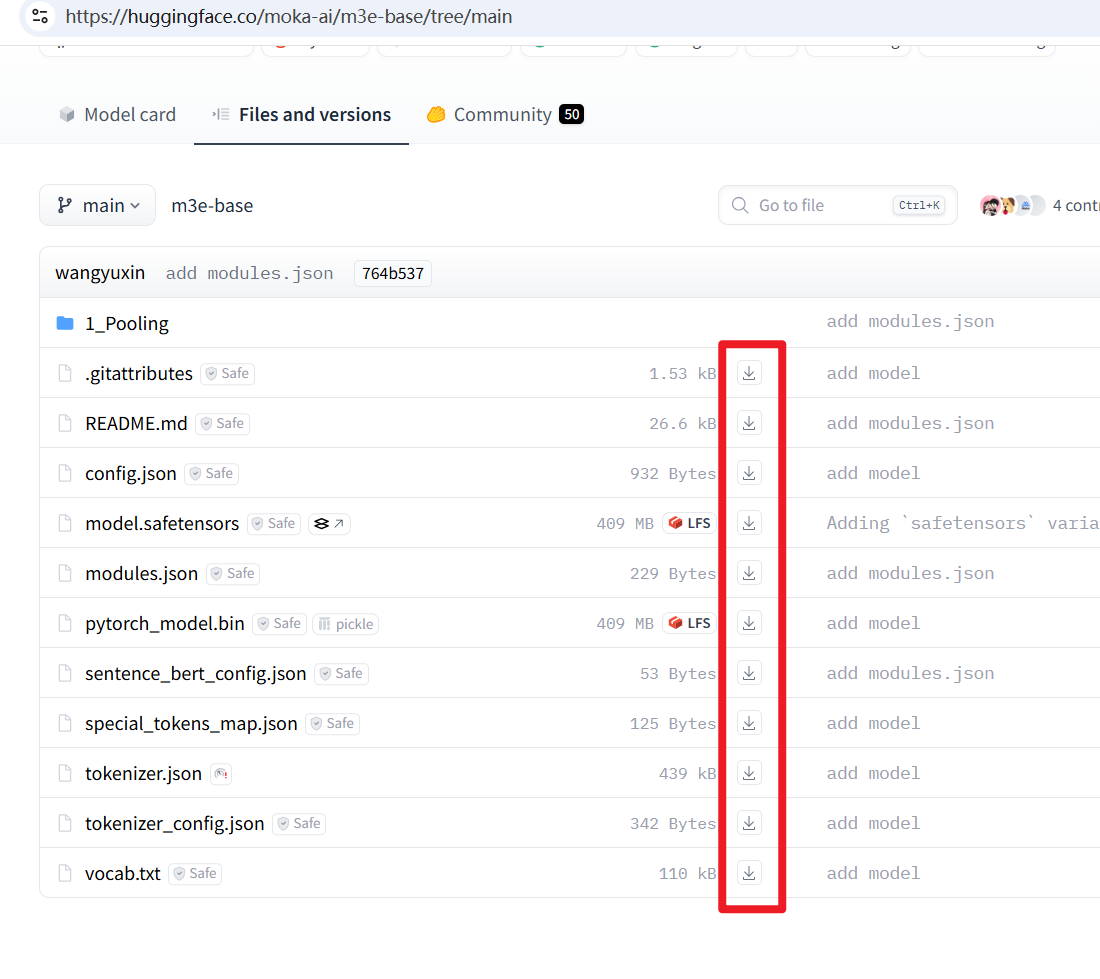
- 下载模型文件: 访问 Hugging Face 模型页面 https://huggingface.co/moka-ai/m3e-base/tree/main ,将页面上看到的所有文件都下载到你的电脑上。
- 在服务器上创建并上传模型:
- 在宝塔面板的
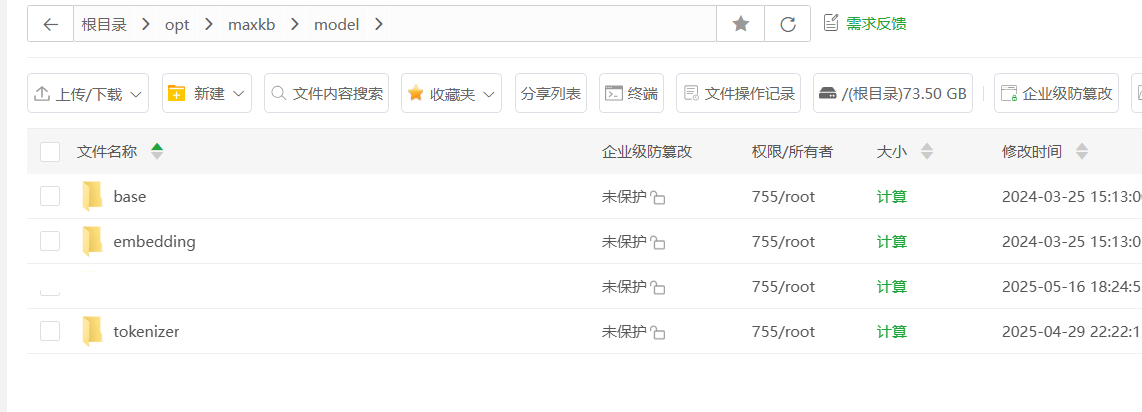
文件管理中,进入/根目录,然后依次创建/opt/maxkb/model这两层目录。
- (可选但推荐)回到终端,执行
cd /opt/maxkb && docker cp maxkb:/opt/maxkb/model .命令,将容器内的默认模型复制出来作为备份。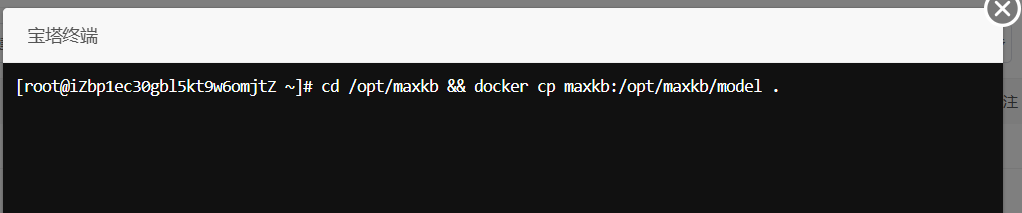
- 在
/opt/maxkb/model目录下,按照这个层级models--moka-ai--m3e-base创建新的文件夹,然后将你第一步下载的所有m3e-base模型文件,全部上传到这个新建的m3e-base文件夹里。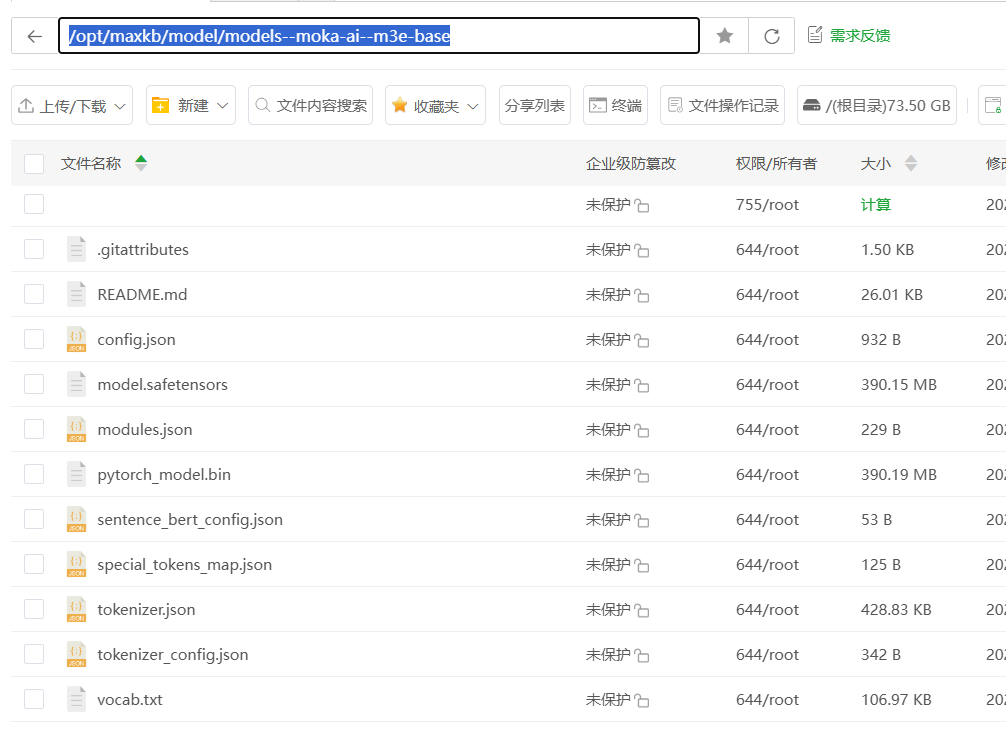
- 在宝塔面板的
如果你觉的一个个下载模型太麻烦,可以直接使用 脚本下载 必须保证服务器已安装 python3.8+版本和git工具,然后依次执行下列命令
git clone https://github.com/LetheSec/HuggingFace-Download-Accelerator.git
cd  HuggingFace-Download-Accelerator
python3  hf_download.py --model moka-ai/m3e-base --save_dir  m3e-base
# 下载完毕后,将`models--moka-ai--m3e-base`文件夹复制到 `/opt/maxkb/models`目录下
如果你的机器配置比较高,也可以使用 m3e-small 模型,效果会更好,只需要将上述示例中的base 字符都改成 small
将模型目录挂载到容器: 和上一步类似,再次编辑
maxkb容器,添加一条新的卷映射:- 本机目录:
/opt/maxkb/model - 容器目录:
/opt/maxkb/model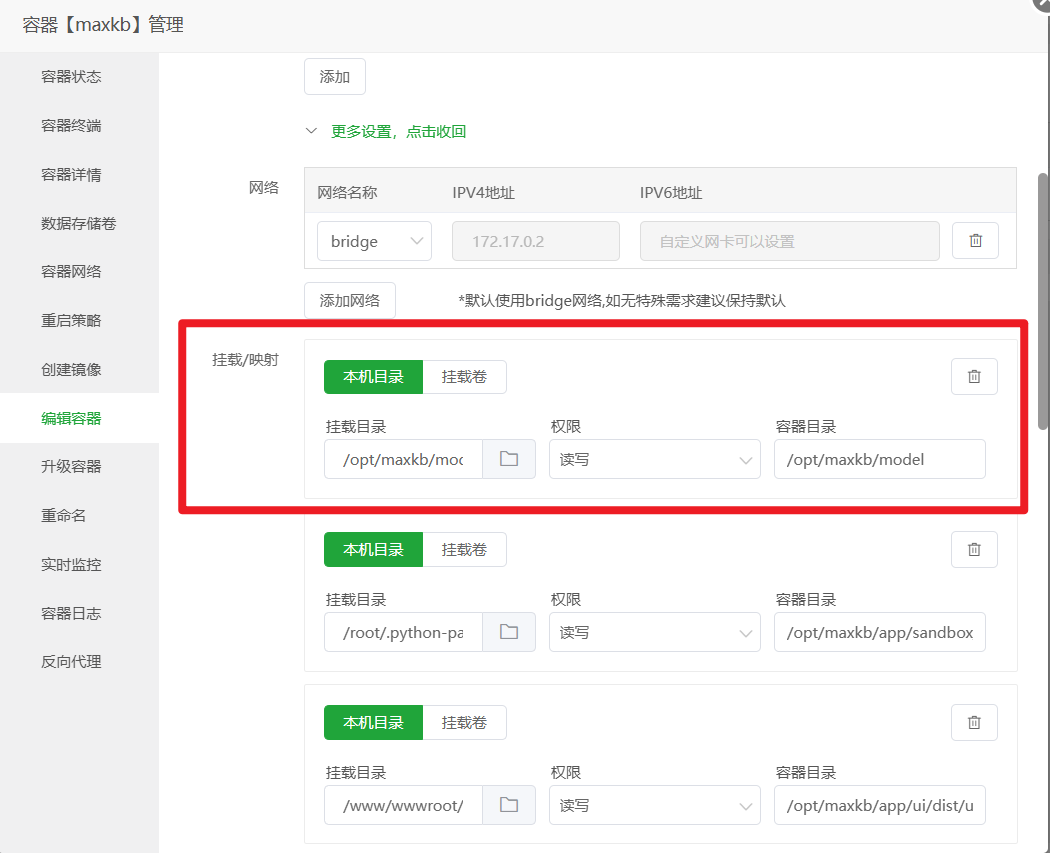 保存并等待容器重启。
- 本机目录:
在 MaxKB 后台添加新模型: 登录 MaxKB,进入
系统设置->模型设置->添加模型,选择本地模型。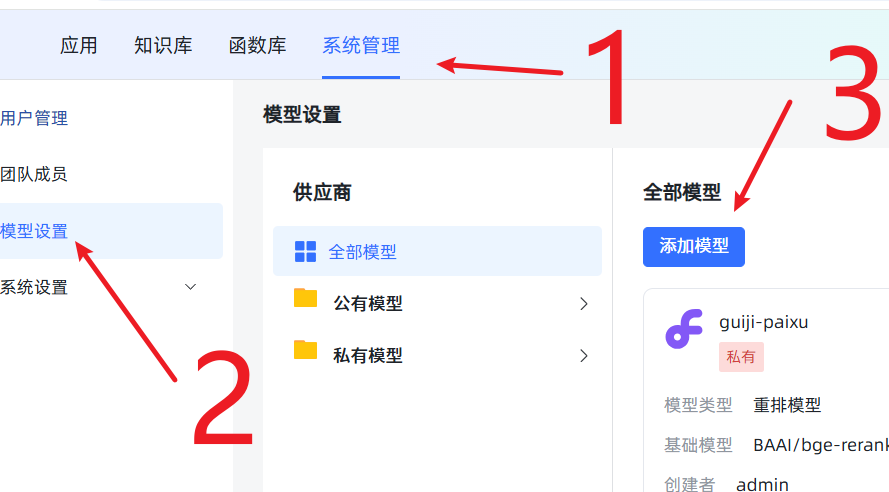
- 模型名称:可以随意取,比如
m3e。 - 模型类型:务必选择
向量模型。 - 基础模型 和 模型目录:都填写你上传模型的绝对路径
/opt/maxkb/model/models--moka-ai--m3e-base。为避免出错,建议直接复制粘贴这个路径。 点击保存。如果没有报错,就说明添加成功了!如果报错,99%的可能是你填写的路径和服务器上的实际路径不符,请仔细检查。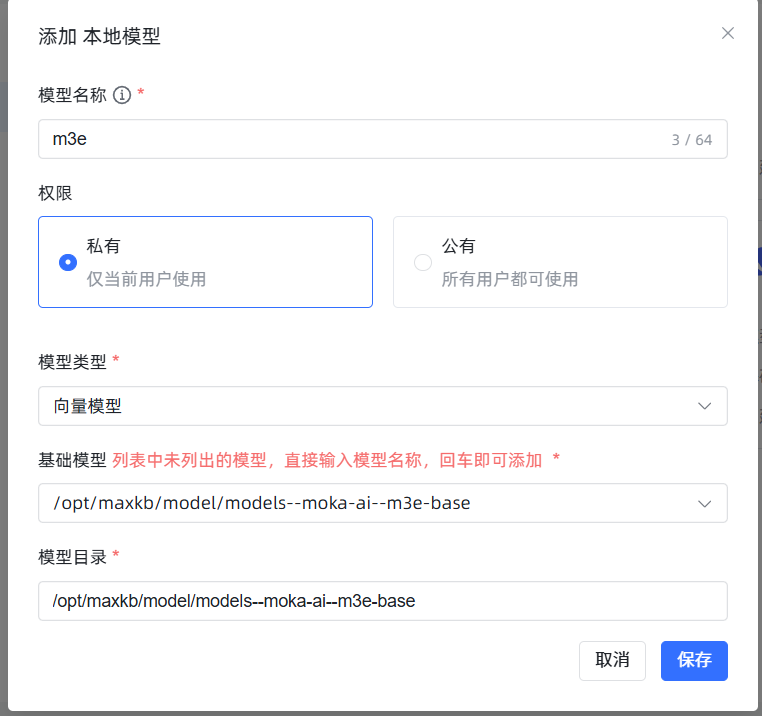 成功后效果如图:
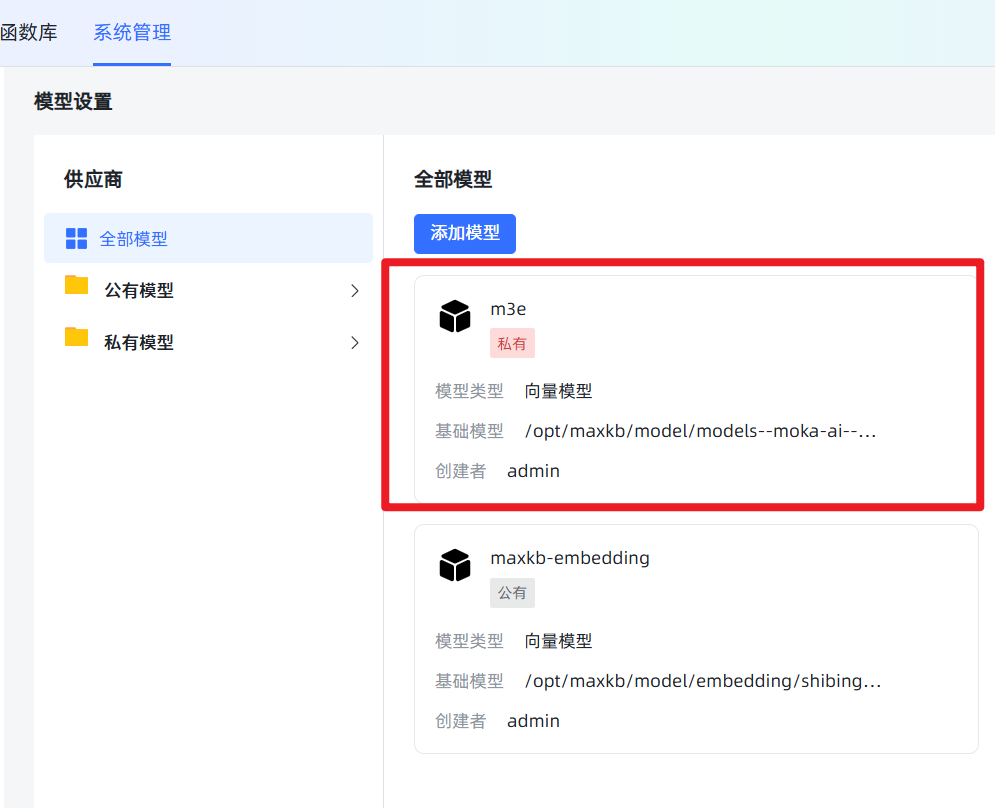
- 模型名称:可以随意取,比如
四、添加 DeepSeek 大语言模型
如果说向量模型是帮你找资料的“图书管理员”,那大语言模型(LLM)就是阅读资料并组织语言回答你的“专家”。这里我们添加一个性价比很高的 DeepSeek 模型。
在 模型设置 中,点击 添加模型,选择 DeepSeek。填写一个自定义名称(如 deepseek-chat),模型选择 deepseek-chat,然后将在 DeepSeek 官网获取的 API Key 填入即可。 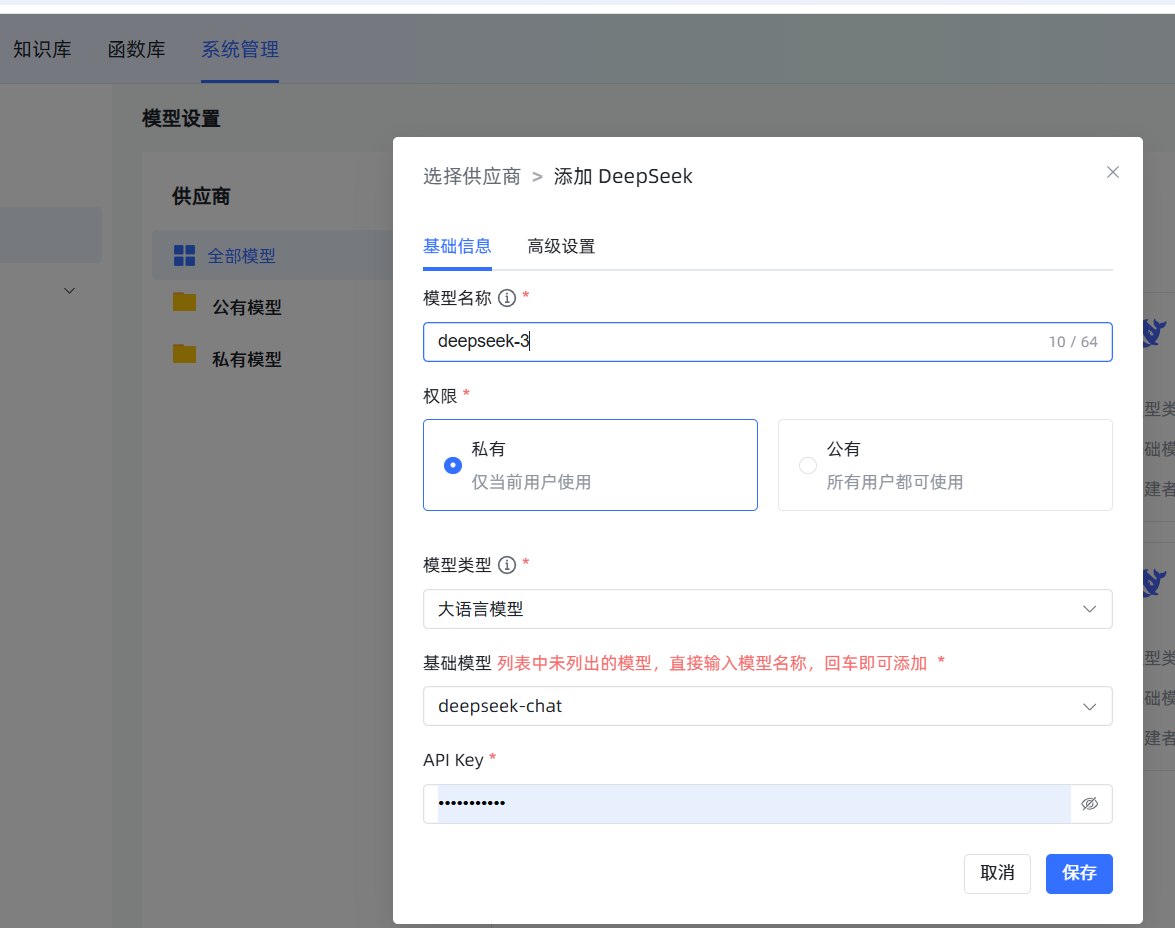
五、创建知识库及注意事项
这是最核心的一环,知识库的质量直接决定了你的 AI 助手的“智商”。
创建时务必选对向量模型:点击
知识库->新建知识库。在创建界面,最重要的一步是向量模型的选择,请选择我们刚刚添加的m3e。一旦知识库创建并导入了文档,再想更换模型,就意味着所有文档都要删掉重来,非常耗时耗力!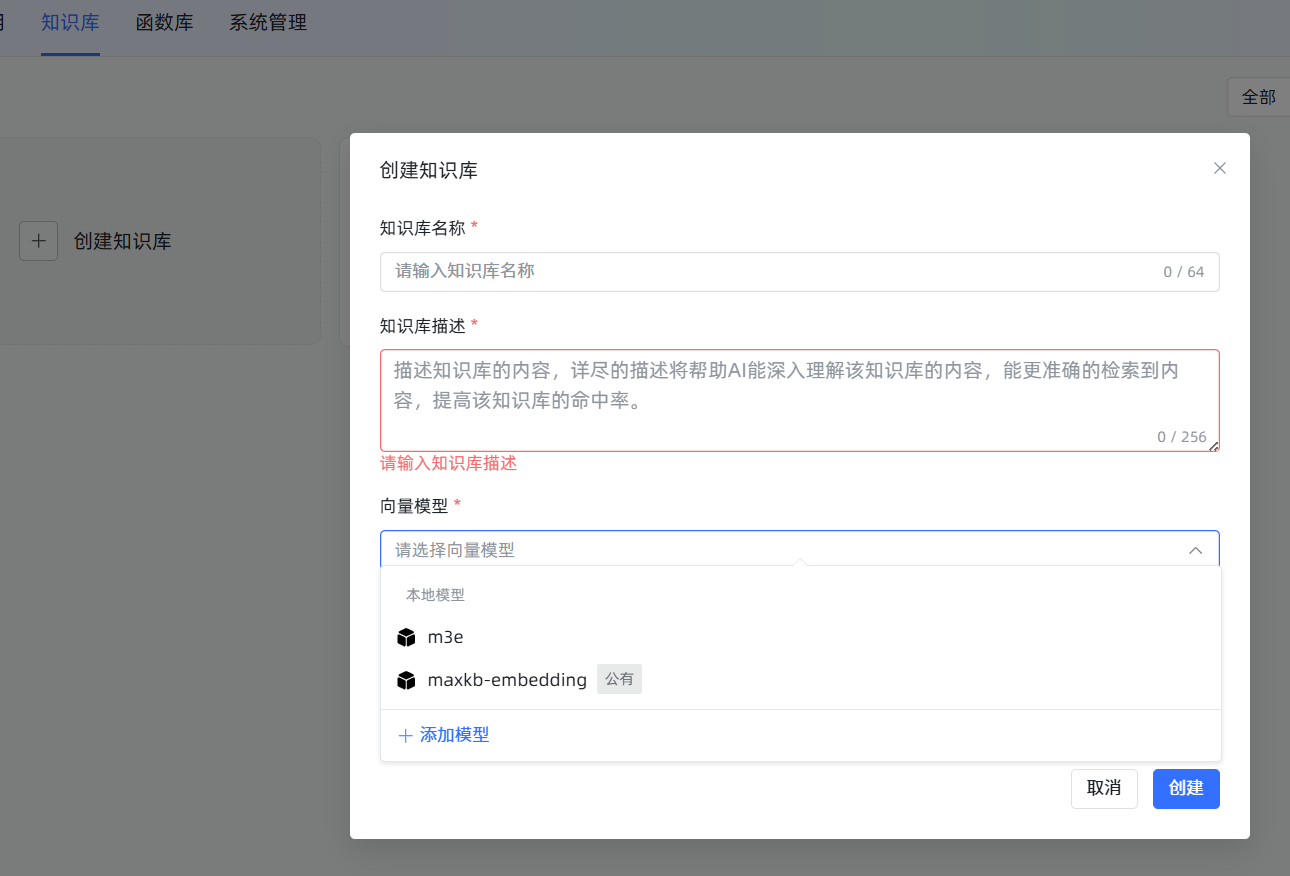
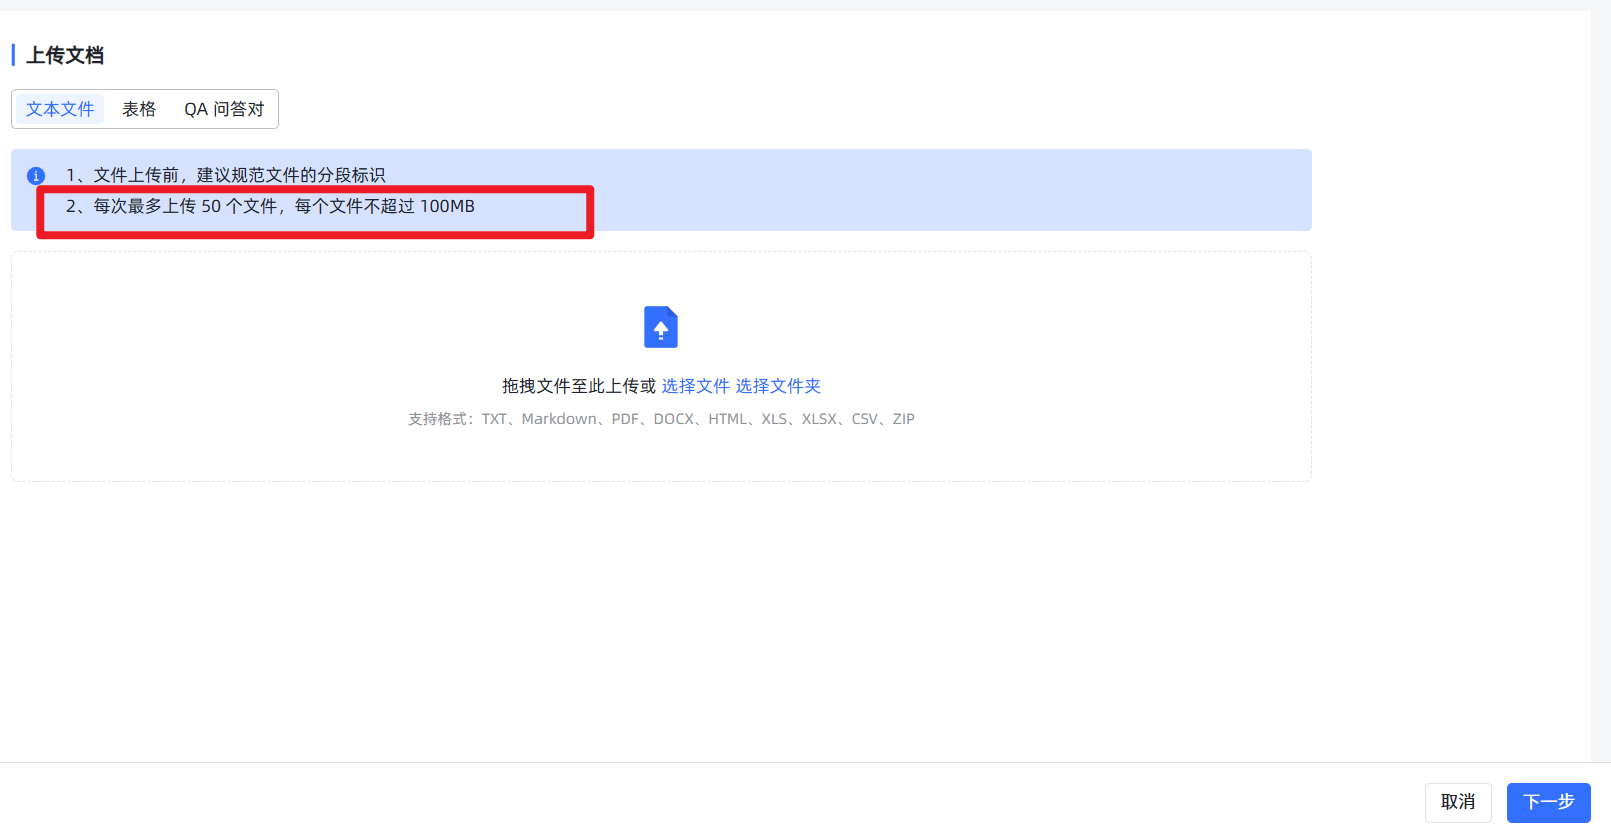
知识库上传法则:
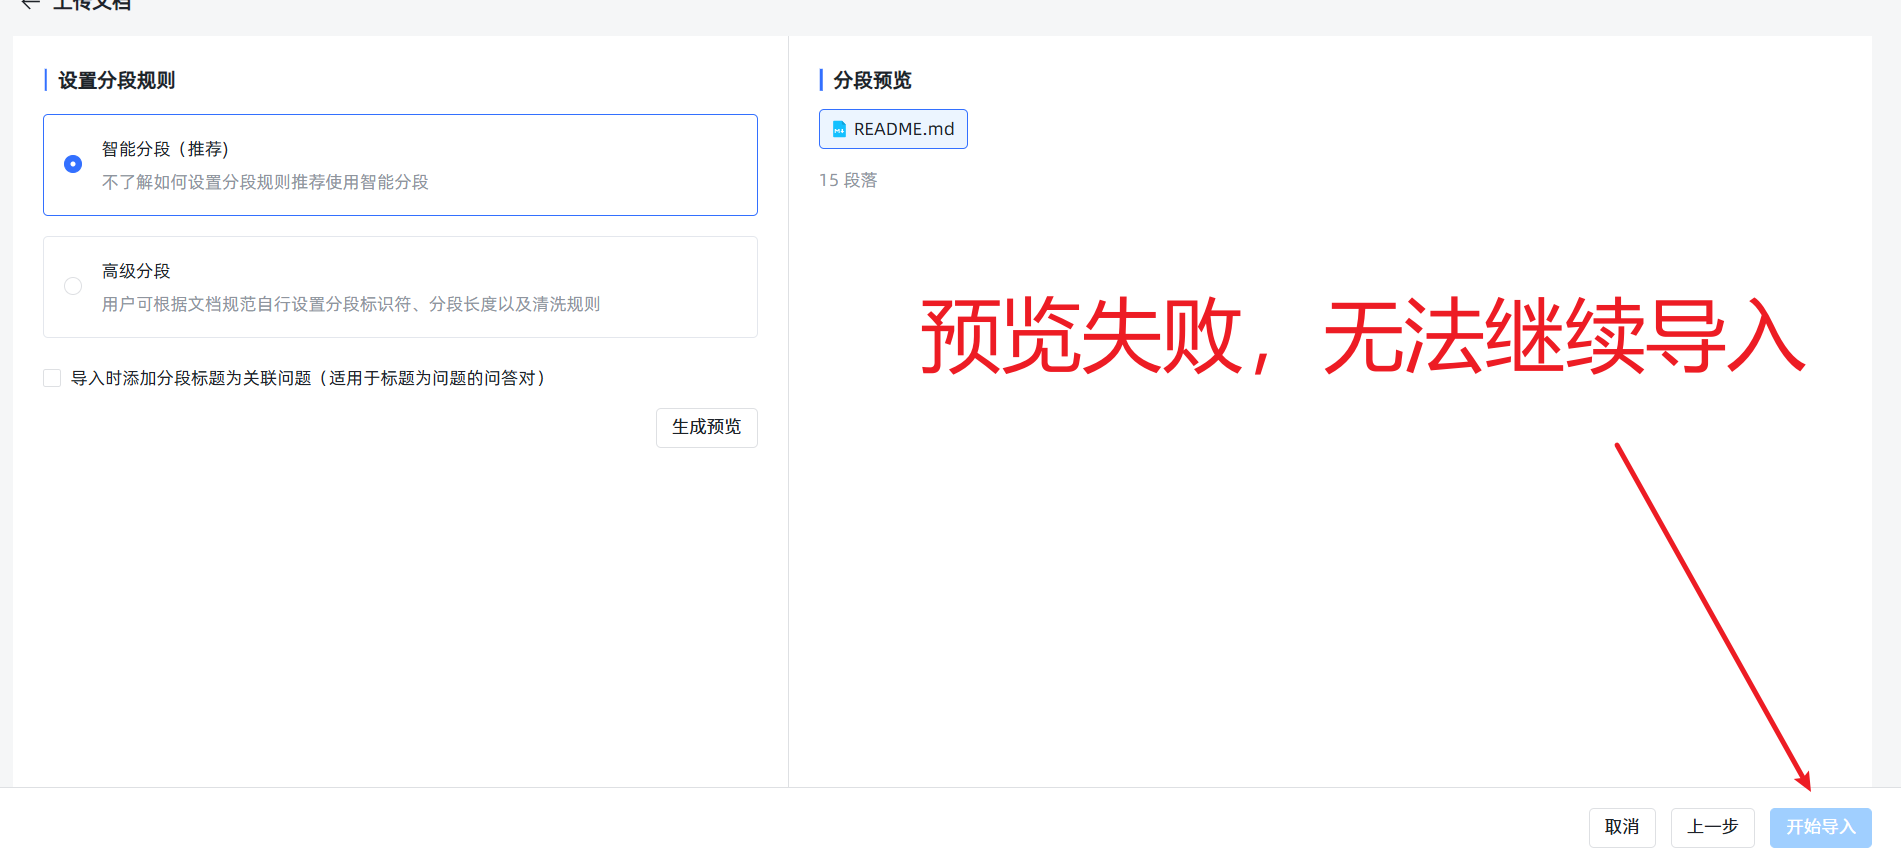
- 法则一:小文件,分批传。 虽然系统提示可以上传很大的文件,但除非你的服务器是“天河二号”,否则请务必将大文档(比如一个超过20MB的文件)手动拆分成多个小文件。单次上传的文件数量也最好控制在5个以内,否则下一步的预览可能会失败,造成无法导入。
- 法则二:忽略“假失败”,查看真进度。 当你上传了稍大的文件并开始导入后,前端页面可能会因为等待超时而显示红色的
失败提示。别慌!这通常是假象! 后端的向量化任务其实还在勤勤恳恳地运行。你可以忽略这个提示,直接到知识库的文件列表页面,那里会显示真实的处理进度。当然,最好的策略还是遵守第一条法则,从源头上避免这个问题。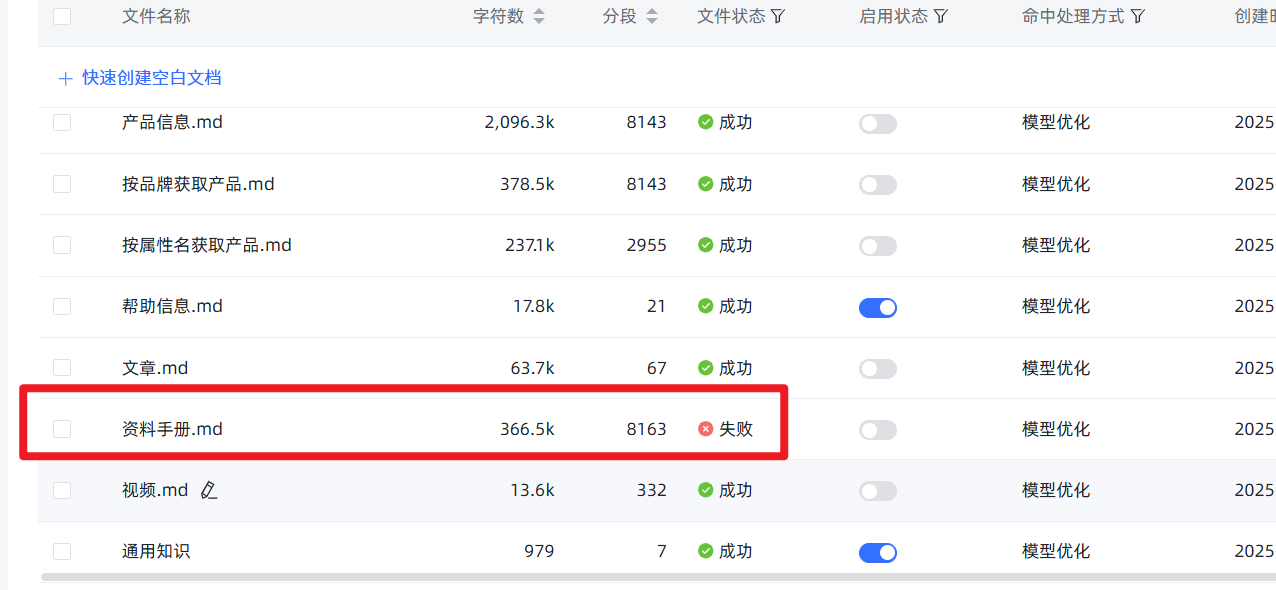
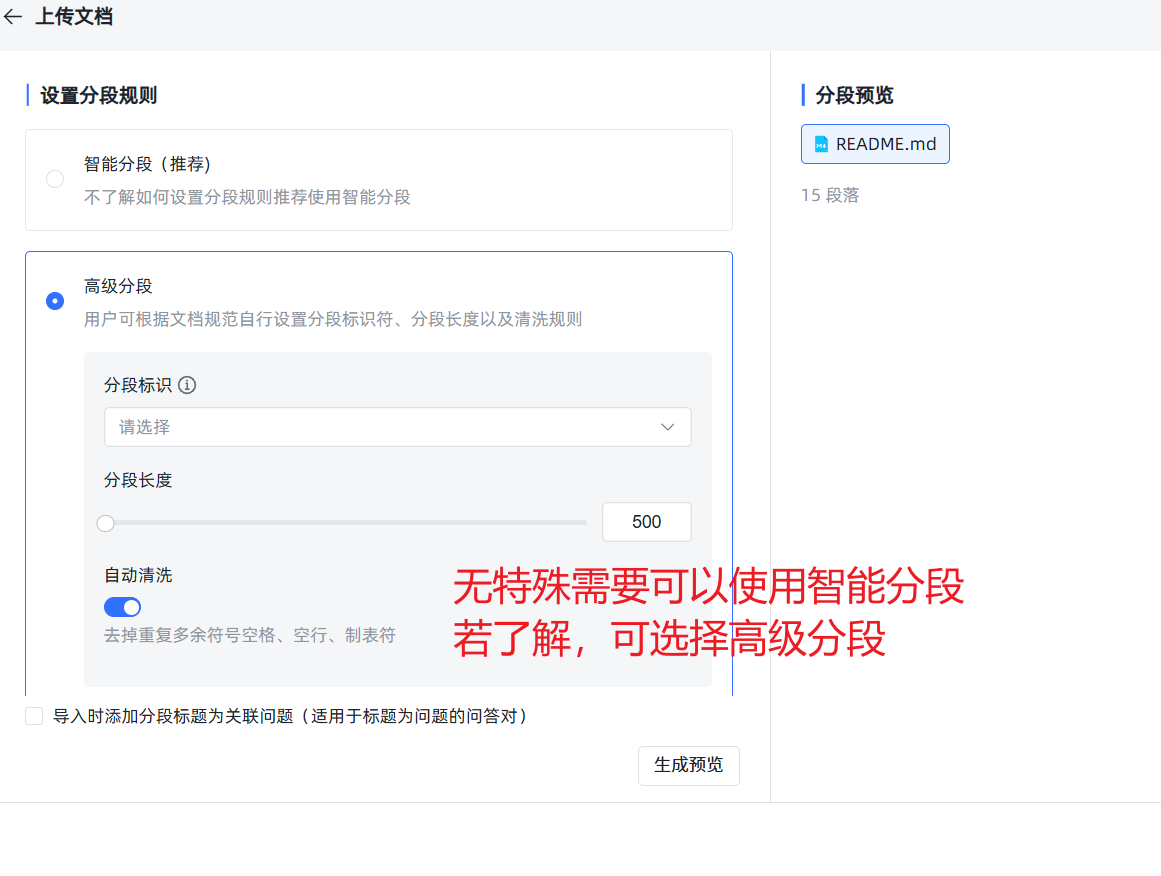
- 法则三:开启“混合检索”。 在知识库的设置里,强烈建议开启“混合检索”。它会同时使用语义(像人一样理解)和关键词(像传统搜索一样)两种方式来查找,能大大提高找到正确信息的概率。
六、创建高级应用:给你的 AI 装上“大脑”
高级应用是 MaxKB 的精髓所在。它让你能像搭积木一样,设计 AI 的工作流程。 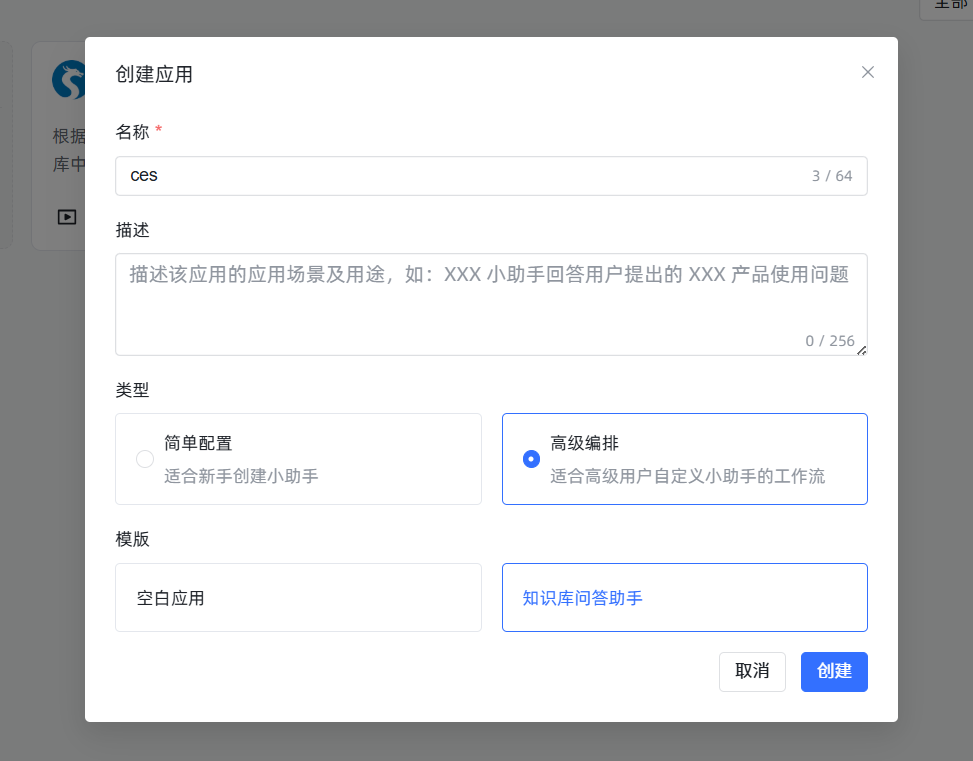 进入编辑界面后,你会看到一个流程图画布。
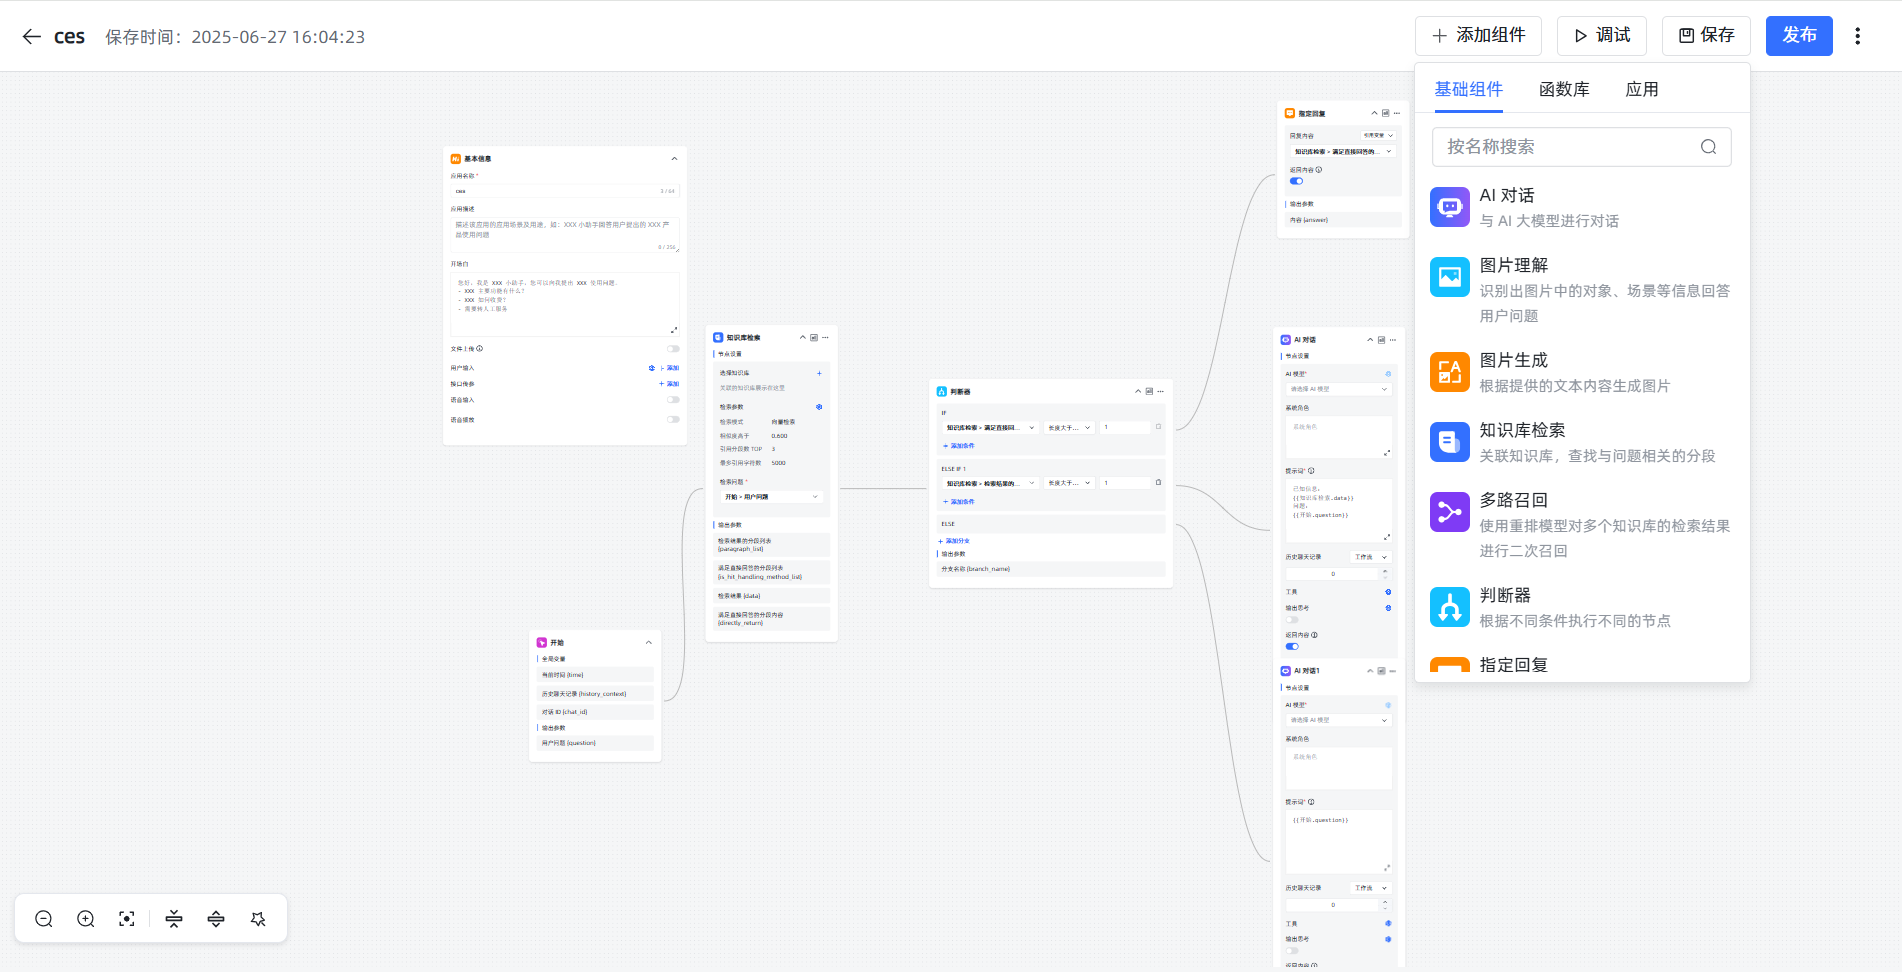
操作铁律:
- 对画布的任何修改,都必须点击右上角的
保存。- 保存后,必须点击
发布,你的改动才能在聊天窗口真正生效。
核心概念:节点与变量
- 节点:画布上的每一个方块都是一个“节点”,代表一个功能,比如“开始”、“知识库检索”。每个节点左上角都有一个中文名字,我们可以修改它。
- 变量:节点之间通过“变量”来传递信息。变量的格式是固定的:
\{\{节点名.输出变量名\}\}。- 举例说明:
\{\{开始.question\}\}的意思是:找到名为开始的那个节点,获取它输出的一个名为question的变量的值。在默认流程里,这个值就是用户输入的问题。同理,\{\{知识库检索.data\}\}就是获取知识库检索节点找到的知识片段。
- 举例说明:
默认流程详解
- 开始:这是起点。用户输入一句话,这个节点就把它打包成一个名为
question的变量。 - 知识库检索:这是“图书管理员”。它的“检索问题”栏里需要填入
\{\{开始.question\}\},告诉它要根据用户的问题去知识库里找资料。它找到的资料会打包成data变量。 - 判断器:这是“交通警察”。它根据条件指挥流程走向。例如,它可以判断
知识库检索.data是否为空,如果找到了资料就走 IF 分支,没找到就走 ELSE 分支。 - AI 对话:这是“专家”。它最重要的设置是 提示词 (Prompt),也就是给 AI 下达的指令。
一个优秀的提示词模板:
你是XX公司的专业客服。请严格根据下面[已知信息]来回答用户的[问题],禁止使用任何你自己的知识或进行编造。如果[已知信息]中没有答案,就回复:"抱歉,关于您的问题,我暂时没有找到相关信息。"

[已知信息]:
\{\{知识库检索.data\}\}

[问题]:
\{\{开始.question\}\}这个模板清晰地告诉 AI 它的角色、信息来源、回答的依据以及找不到答案时的标准回复。
玩法升级:使用“函数”组件
假如你想在每个回答后面都自动加上一个时间戳,怎么办?“函数”节点可以帮你实现!
实战:为 AI 的回答添加时间戳
添加节点:在“AI 对话”节点之后,从右侧组件列表拖入一个“函数”节点,并用鼠标将它们连接起来。
编写代码:点击“函数”节点进行设置。在代码编辑器里,粘贴以下 Python 代码:
pythonimport datetime # 这是固定的函数入口,ai_answer 是我们自己定义的输入参数名 def process(ai_answer: str) -> dict: # 获取 AI 的原始回答 # ai_answer 这个变量名可以自己取,但要和下面的输入参数设置保持一致 # 获取当前北京时间并格式化 beijing_time = datetime.datetime.utcnow() + datetime.timedelta(hours=8) time_str = beijing_time.strftime("%Y-%m-%d %H:%M:%S") # 将原始回答和时间戳拼接成新的文本 final_response = f"{ai_answer}\n\n---\n*该回答由 AI 生成于 {time_str}*" # 将处理结果以字典形式返回 # "response_with_timestamp" 将成为这个函数节点的输出变量名 return {"response_with_timestamp": final_response}配置输入参数:在函数节点的“输入参数”部分,点击“添加”,参数名填写
ai_answer(与代码中保持一致),参数值填写\{\{AI对话.answer\}\}。这一步是告诉函数,它的输入数据来自哪里。使用函数输出:这个函数执行后,会产生一个名为
response_with_timestamp的新变量。现在,在流程最后的“结束”节点里,将它的answer字段的值从原来的\{\{AI对话.answer\}\}改为\{\{函数.response_with_timestamp\}\}。
更多函数可查看maxkb官方论坛分享: https://bbs.fit2cloud.com/t/topic/11004 更多高级应用玩法可参考论坛帖子: https://bbs.fit2cloud.com/t/topic/7753
通过以上步骤,你就成功地对 AI 的输出进行了自定义加工!MaxKB 的强大之处就在于此,通过这些节点的自由组合,你可以创造出满足各种复杂需求的智能应用。