零依赖、高效率的语音转文字神器:whisper.cpp 保姆级入门教程 (附批量处理脚本)
语音转录这个领域,OpenAI 的 Whisper 模型无疑是目前知名度最广、支持语言最多的选择。
围绕 Whisper,也涌现出了许多优秀的衍生项目,比如 faster-whisper,以及支持说话人分离的 whisperx。以及本文要介绍的whisper.cpp。
为什么选择 whisper.cpp?
whisper.cpp 是 Whisper 模型的一个 C++ 实现版本,它的核心优势非常突出:
- 几乎无依赖:这是它最大的亮点。不同于其他需要通过
pip安装一大堆 Python 库的项目,whisper.cpp几乎没有依赖。你再也不用担心陷入恼人的环境配置、模块安装错误和版本冲突的“深坑”里了。 - 性能卓越:C++ 带来的原生性能优势,让它的转录速度非常快,资源占用也相对较低。
- 跨平台与硬件支持:无论是 Windows、macOS还是 Linux,它都能良好运行。更棒的是,它支持多种硬件加速,从主流的 NVIDIA (CUDA)、AMD (OpenCL) 显卡,到苹果的 Metal 框架,甚至是专用 NPU,都能利用起来进一步提速。
- 部署简单:可以直接下载官方编译好的可执行文件,解压即用,整个程序包非常小巧。
当然,它也有一个对新手来说不太友好的地方:纯命令行操作。
不过别担心,这篇文章就是为了解决这个问题而生的。本文将手把手带你完成从下载到使用的全过程,并提供一个专为 Windows 用户定制的批量处理脚本。你只需要复制粘贴,就能实现双击鼠标,一键转录文件夹内所有音视频文件。
第一步:准备工作
在开始转录之前,需要先准备好必要的程序和文件。
1. 下载 whisper.cpp 主程序
首先,需要根据自己的操作系统和硬件情况,下载对应的预编译版本。
下载地址: https://github.com/ggml-org/whisper.cpp/releases/tag/v1.8.2
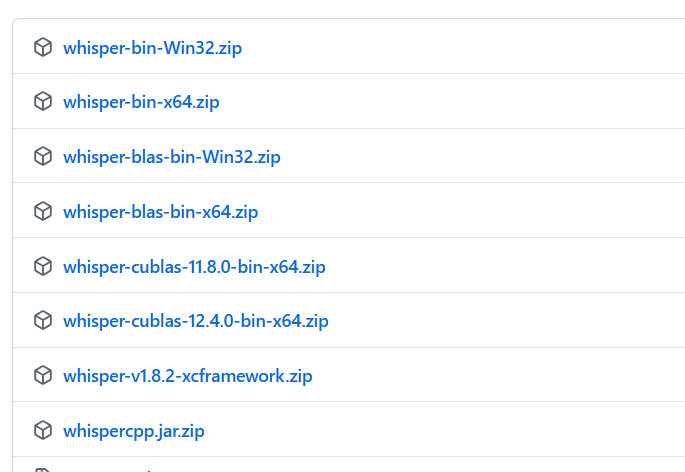
如何选择?
- Windows (无 NVIDIA 显卡):下载
whisper-bin-x64.zip。 - Windows (有 NVIDIA 显卡):请根据你安装的 CUDA 版本选择。例如,安装了 CUDA 12.x,就下载
whisper-cublas-12.4.0-bin-x64.zip;安装了 CUDA 11.x,就下载whisper-cublas-11.8.0-bin-x64.zip。利用 GPU 加速能极大提升转录速度。 - macOS 用户:下载
whisper-v1.8.2-xcframework.zip。
2. 解压并整理文件结构
下载完成后,将压缩包解压。强烈建议解压到一个不包含中文和空格的简短路径下,例如 D:\whispercpp,这样可以避免很多不必要的麻烦。
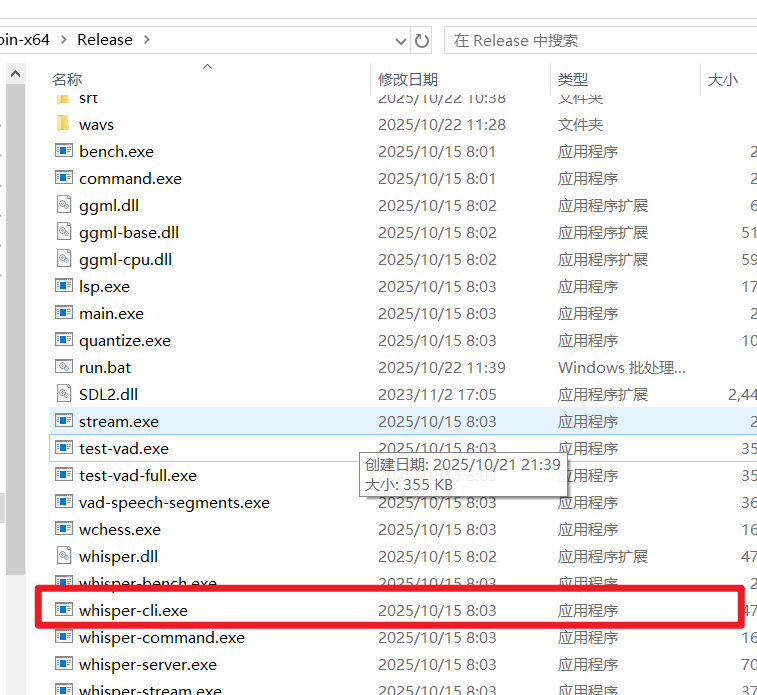
解压后,进入文件夹,确保你能看到一个名为 whisper-cli.exe的文件(下文我们称这个文件夹为whisper.cpp根目录)。
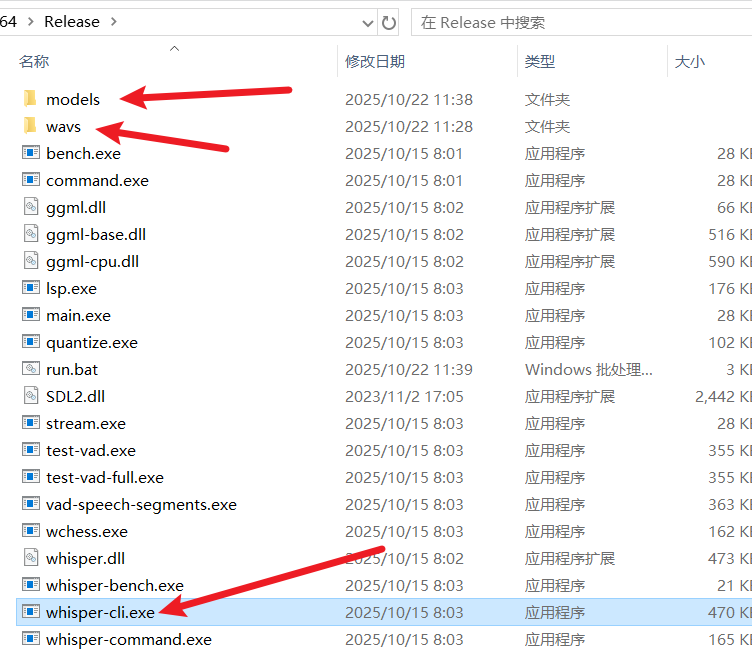
为了方便管理,我们在这个文件夹内手动创建两个新的子文件夹:
models: 用于存放稍后下载的转录模型文件。wavs: 用于存放所有需要转录的音频或视频文件。
3. 准备 FFmpeg (可选但强烈推荐)
whisper.cpp 本身只处理标准格式的 .wav 音频文件。如果你的文件是 mp3、m4a 等其他音频格式,甚至是 mp4、mkv 等视频格式,直接处理可能会报错或得到空白结果。
这时,我们就需要一个强大的工具来帮忙——FFmpeg。它可以轻松地将各种格式的文件转换成 whisper.cpp 需要的格式。
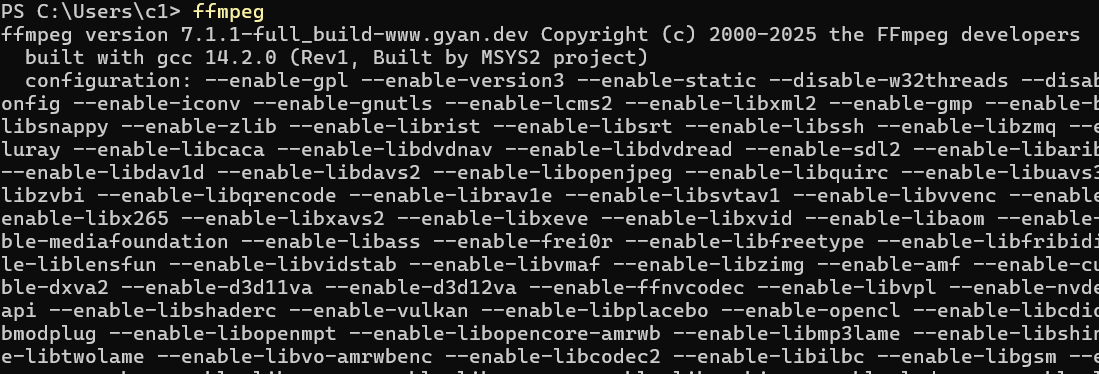
- 检查是否已安装:打开命令行窗口(cmd),输入
ffmpeg并回车。如果显示一堆版本信息,说明已安装并配置好环境变量。如果提示“命令未找到”,则需要手动下载。

- 下载 FFmpeg:
- 懒人版: 作者已提供单独的
ffmpeg.exe文件,下载后直接放到whisper-cli.exe所在目录下即可。https://github.com/jianchang512/stt/releases/download/0.0/ffmpeg.exe
- 官方版: 你也可以从 FFmpeg 官网下载最新版本,解压后,在
bin文件夹里找到ffmpeg.exe,同样复制到whisper-cli.exe所在目录下。
- 懒人版: 作者已提供单独的
4. 下载模型文件
模型越大,通常准确率越高,但需要的计算资源也越多,速度越慢。
模型下载地址: https://huggingface.co/ggerganov/whisper.cpp/tree/main
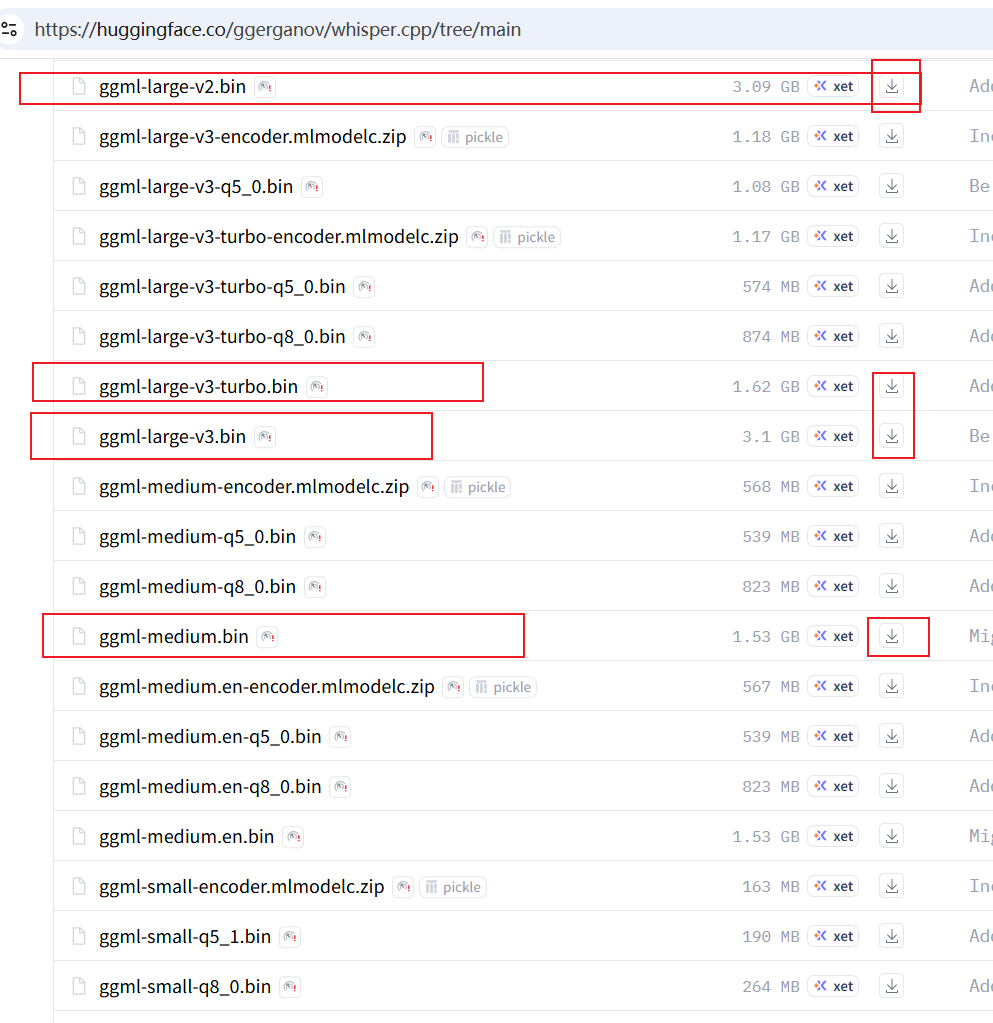
推荐在以下几个模型中进行选择(tiny/base模型太小无意义,其他量化模型也没必要):
| 模型名称 | 文件大小 | 推荐场景 | 下载链接 |
|---|---|---|---|
ggml-small.bin | ~488 MB | 电脑配置较低,对速度要求高,能接受少量错误。 | 点击下载 |
ggml-medium.bin | ~1.5 GB | 平衡之选。 | 点击下载 |
ggml-large-v2.bin | ~3.0 GB | 追求高准确率,电脑配置较好。 | 点击下载 |
ggml-large-v3.bin | ~3.1 GB | 最高准确率,目前效果最好的模型,推荐给追求极致效果的用户。 | 点击下载 |
ggml-large-v3-turbo.bin | ~1.6 GB | large-v3 的优化版本,速度比v2/v3更快,准确率相差不大,适合大多数用户。 | 点击下载 |
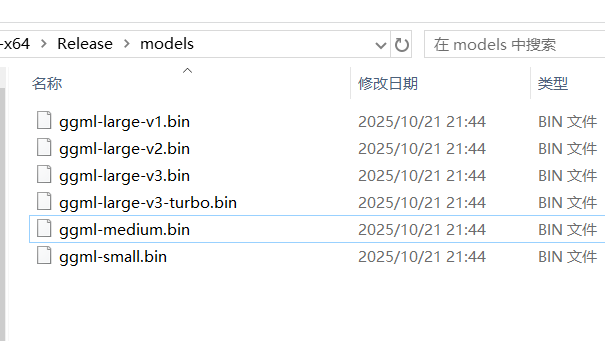
选择一个你需要的模型下载,然后将下载好的 .bin 文件放入我们之前创建的 models 文件夹内。
第二步:开始转录
准备工作就绪,现在我们可以开始真正的转录了。
1. 手动执行一次,感受基本流程
为了理解 whisper.cpp 是如何工作的,我们先手动运行一次。
打开命令行窗口:进入
whisper-cli.exe所在文件夹,在地址栏里输入cmd,然后按回车键。这会直接在该目录下打开一个命令行窗口。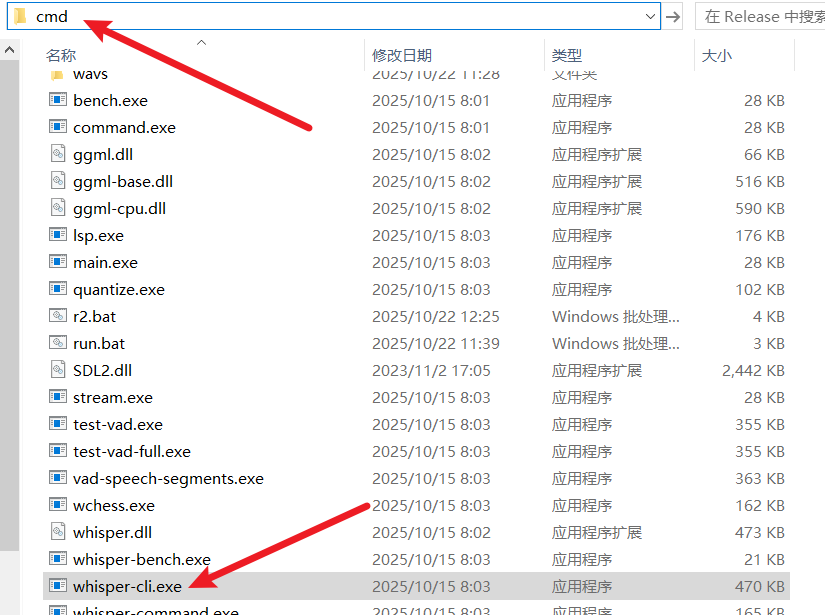
准备命令:
whisper.cpp的基本命令格式如下:whisper-cli [参数] -f [你的音频文件路径] -m [你的模型文件路径]我们来构造一个具体的例子。假设:
- 要转录的文件
60.wav在桌面,完整路径是C:\Users\c1\Desktop\60.wav。 - 使用的模型是
ggml-small.bin。 - 我们希望自动检测语言,并输出 SRT 字幕文件。
那么,最终的命令就是:
whisper-cli -np -f "C:\Users\c1\Desktop\60.wav" -l auto -m models/ggml-small.bin -osrt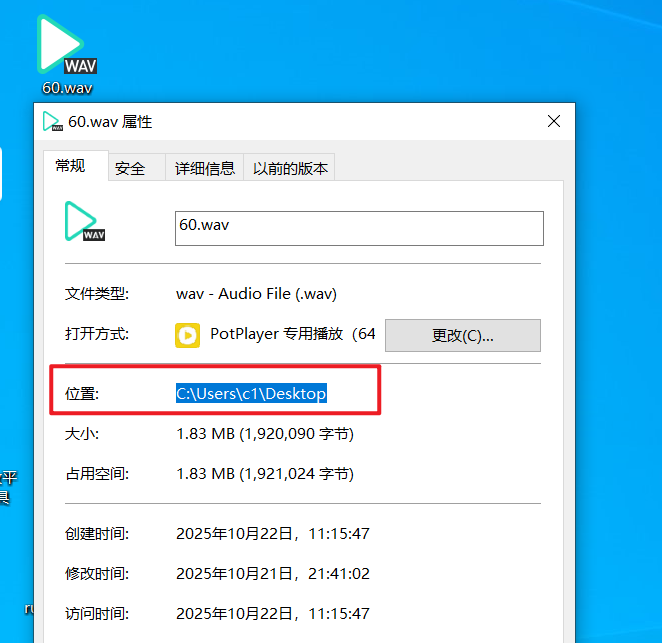
命令参数解释:
- 要转录的文件
| 参数 | 作用 | 说明 |
|---|---|---|
whisper-cli | 主程序 | 这是我们执行转录的核心文件。 |
-np | No Progress | 不显示实时进度条。在脚本中运行时,这能让输出更干净。 |
-f "文件路径" | File | 指定要转录的输入文件。如果路径包含空格,请务必用双引号括起来。 |
-l auto | Language | 指定语言。auto 表示自动检测。你也可以明确指定,如 zh (中文), en (英文)。 |
-m models/... | Model | 指定使用的模型文件路径。 |
-osrt | Output SRT | 表示输出 .srt 格式的字幕文件。 |
执行命令:在
cmd窗口中粘贴上述命令,然后回车。
程序会开始运行。等待执行完毕后,你会在源文件所在的目录(这个例子中是桌面)看到一个新生成的
60.wav.srt字幕文件。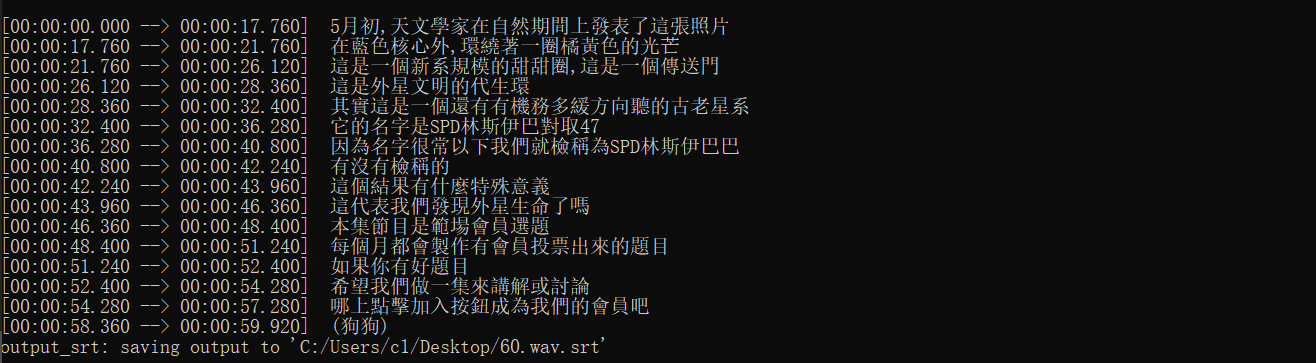
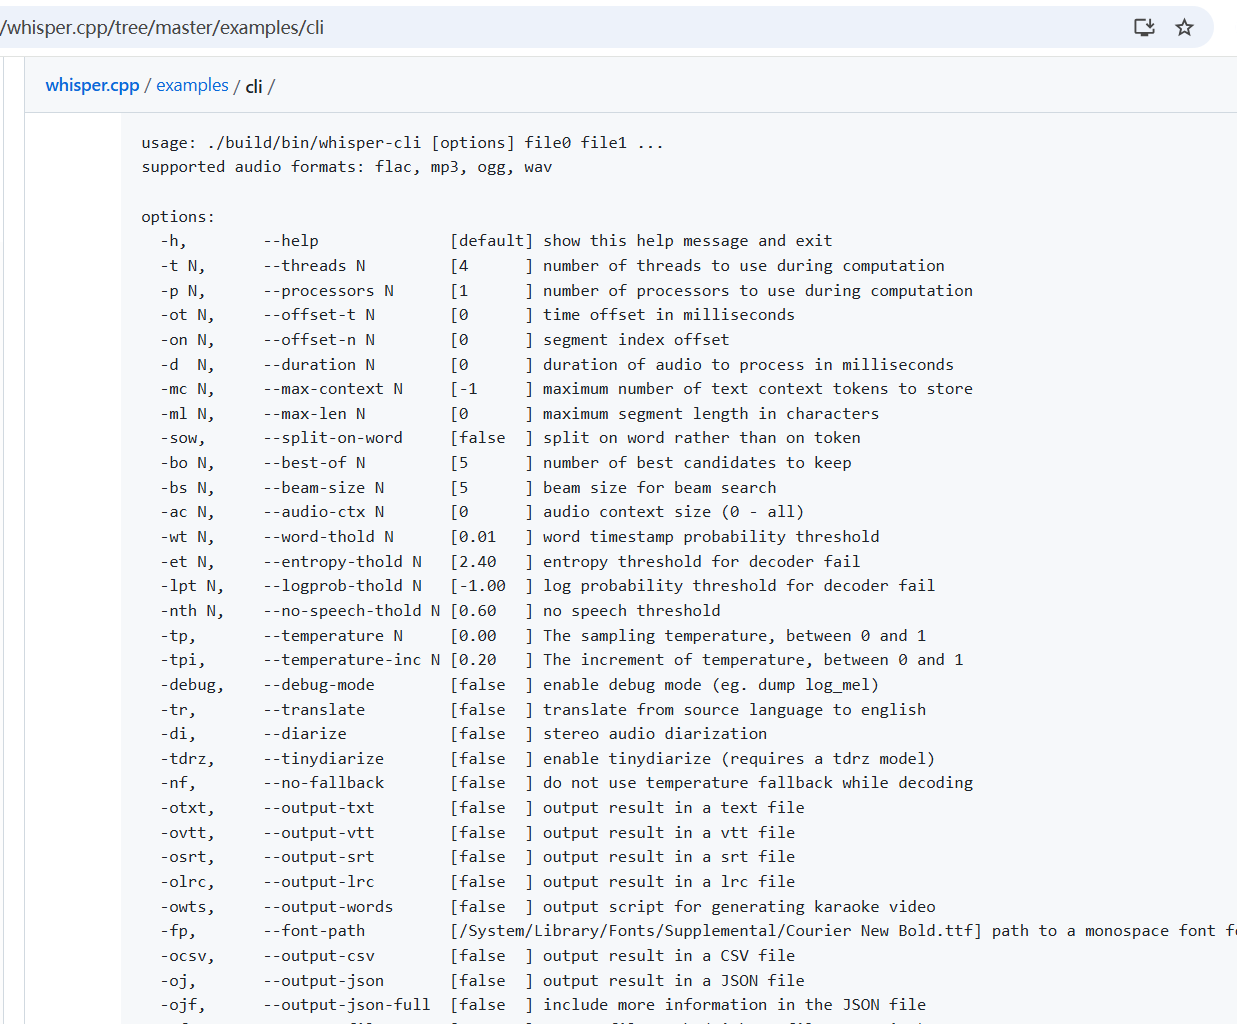
whisper.cpp其实还有非常多高级参数,可以进行更精细的控制。感兴趣的朋友可以去官方文档深入研究。对于日常使用,掌握以上几个就足够了。更多命令参数:https://github.com/ggml-org/whisper.cpp/tree/master/examples/cli
2. 使用 BAT 脚本,实现一键批量处理
手动输入命令不仅效率低下,还容易出错。为了解决这个问题,我为大家准备了一个 Windows 批处理(.bat)脚本,它可以自动完成以下工作:
- 遍历
wavs文件夹下的所有文件。 - 使用 FFmpeg 将非
.wav格式的音视频自动转换为临时.wav文件。 - 调用
whisper.cpp进行转录。 - 将生成的
.srt字幕文件统一存放到srt文件夹中。 - 自动清理临时文件。
操作步骤:
创建脚本文件:在
whisper-cli.exe所在目录下,右键新建一个文本文档,命名为run.txt。粘贴代码:双击打开
run.txt,将下面的所有代码复制并粘贴进去。bat@echo off set model_name=ggml-large-v3-turbo.bin setlocal enabledelayedexpansion cd /d "%~dp0" if not exist "srt\" mkdir "srt" set "audio_ext=.wav" if not exist "models/%model_name%" ( echo. echo ================================================================= echo [错误] 模型文件不存在: models/%model_name% echo. echo 请确认你已经下载了模型,并将其放置在 models 文件夹内。 echo 如果模型文件名不同,请修改本脚本第二行的 "set model_name=..." echo. echo 模型下载地址: https://huggingface.co/ggerganov/whisper.cpp/tree/main echo ================================================================= echo. pause exit /b 1 ) echo =============================================== echo 开始批量转录 "%~dp0wavs" 文件夹下的所有文件... echo 结果将保存到 "%~dp0srt" 文件夹内。 echo 当前使用模型: %model_name% echo =============================================== echo. :: 遍历 wavs 文件夹下的所有文件 (*.*) FOR %%F IN (wavs\*.*) DO ( set ext="%%~xF" set sttwav="%%F" set temp_wav="" echo. echo ----------------- 开始处理文件: "%%~nxF" ----------------- rem 判断格式如果不是wav,则使用 ffmpeg转码 echo !audio_ext! | findstr /i /c:"!ext!" >nul if !errorlevel! neq 0 ( set temp_wav="wavs\temp_%%~nxF.wav" echo [-] "%%F" 不是标准的WAV音频,正在使用 FFmpeg 进行转换... ffmpeg -y -i "%%F" -ac 1 -ar 16000 -c:a pcm_s16le "!temp_wav!" >nul 2>&1 if !errorlevel! equ 0 ( echo [+] FFmpeg 转换成功! set sttwav="!temp_wav!" ) else ( echo [X] 错误: 文件 "%%~nxF" 使用 FFmpeg 转换失败,已跳过。 set sttwav="" ) ) if not !sttwav! == "" ( echo [-] 正在调用 whisper.cpp 进行转录... set temp_log="temp_%%~nxF.log" whisper-cli.exe -np -f !sttwav! -l auto -m models/%model_name% -osrt -of "srt\%%~nF" > !temp_log! 2>&1 findstr /i /c:"error:" !temp_log! >nul if !errorlevel! equ 0 ( echo [X] 错误: 文件 "%%~nxF" 转录失败,请查看日志了解详情。 ) else ( echo [OK] 成功: 文件 "%%~nxF" 转录完成,字幕已保存为 "srt\%%~nF.srt" ) del !temp_log! if not !temp_wav! == "" ( del !temp_wav! ) ) echo -------------------------------------------------------------------- ) echo. echo =============================================== echo 所有文件处理完毕! echo 结果已全部保存在 "%~dp0srt" 文件夹内。 echo =============================================== echo. pause修改后缀名:保存并关闭
run.txt。然后,将这个文件的后缀名从.txt修改为.bat。最终文件名应为run.bat。重要提示:如果你的电脑不显示文件扩展名,请先在文件夹选项中开启“显示文件扩展名”,否则你可能会把它错误地命名为
run.bat.txt。
如果修改后双击文件,它依然用记事本打开,说明你没有成功修改后缀名。请确保文件名末尾没有
.txt。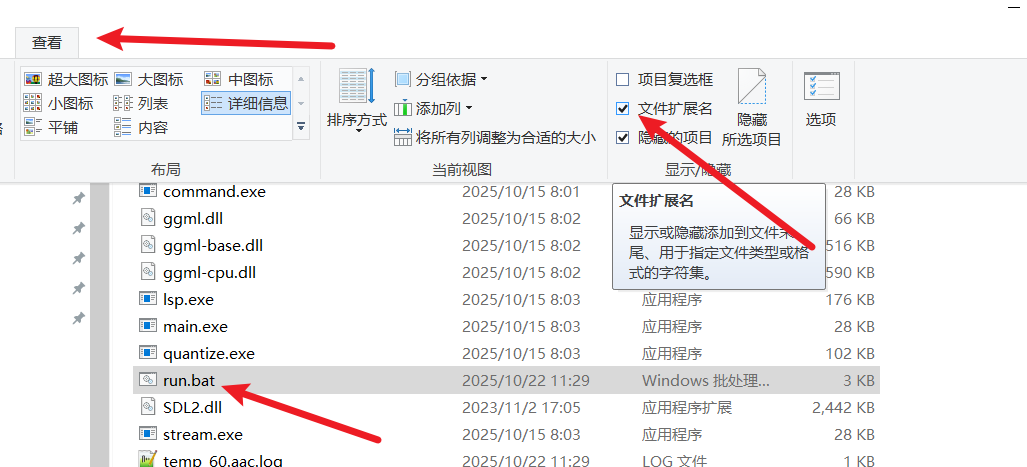
配置模型:右键点击
run.bat文件,选择“编辑”。你会看到代码的第二行是:set model_name=ggml-large-v3-turbo.bin你可以在这里修改成你下载并想使用的任何模型的文件名。例如,如果你想使用
large-v3模型,就把它改成:set model_name=ggml-large-v3.bin
修改后保存即可。
开始批量转录:
- 将你所有需要转录的音频和视频文件,全部复制或移动到
wavs文件夹内。 - 双击运行
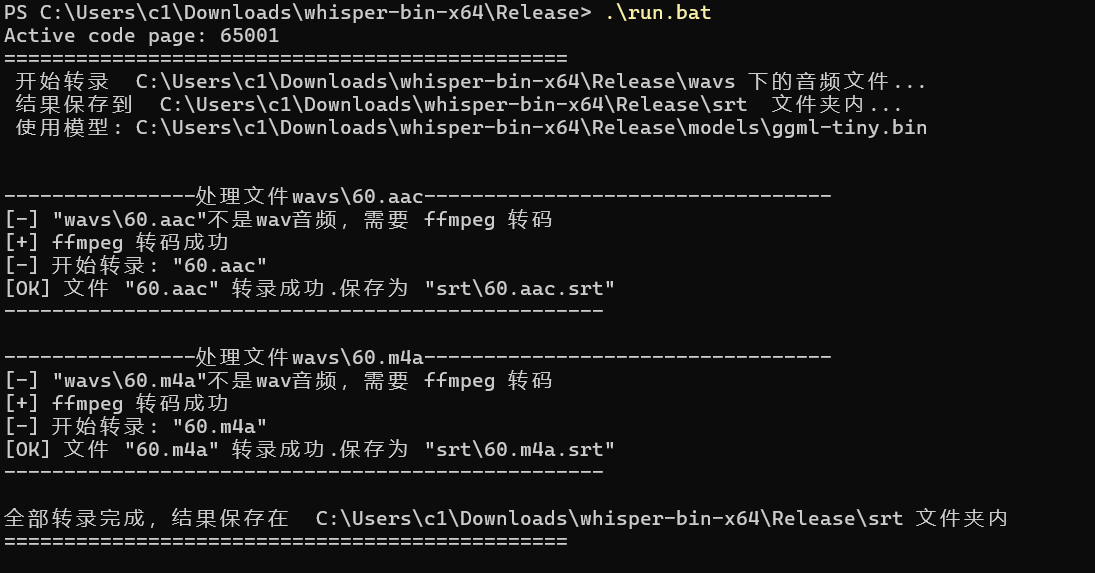
run.bat脚本。 - 此时会弹出一个黑色的命令行窗口,脚本会自动开始处理文件。你只需要静静等待它完成。
脚本运行示例
- 将你所有需要转录的音频和视频文件,全部复制或移动到
当窗口显示“所有文件处理完毕!”时,你就可以关闭它了。此时,去 srt 文件夹看看,所有的字幕文件是不是都已经生成好了?
第三步:脚本代码解释 (可选阅读)
对于想了解脚本是如何工作的朋友,这里对核心代码做个简单的解释:
@echo off: 关闭命令回显,让窗口输出更干净。set model_name=...: 定义一个变量model_name,方便我们在脚本开头集中修改模型。cd /d "%~dp0": 将当前目录切换到脚本所在的目录,确保后续命令能在正确的路径下执行。if not exist "srt\" mkdir "srt": 检查是否存在srt文件夹,如果不存在就创建一个。if not exist "models/%model_name%": 检查指定的模型文件是否存在,如果不存在则报错并退出,给出模型的下载地址。FOR %%F IN (wavs\*.*) DO (...): 这是一个循环语句,它会遍历wavs文件夹里的每一个文件,并将文件名赋值给变量%%F,然后执行DO后面的代码块。if !errorlevel! neq 0 (...): 这段是判断文件格式并调用 FFmpeg 的逻辑。!errorlevel!是上一条命令的返回状态码,0代表成功,非0代表失败。这里通过一个小技巧判断文件名后缀是否为.wav,如果不是,就调用ffmpeg命令进行转换。ffmpeg -y -i "%%F" -ac 1 -ar 16000 ...: 这是 FFmpeg 的转换命令,参数含义分别是:-y: 如果输出文件已存在则直接覆盖。-i "%%F": 指定输入文件。-ac 1: 设置音频通道为单声道。-ar 16000: 设置采样率为 16000 Hz。-c:a pcm_s16le: 设置音频编码为 16-bit PCM。这些都是 Whisper 最推荐的音频规格。
whisper-cli.exe ...: 调用核心转录程序,和我们手动执行时类似。del !temp_wav!: 转录完成后,删除 FFmpeg 生成的临时.wav文件,保持目录整洁。pause: 在脚本执行结束时暂停,等待用户按任意键关闭窗口,这样可以让我们看清楚最后的执行结果。
至此,你已经成功搭建起一个本地、高效、免费且无依赖的语音转文字工作流。通过 whisper.cpp 的强大性能和我们提供的批处理脚本,无论是整理会议记录、制作视频字幕,还是转换学习资料,都将变得异常简单。