什么是 uv?
在开始安装之前,让我们简单了解一下 uv。uv 是一个用 Rust 编写的超快速 Python 包和项目管理器。非常适合用来安装管理基于python的开源AI项目。
准备工作:选择安装方法
我们提供两种在 Windows 上安装 uv 的方法,您可以根据自己的偏好选择其中一种。
- 方法一:使用 PowerShell 自动安装 (推荐) - 这是最简单快捷的方法,一条命令即可完成安装和配置。
- 方法二:手动下载和配置 - 如果方法一遇到问题,或者您想更好地控制文件位置,可以选择此方法。
方法一:使用 PowerShell 自动安装 (推荐)
PowerShell 是 Windows 系统内置的一个功能强大的命令行工具。我们将使用它来运行官方的安装脚本。
第 1 步:打开 PowerShell
您需要找到并打开 PowerShell。
- 点击屏幕左下角的 开始菜单 (Windows 图标)。
- 在应用列表中找到
Windows PowerShell文件夹,或者直接在搜索框中输入PowerShell(按win键 + q键,输入powershell搜索)。
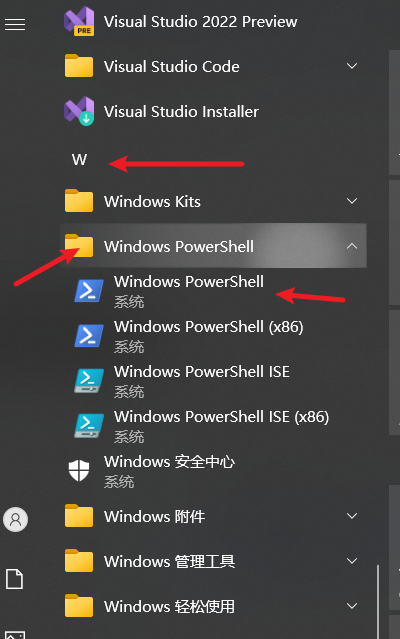
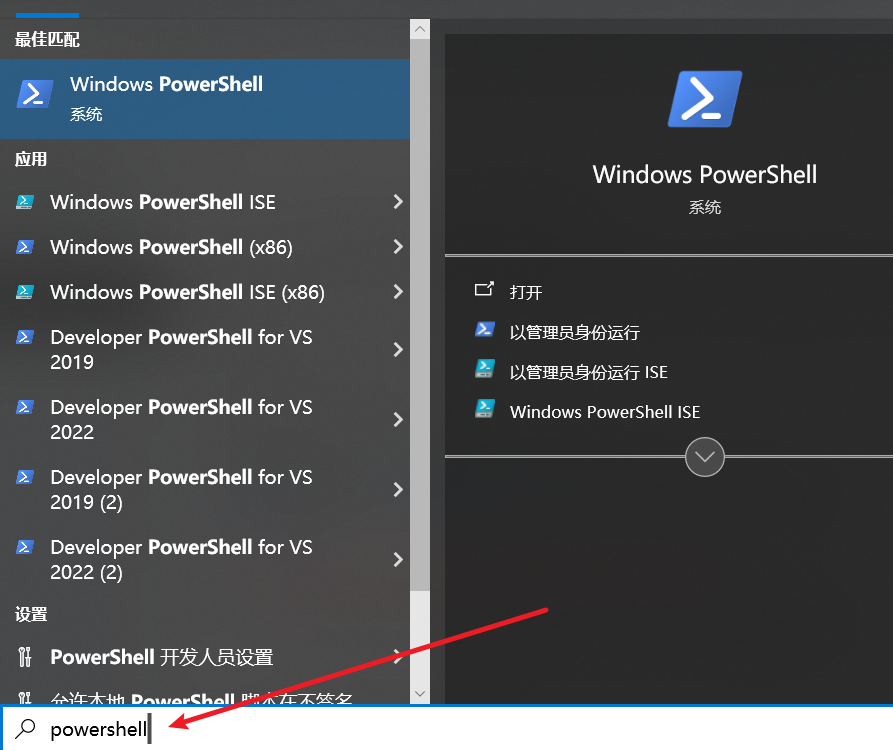
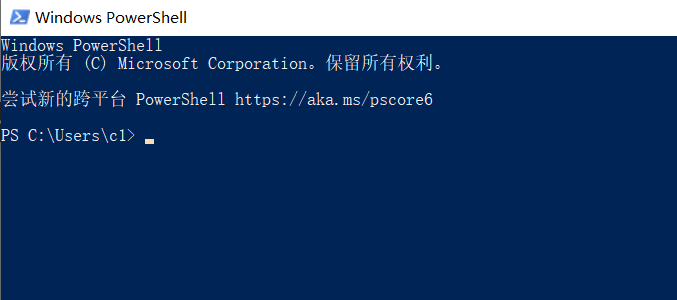
- 点击 Windows PowerShell 将其打开。您会看到一个带有蓝色背景的窗口。
第 2 步:复制并执行安装命令
用鼠标完整地复制下面这行命令:
powershellpowershell -ExecutionPolicy ByPass -c "irm https://astral.sh/uv/install.ps1 | iex"回到刚刚打开的 PowerShell 窗口,点击鼠标右键,复制的命令就会被自动粘贴进去。
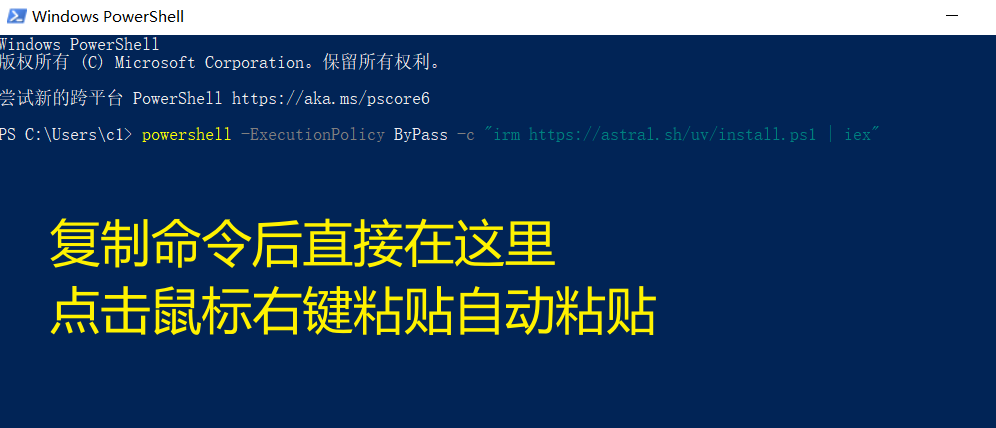
- 按下键盘上的 Enter (回车) 键。
脚本会自动下载 uv 并为您配置好一切。安装过程中,您可能会看到一些进度条和文本信息,这是正常现象。
💡 命令解释: 这行命令会启动一个新的 PowerShell 进程,然后从 uv 官方地址下载安装脚本并立即执行。 这种方式非常安全,不会影响您计算机的整体设置。
第 3 步:验证安装
安装完成后,我们需要验证一下 uv 是否已经成功安装。请务必重新打开一个新的 PowerShell 或 CMD 窗口来执行验证,因为环境变量的更改需要新开窗口才能生效。
- 按下键盘上的 Windows 键 + R 键,打开“运行”对话框。
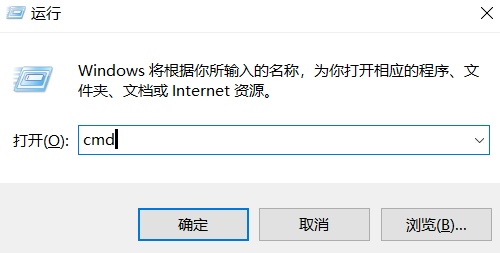
输入
cmd并按回车,打开一个黑色的命令提示符窗口。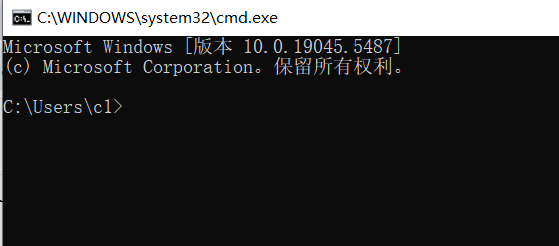
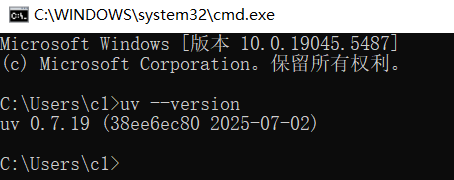
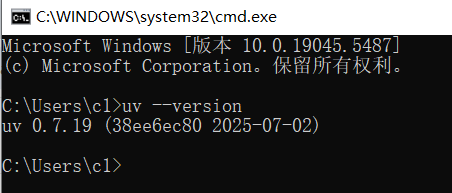
在窗口中输入以下命令,然后按回车:
cmduv --version如果您看到类似下面的版本号信息,恭喜您,安装成功了!(版本号可能会有所不同)
uv 0.7.19 (38ee6ec80 2025-07-02)
方法二:手动下载exe文件
如果 PowerShell 方法因网络或其他原因失败,您可以尝试手动安装。这个过程稍微复杂一点,但只要跟着步骤走,也一样可以完成。
第 1 步:下载 uv 程序文件
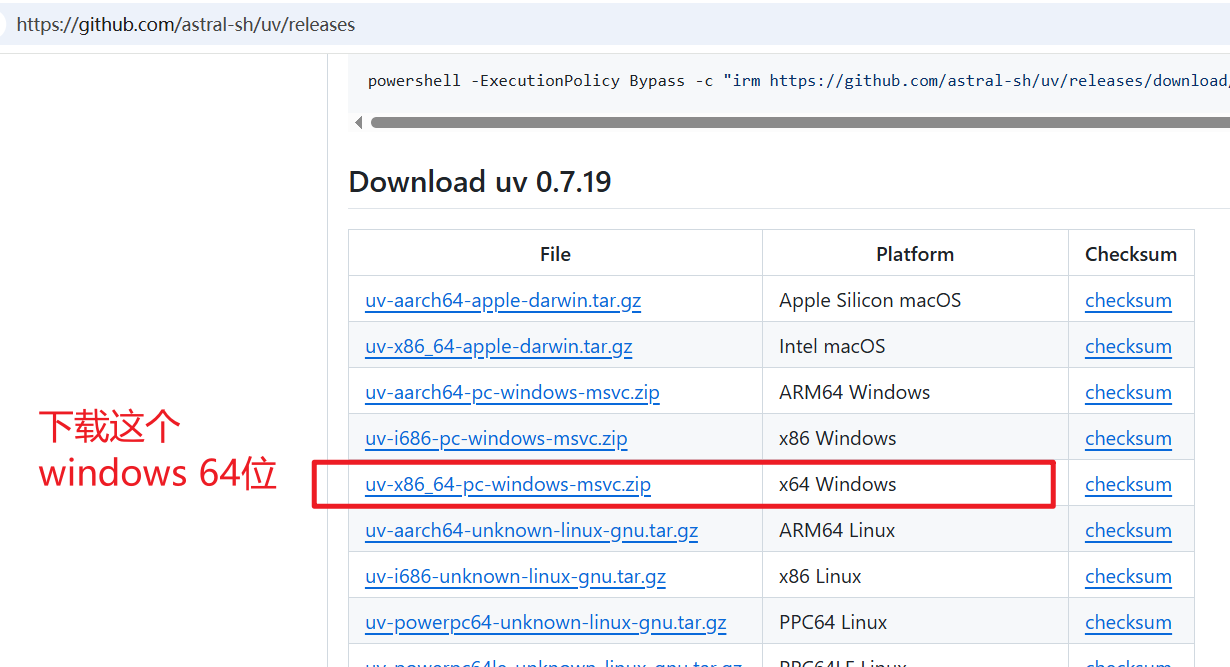
打开您的浏览器,访问
uv的 GitHub 发布页面: https://github.com/astral-sh/uv/releases在页面中找到最新的版本,并找到名为
uv-x86_64-pc-windows-msvc.zip的文件进行下载。
第 2 步:解压并存放文件
- 下载完成后,找到这个
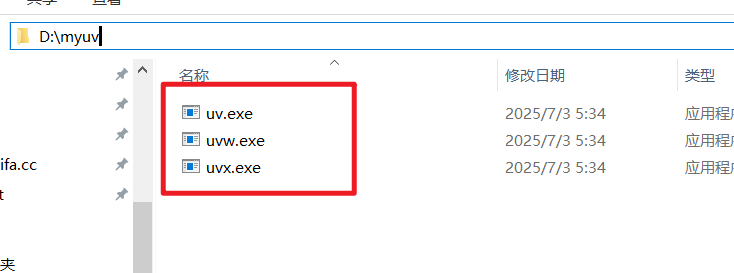
.zip压缩包,右键点击它,选择 “全部解压缩”。 - 您需要为解压后的文件选择一个永久存放的位置。请不要放在“下载”或者桌面上临时文件夹里。一个好的建议是在D盘或者C盘根目录下创建一个专门的文件夹。例如,我们在 D 盘创建一个名为
myuv的文件夹 (D:\myuv)。 - 将解压后得到的
uv.exe,uvx.exe,uvw.exe这三个文件移动到您刚刚创建的D:\myuv文件夹中。
第 3 步:配置系统环境变量
这是最关键的一步。我们需要告诉 Windows 系统去哪里找 uv.exe 这个程序。
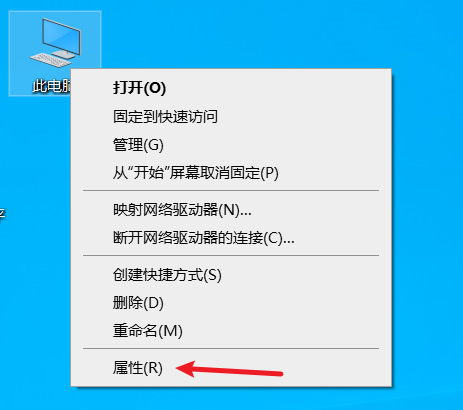
- 在桌面上找到“此电脑”(或“计算机”)图标,右键点击,选择 “属性”。
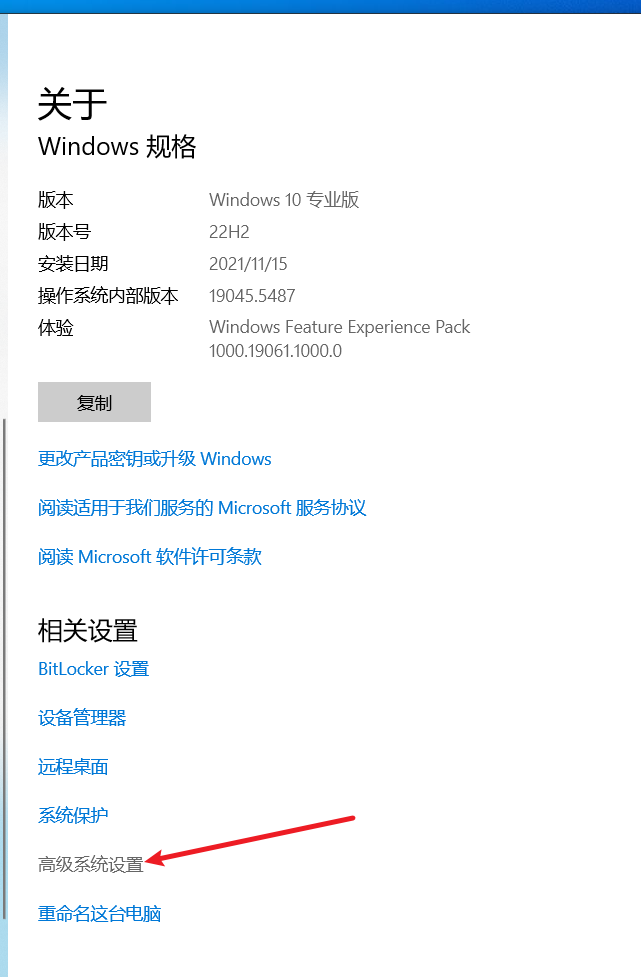
在打开的窗口中,找到并点击 “高级系统设置”。
在弹出的“系统属性”窗口中,点击下方的 “环境变量” 按钮。

- 在“环境变量”窗口的下半部分,找到 “系统变量” 区域,然后找到名为
Path的变量,用鼠标单击选中它,再点击 “编辑” 按钮。

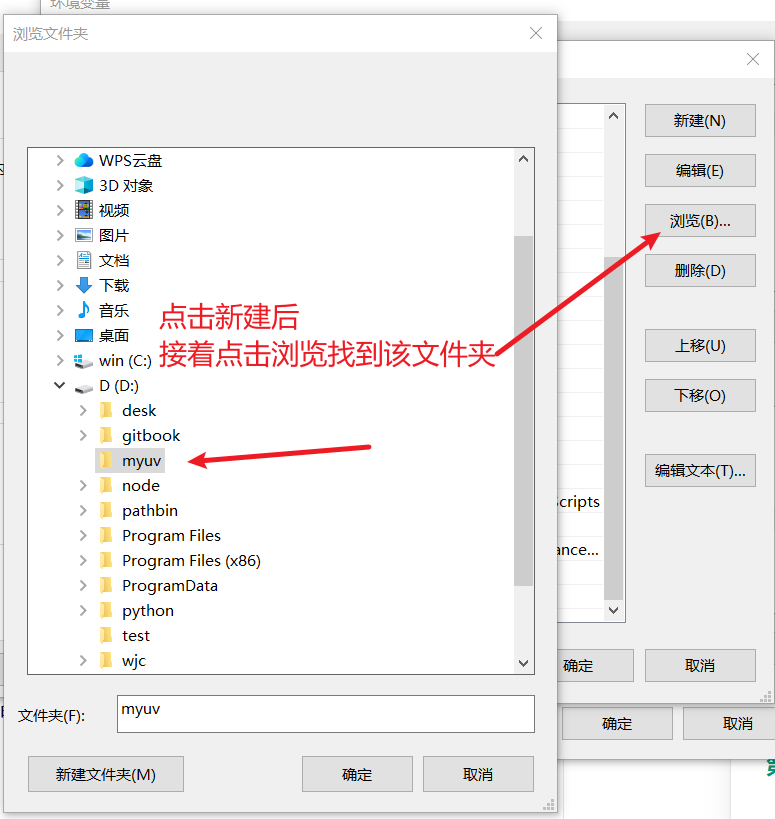
- 在弹出的“编辑环境变量”窗口中,点击右上角的 “新建” 按钮。
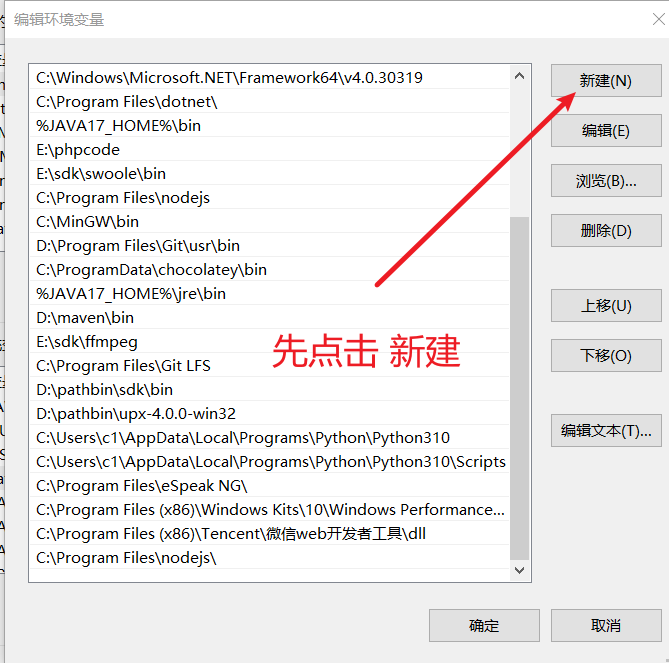
- 此时会出现一个新行,将您之前存放
uv.exe的文件夹路径 (例如D:\myuv) 输入进去。为了避免输错,您也可以点击 “浏览” 按钮,然后手动找到那个文件夹。
- 输入完成后,一路点击 “确定”,关闭所有刚才打开的设置窗口。
第 4 步:验证安装
和方法一一样,我们需要打开一个新的终端窗口来验证。
- 按下键盘上的 Windows 键 + R 键,输入
cmd并按回车。 - 在黑色的命令提示符窗口中输入
uv --version并按回车。 - 如果成功显示版本号,说明您的手动安装和配置全部成功!
疑难解答:常见问题
问:我输入了 uv --version,但提示 'uv' 不是内部或外部命令,也不是可运行的程序或批处理文件。 这是为什么?
答:这几乎总是意味着环境变量配置失败或者没有重新打开终端窗口。
- 检查路径:请仔细重复方法二中的第3步,确保您添加到
Path变量里的路径是完全正确的,就是您存放uv.exe的那个文件夹路径。 - 重启终端:对环境变量的修改,只对修改后新打开的命令行窗口生效。请务必关闭所有已打开的 PowerShell 或 cmd 窗口,然后重新打开一个再试。
问:PowerShell 安装时出现红色报错信息怎么办?
答:这通常是因为您电脑的安全策略阻止了脚本运行。
- 以管理员身份运行:首先尝试右键点击 PowerShell 图标,选择 “以管理员身份运行”,然后再执行安装命令。
- 更改执行策略:如果管理员模式下依然报错,可以先更改执行策略。在管理员模式的 PowerShell 中输入以下命令并回车:powershell
Set-ExecutionPolicy RemoteSigned -Scope CurrentUser
系统会询问您是否更改,输入 A 并回车确认。 这个命令允许运行本地脚本和来自受信任发布者的远程脚本,是安全性和便利性的一个良好平衡。 完成后再重新执行 uv 的安装命令。