From CMD to PowerShell, Solving the Issue of Unable to Run ps1 Scripts in PowerShell (Scripts Activate.ps1)
For many Python developers on Windows, CMD (Command Prompt) is like a loyal old friend—simple, reliable, and rarely fails. But as we pursue efficiency and functionality, we increasingly turn to PowerShell.
However, when you eagerly type a familiar command in PowerShell, you might encounter a harsh red error, as if the new world is saying "no" to you:
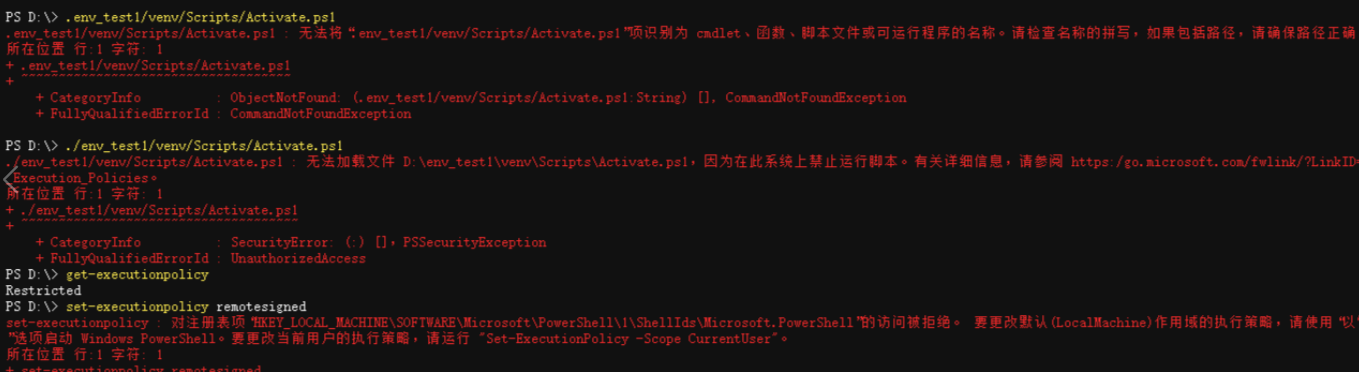
PS C:\my_project> .\venv\Scripts\activate
.\venv\Scripts\activate : File activate.ps1 cannot be loaded ... because script execution is disabled on this system.
+ ~~~~~~~~~~~~~~~~~~~~~~~~~~~~~~~~~~~~~
    + CategoryInfo          : SecurityError: (:) [], PSSecurityException
+ FullyQualifiedErrorId : UnauthorizedAccessWhy does this happen? Keep reading to find out.
The Comfort Zone of CMD: Why It "Rarely Fails"?
Let's first revisit the good old days in CMD. The command to activate a virtual environment typically looks like this:

C:\my_project> venv\Scripts\activate
(venv) C:\my_project>Why is it so simple? Because you're actually running a batch file named activate.bat. CMD is designed to execute batch commands, and its security model is very lenient, allowing .bat files to run by default. It's simple and reliable, but also relatively basic in functionality.
Why Switch to PowerShell?
If CMD is so hassle-free, why bother with the "trouble"? Because the efficiency gains from PowerShell are significant:
- Smart Tab Completion: Much more powerful than CMD's auto-completion, suggesting commands, parameters, paths, and more.
- Linux-like Command Aliases: Use familiar commands like
ls,clear,cp,mvdirectly, seamlessly switching development environments. - Powerful Pipelines and Object Manipulation: Pass the output of one command (as structured objects) to another for complex processing, which CMD cannot match.
- Excellent Terminal Experience: In Windows Terminal, PowerShell supports multiple panes, tabs, rich colors, and custom configurations, combining aesthetics with functionality.
Conclusion: It's absolutely worth it! The initial minor configuration hassle will pay off with long-term development efficiency.
PowerShell's "Test": Understanding Execution Policy
When you switch from CMD to PowerShell, the command to activate a virtual environment also changes. You're no longer running a .bat file, but a script specifically prepared for PowerShell: activate.ps1.
This is the core of the problem.
PowerShell treats all .ps1 files as scripts and introduces a key security mechanism—Execution Policy. It acts like a "security guard," and by default, its policy is Restricted, meaning it prohibits running any scripts to prevent accidental execution of malicious code.
So, when you run .\venv\Scripts\activate, you're essentially asking the "guard" to allow the activate.ps1 script. The guard checks and says: "No, my rule is to block all scripts," denying your request and showing that red error message.
One-Time Fix: Giving Your PowerShell the "Green Light"
The solution to the initial problem is here, with the core step being to adjust the policy to RemoteSigned.
To fix this, we simply need to adjust the "guard's" rule, telling it: "Scripts I write locally are safe; please allow them to run." We recommend using the RemoteSigned policy, which strikes a perfect balance between security and convenience.
The RemoteSigned policy means:
- Allows running all scripts you create locally (like
activate.ps1). - Scripts downloaded from the internet must be digitally signed to run.
Steps to Implement (Once and for All)
Modifying the system-wide execution policy requires administrator privileges.
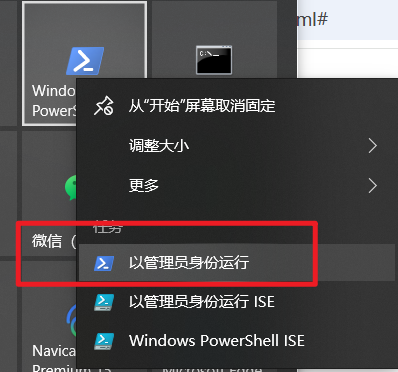
1. Open PowerShell as Administrator
- Search for
powershellin the Start menu. - Right-click "Windows PowerShell" and select "Run as administrator".
2. Execute the Modification Command In the administrator window that opens, type the following command and press Enter:
Set-ExecutionPolicy RemoteSigned
3. Confirm the Change The system will ask if you're sure about the change. Type Y and press Enter.
Execution Policy Change
...
[Y] Yes  [A] Yes to All  [N] No  [L] No to All  [S] Suspend  [?] Help (default is "N"): Y
If there's no error, you've succeeded! You can now close this administrator window.
Alternative (If You Lack Administrator Privileges)
If you don't have administrator rights, you can modify the policy for the current user only. In a regular PowerShell window, execute:
Set-ExecutionPolicy -Scope CurrentUser RemoteSignedSimilarly, type Y to confirm.
Embrace the New Workflow: Smooth Operations in PowerShell
Now, your PowerShell is ready. Let's experience the new, efficient Python virtual environment workflow.
- Create a Python Virtual Environment (after
cdto your project directory):powershellpython -m venv venv - Activate the Environment:powershellLook! The
.\venv\Scripts\activate(venv)prefix appears before the command prompt—success!powershell(venv) PS C:\my_project> - Deactivate the Environment:powershell
(venv) PS C:\my_project> deactivate
Quick Reference: CMD vs. PowerShell Similarities and Differences
Transitioning from CMD to PowerShell might involve a small hurdle due to the execution policy, but it's more like a "rite of passage." Once you complete this one-time configuration, you'll open the door to a more efficient and enjoyable development experience.
| Action | CMD (Old Friend) | PowerShell (New Companion) |
|---|---|---|
| Activation Command | venv\Scripts\activate | .\venv\Scripts\activate |
| File Executed | activate.bat (Batch) | activate.ps1 (Script) |
| First Obstacle | Rarely | Common, due to execution policy |
| Solution | None needed | Run Set-ExecutionPolicy RemoteSigned as Administrator |
Welcome to the world of PowerShell—enjoy the power and convenience it brings!